Perhaps you too tend to make furniture in certain favourite styles? I like Shaker, Cotswold A&C, Mission, Greene & Greene. These and other styles tend to have collections of motifs associated with them - shapes, joinery methods, carved details, dimensions and so forth.
Learning to do some of these details is often both the most interesting but also the most difficult part. Personally I struggle a bit with carving rather than with, say, the jointing methods.
I wonder if it would be worth developing a thread here in which we can both ask for and offer methods of work for achieving success with some of these motifs, especially when we’re trying one for the first time? Naturally, it would include the list of necessary tools from Axminster. 
Anyone interested? At present I can offer a bit of advice about how to do some Cotswold chip-carved motifs but need advice about how to best achieve several others I can’t presently manage to form well.
Lataxe
Yep, I’m up for that, particularly Cotswold A&C, but don’t expect any assistance with G&G…not my fave style by any means, but I could be persuaded to go the distance with genuine oriental pieces (Korean, Chinese & Japanese) which I’ve lately taken a shine to…
I have some photos of the process for making two styles of diamond chip carvings that go on the edges of tables and the corners of legs in Cotswold A&C furniture. I could do a post showing the marking-out, chisel actions and results but it would take at least three photos and maybe four or five would be better. At present I’m limited to posing only one photo at a time here. Is there some way to change this?
There are some other experimentations I’ve made which are not, strictly speaking, Cotswold A&C albeit based on the carving styles.
As to a request for help - I would like to find a way to carve these
in a neat and tidy fashion. My attempts so far look too crude, with too much chisel evidence in the scoop-outs.
Lataxe
Here’s a series of small posts illustrating the techniques for making two styles of diamond chip carvings on Cotswold A&C furniture of the Barnsley/Gimson ilk.
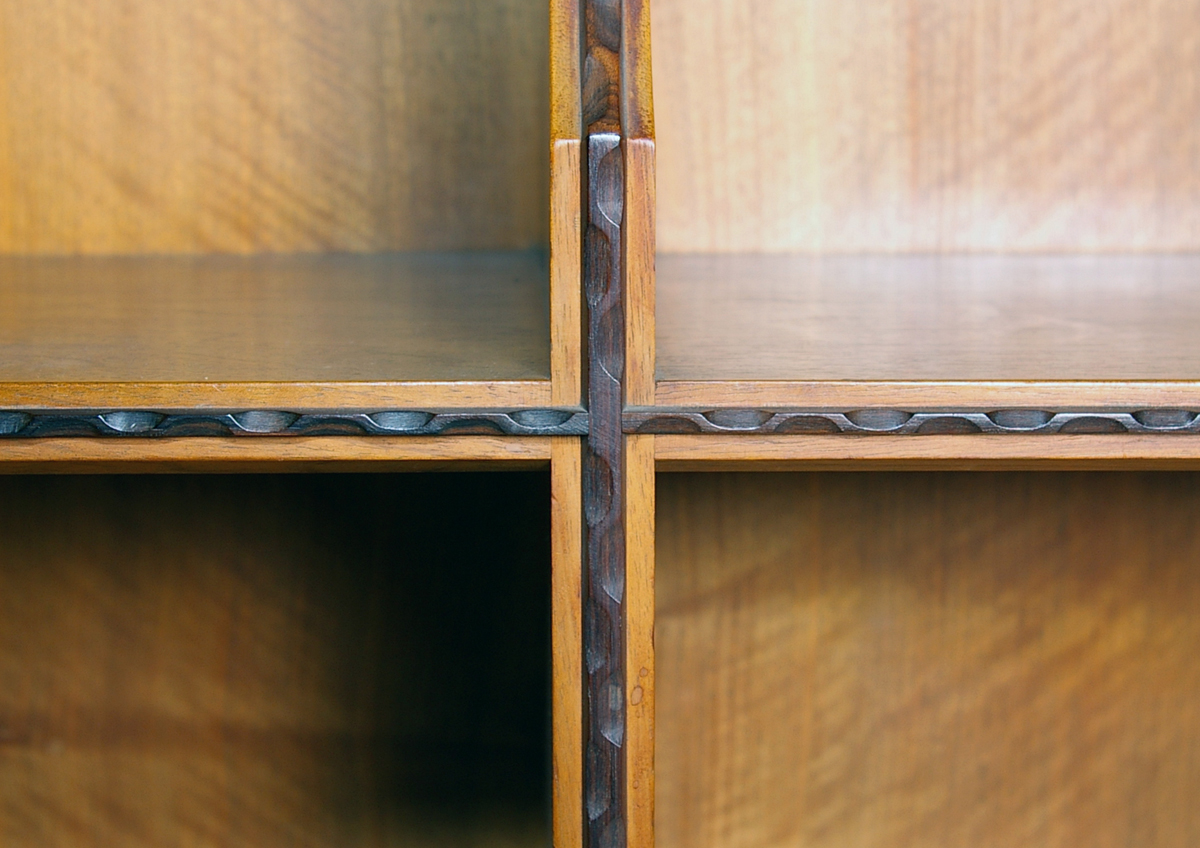
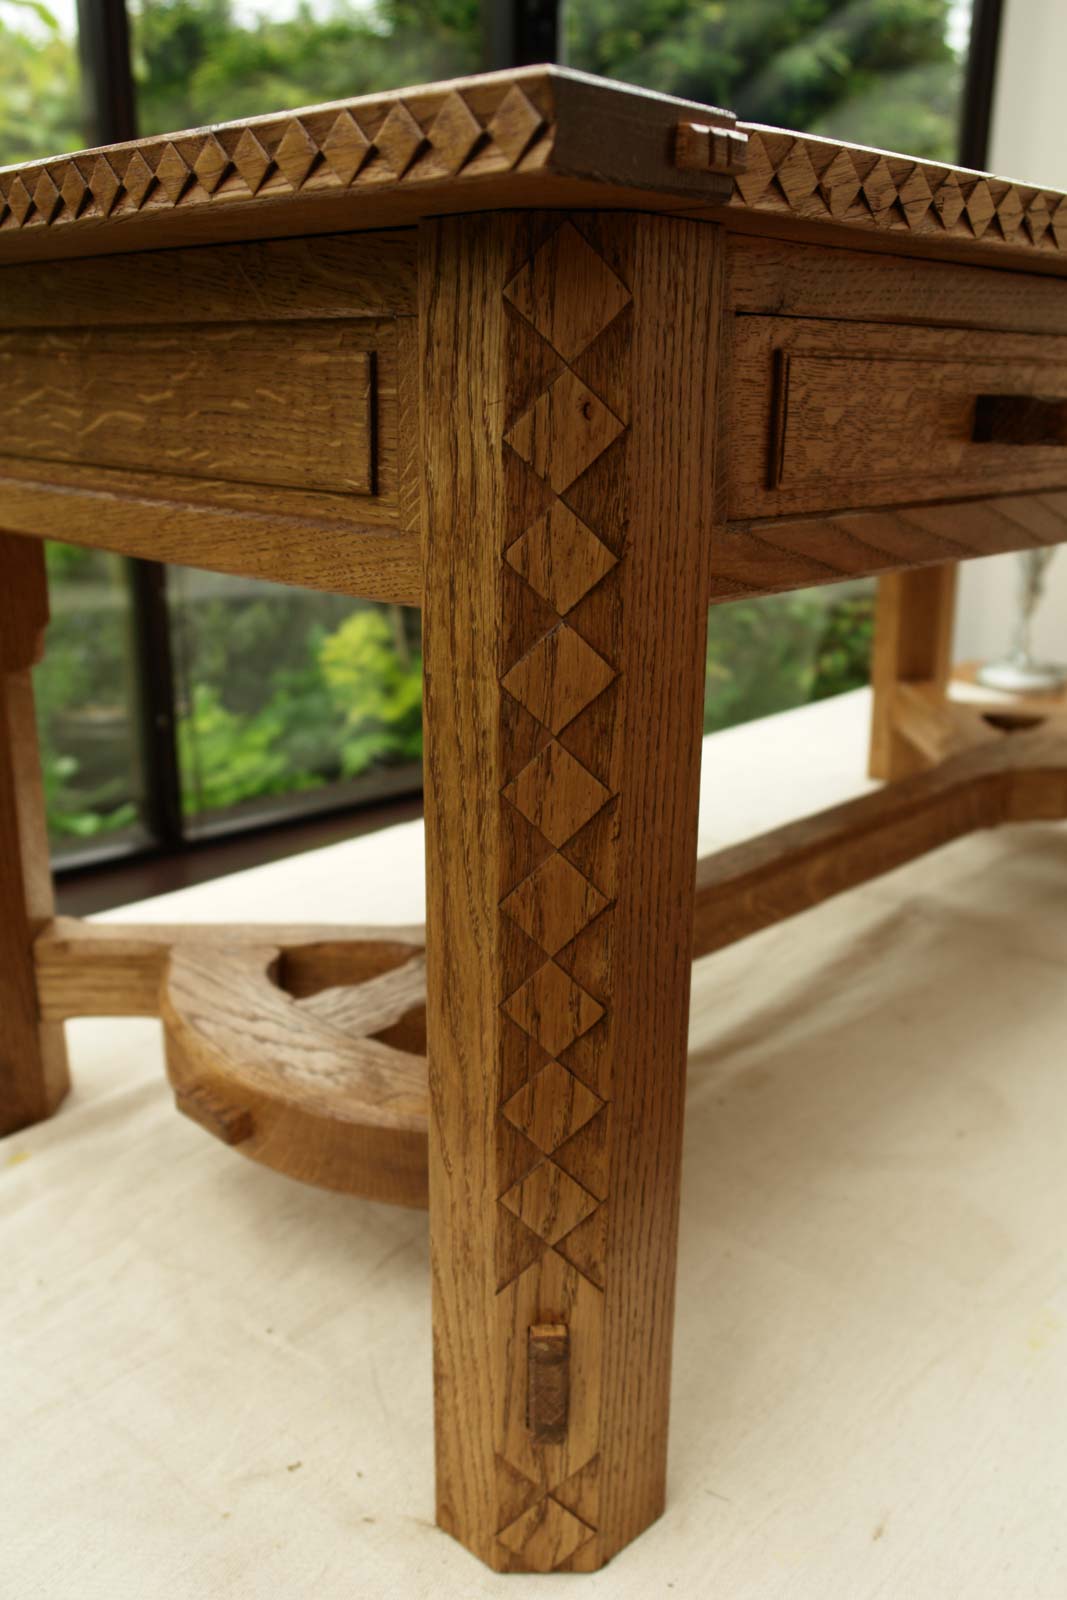
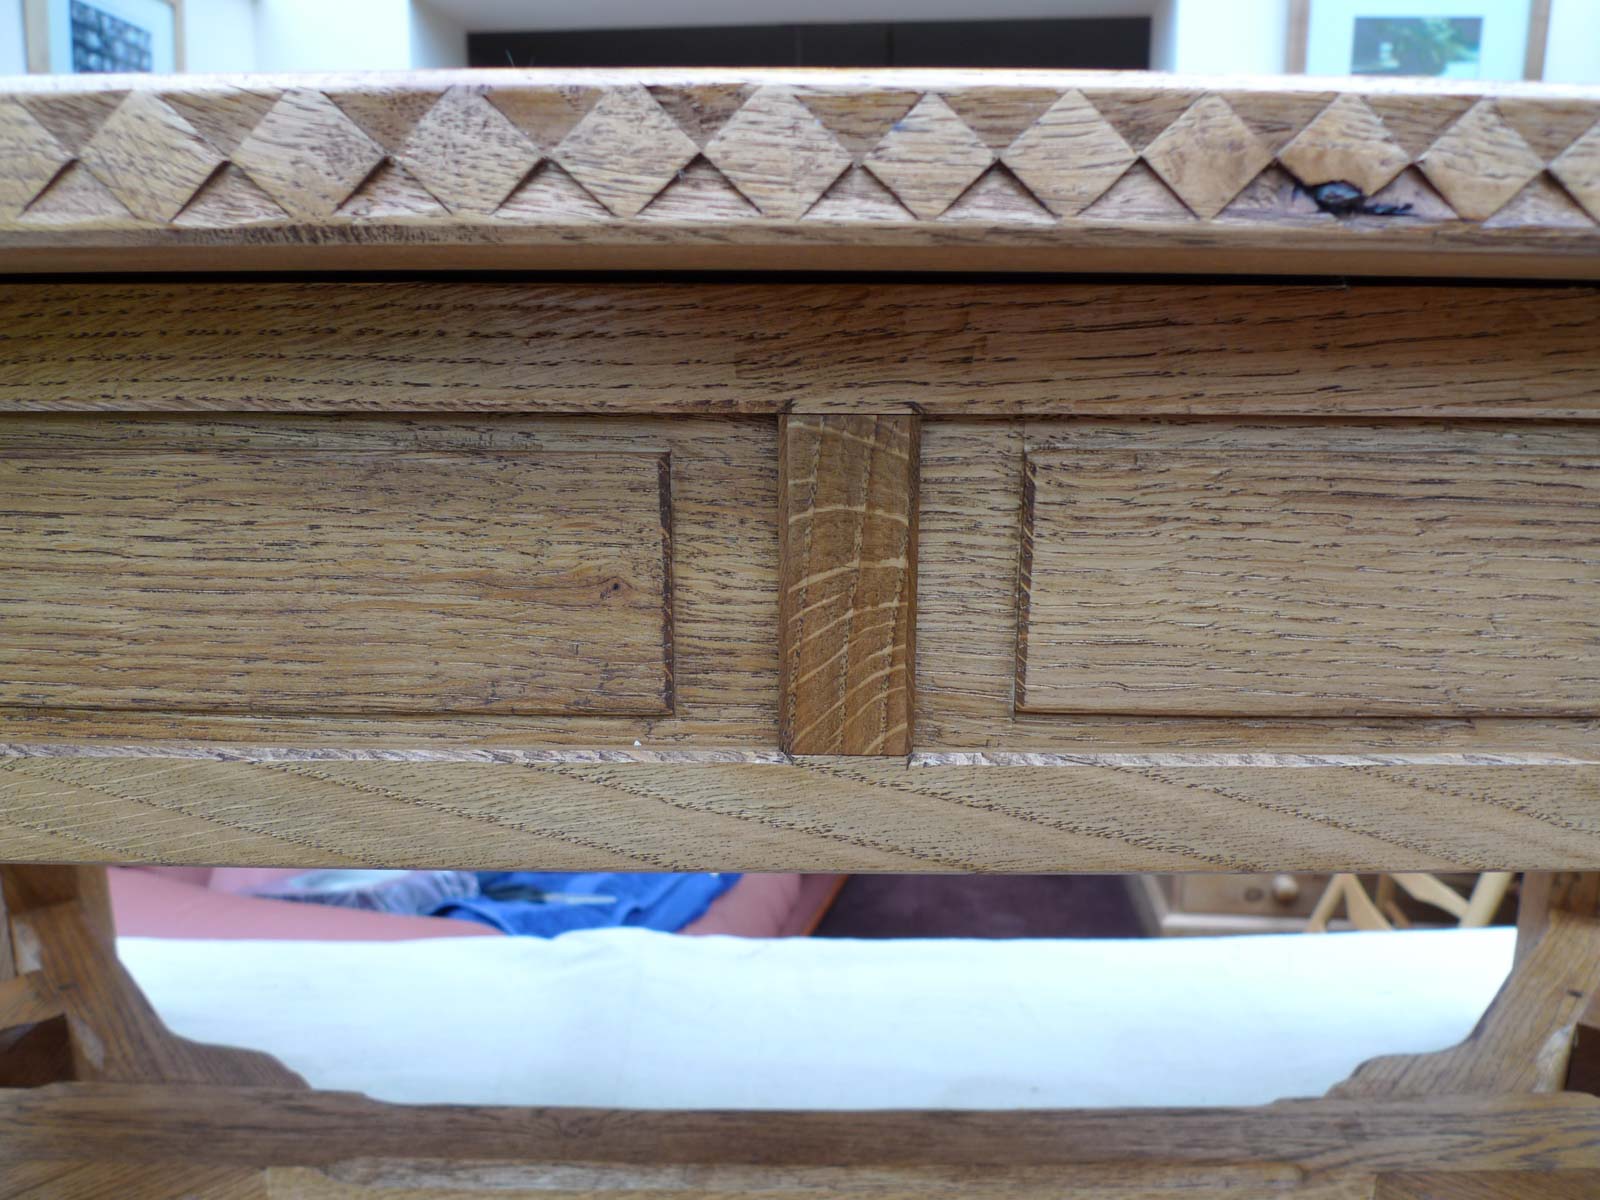
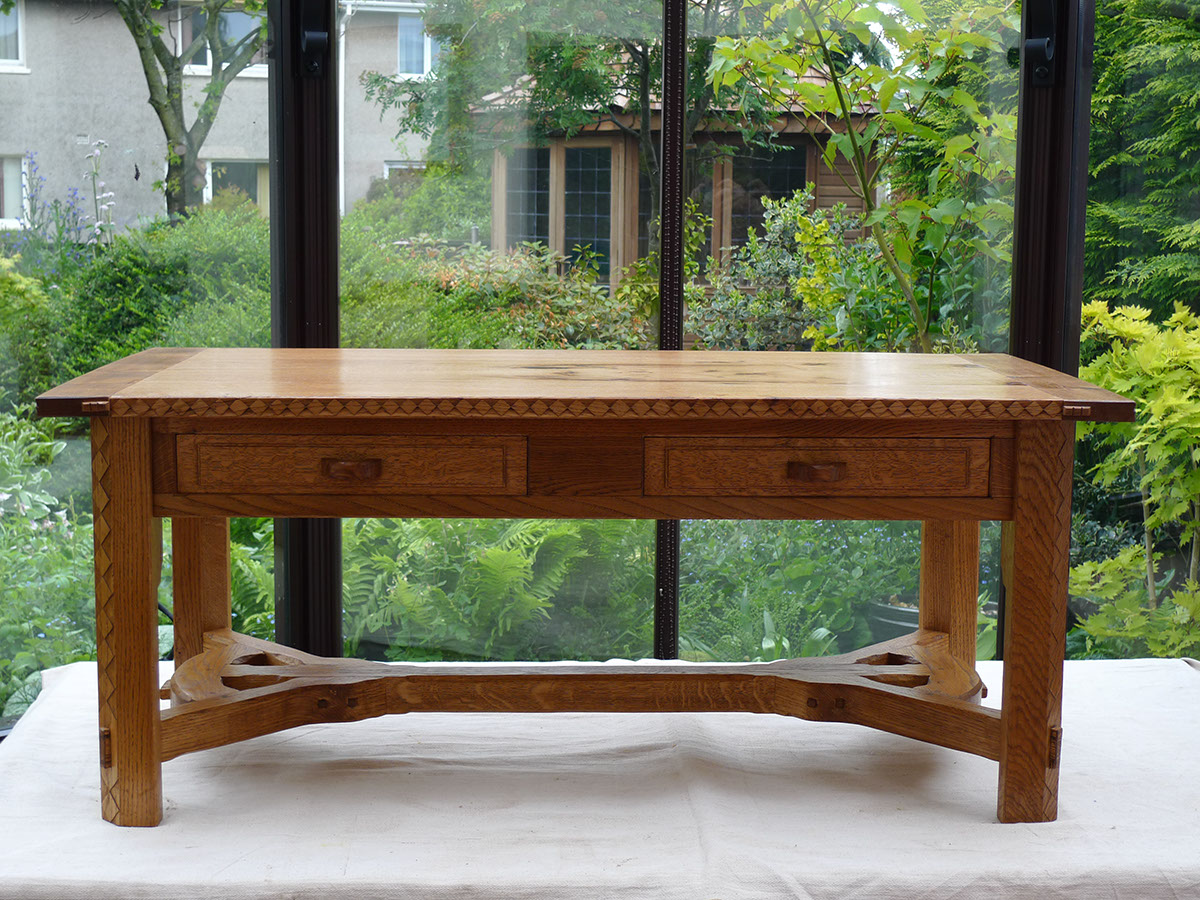
This table shows both styles. One is made by cutting indented triangles along both sides of an edge See the edge of the table top). The other cuts out triangles of the same depth on a flat surface (see those down the leg). Hopefully you can discern the difference.
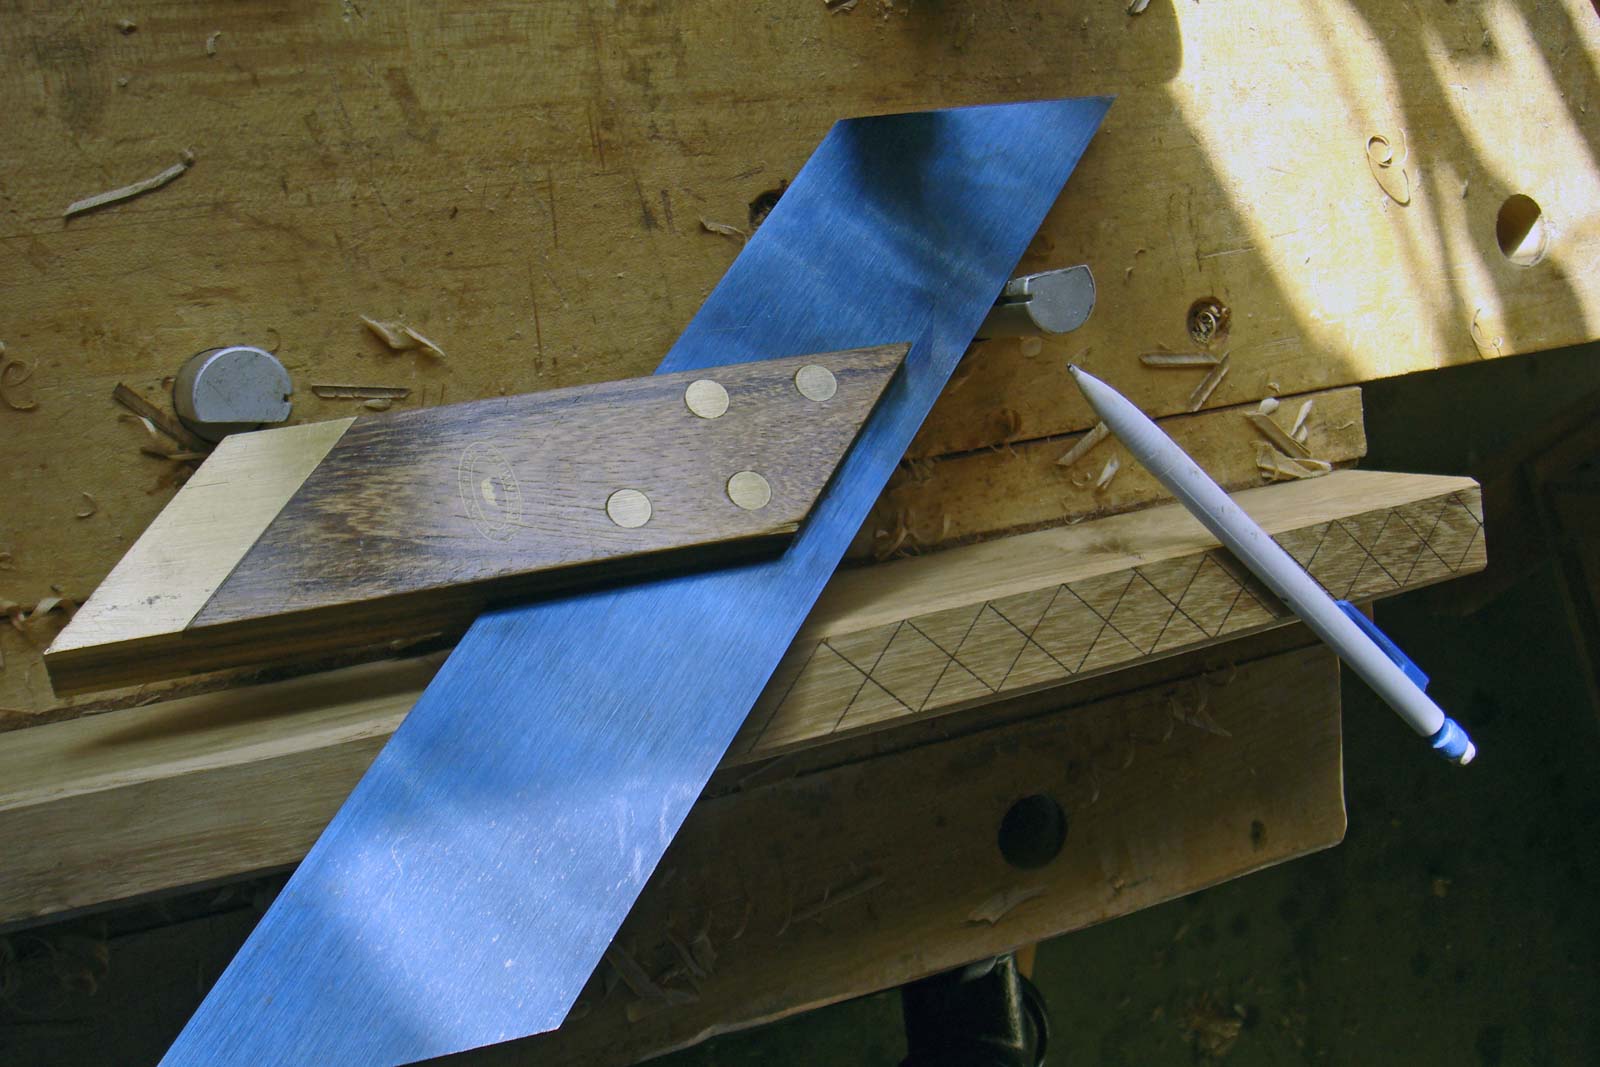
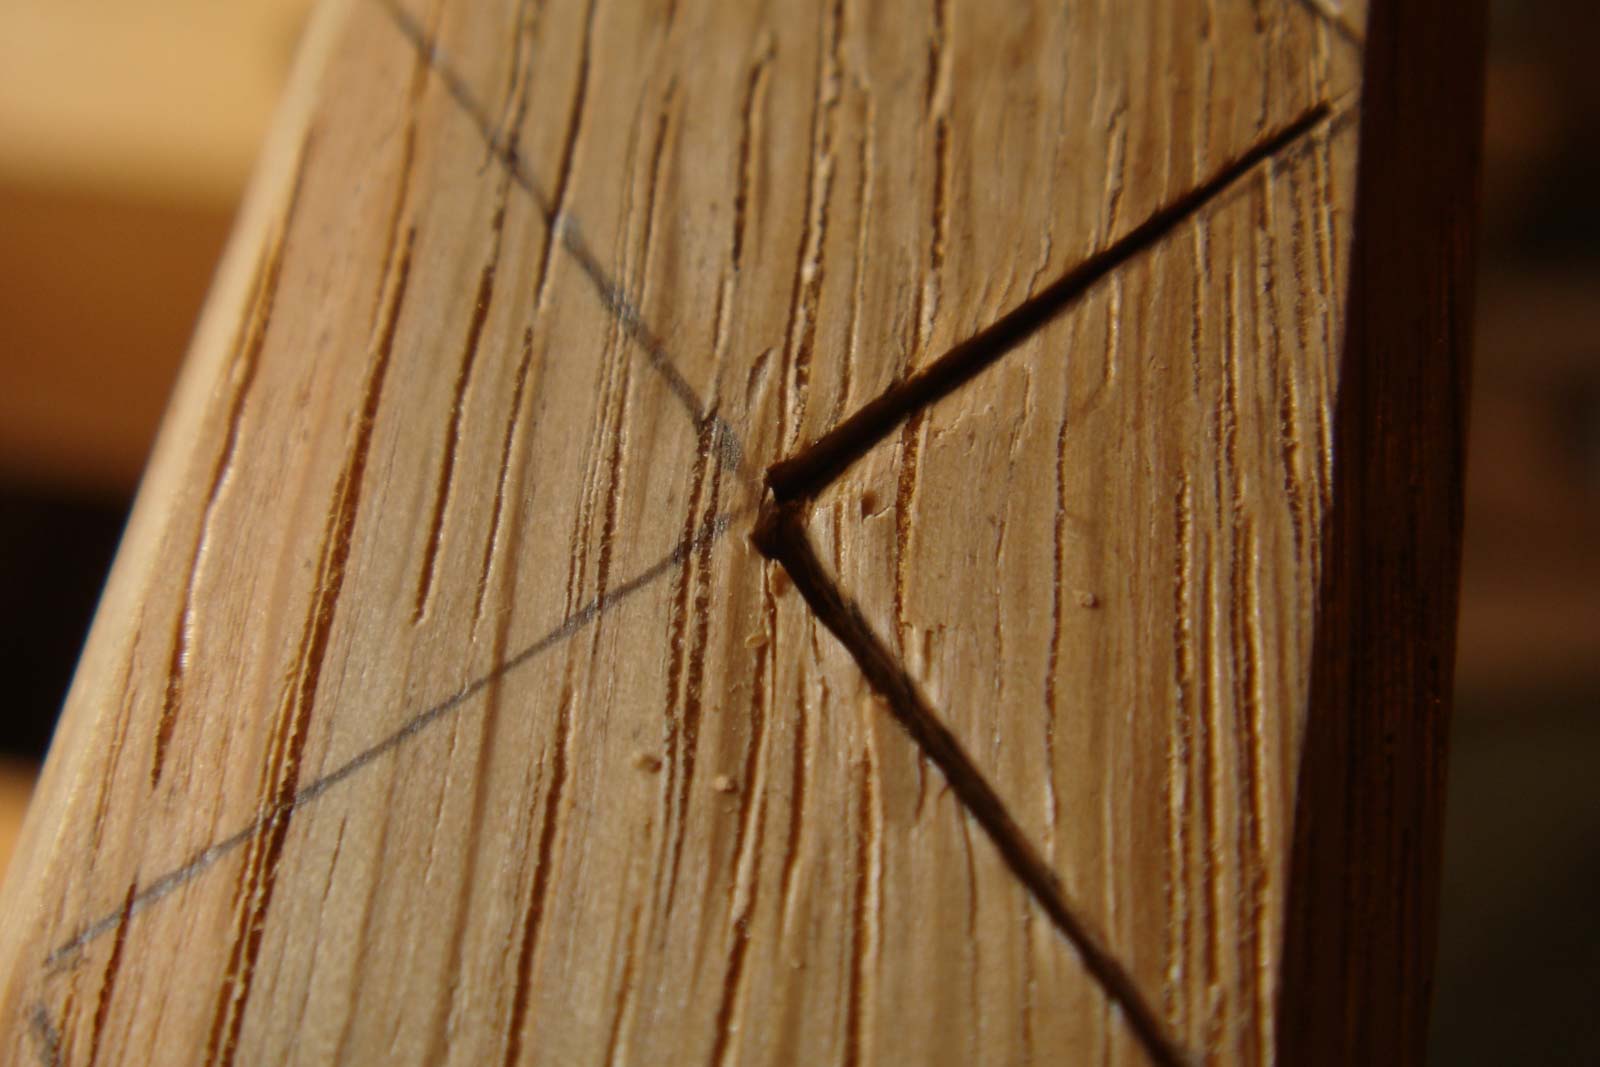
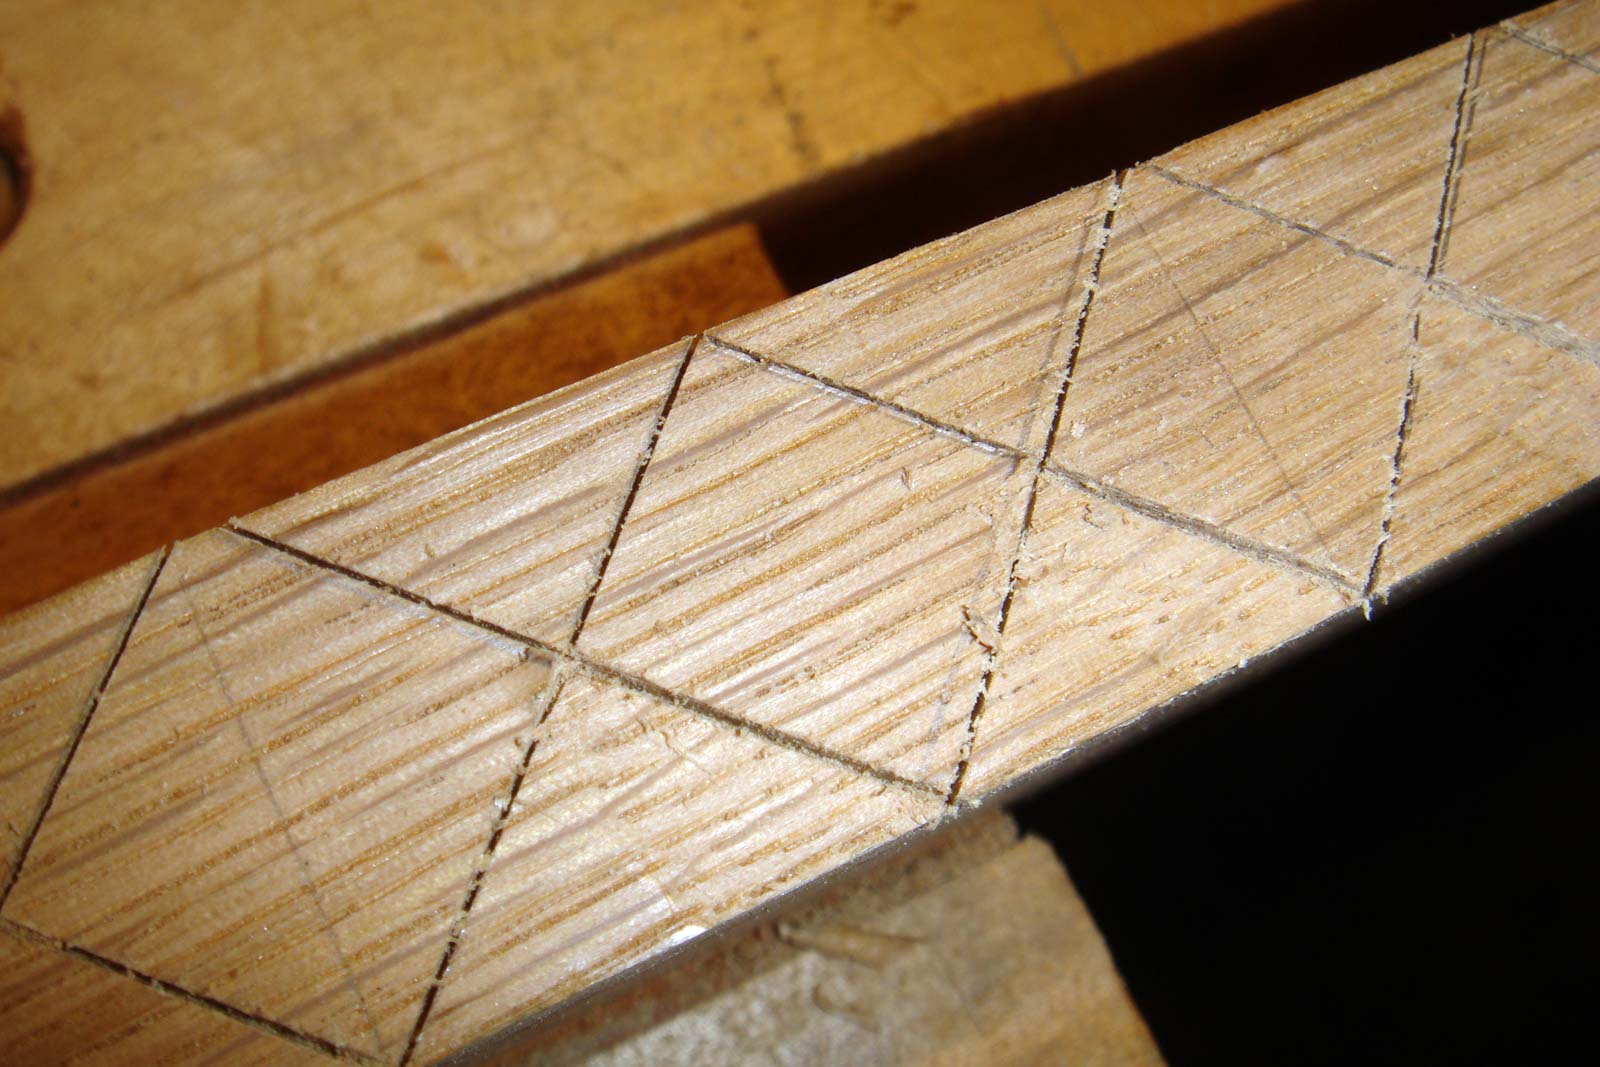
First task is to mark them out in (thin) pencil lines. The width of the edge dictates the size of the diamonds. The idea is to leave a thin bit of both the top and bottom edges intact (uncut) so that two thin lines confine the indented cuts that form the diamond shapes.
The pencil lines are used to locate a straight-edge chisel of the right width, held at a slight angle, to cut lines that are about 2mm deep at one end of the chisel blade (located in the middle part of the edge) and 0mm deep at the other end of the chisel blade (at the top/bottom of the edge).
You end up with pairs of intersecting cuts looking like this:
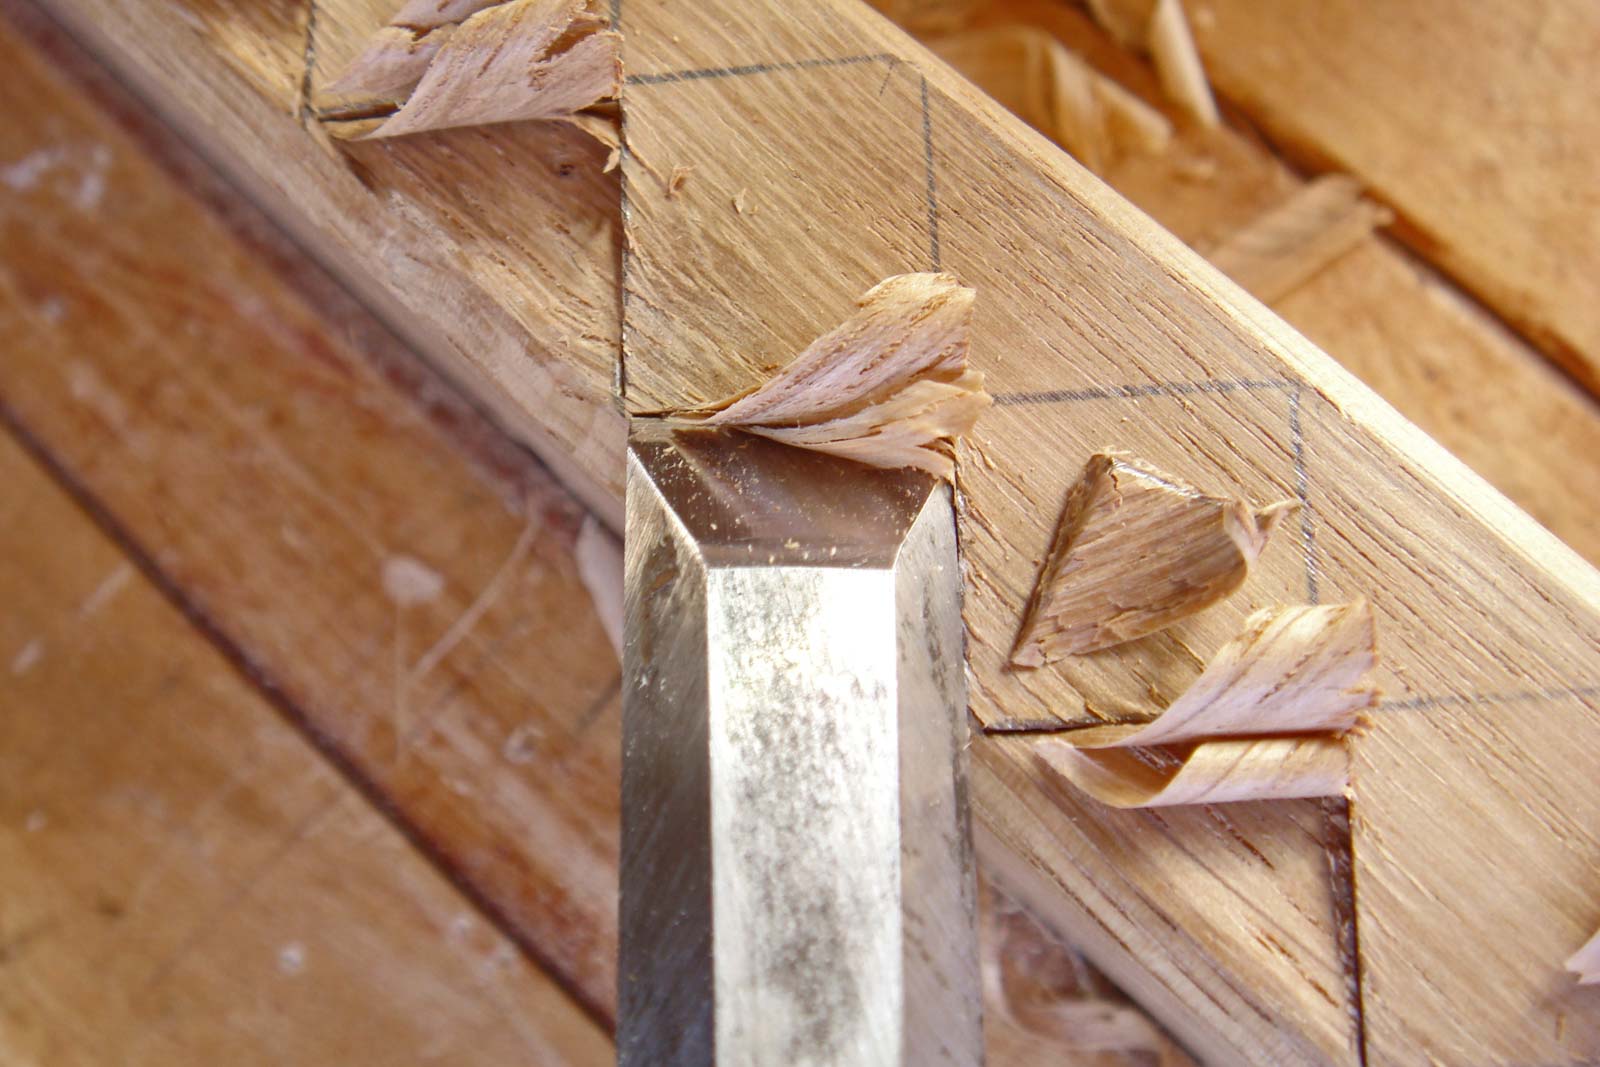
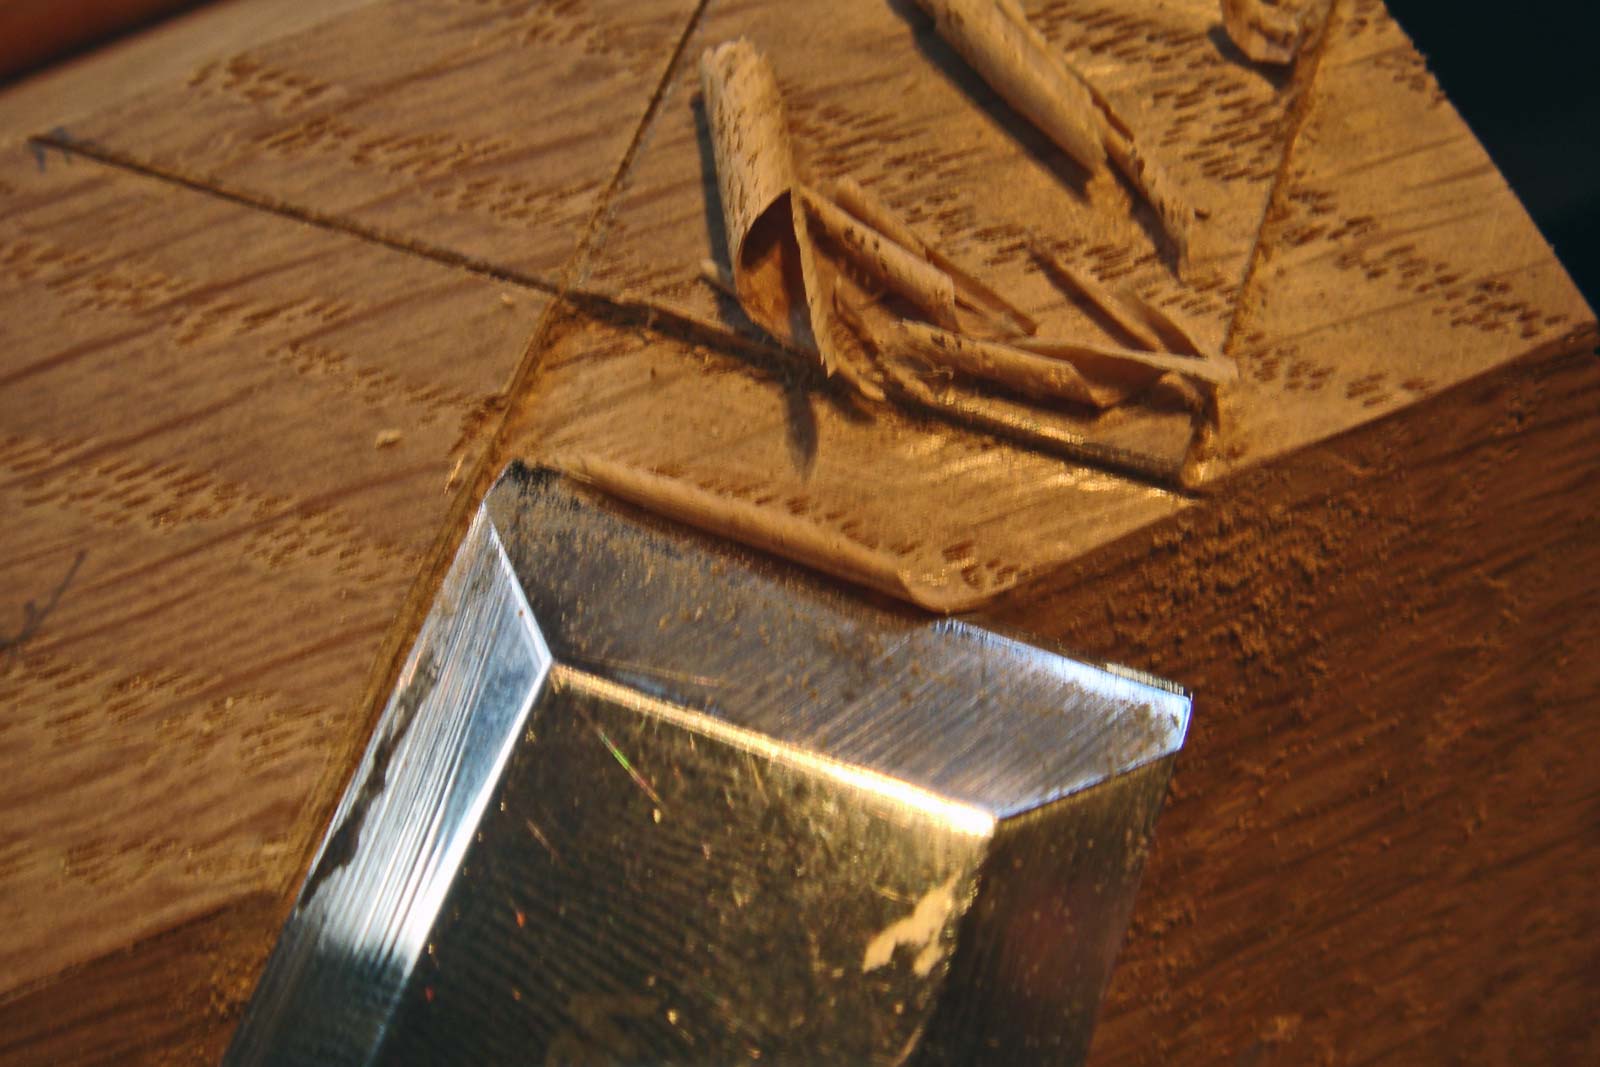
When all the lines are so-cut with the chisel, you chop out the waste to leave the diamond proud - proudest in the centre of the edge and not at all proud along the top and bottom of the edge.
If you’re using oak or another fibrous or otherwise awkward timber, it’s best to take several light cuts, to avoid tear-out. Sometimes you can’t go with the grain, so a very sharp chisel is essential. It’s best to limit the size of the shavings taken to those easily made with hand pressure only - no mallet - as you can then feel if the rascal is going to be awkward.
After a bit of light sanding, the edge should end up looking like this:
It helps to define the edge (and make it less sharp on the hand of the furniture user) if the edge top & bottom are given a small chafer, as shown.
The diamonds are usually a bit different, one to the next, which is a good thing in this style of furniture. (Hand of the maker, no machine-made ultra-regularity etc.). The trick is to get them looking irregular but neat - no chisel marks all over the place; or big differences in cut-depth, shape and so forth.
Interesting, not something I’ve ever tried but I have been tempted in the past to build a ‘hayrake’ table. A good book on this topic (if you haven’t seen it) is ‘Gimson & The Barnsley’s’ by Mary Comino; probably long out of print now.
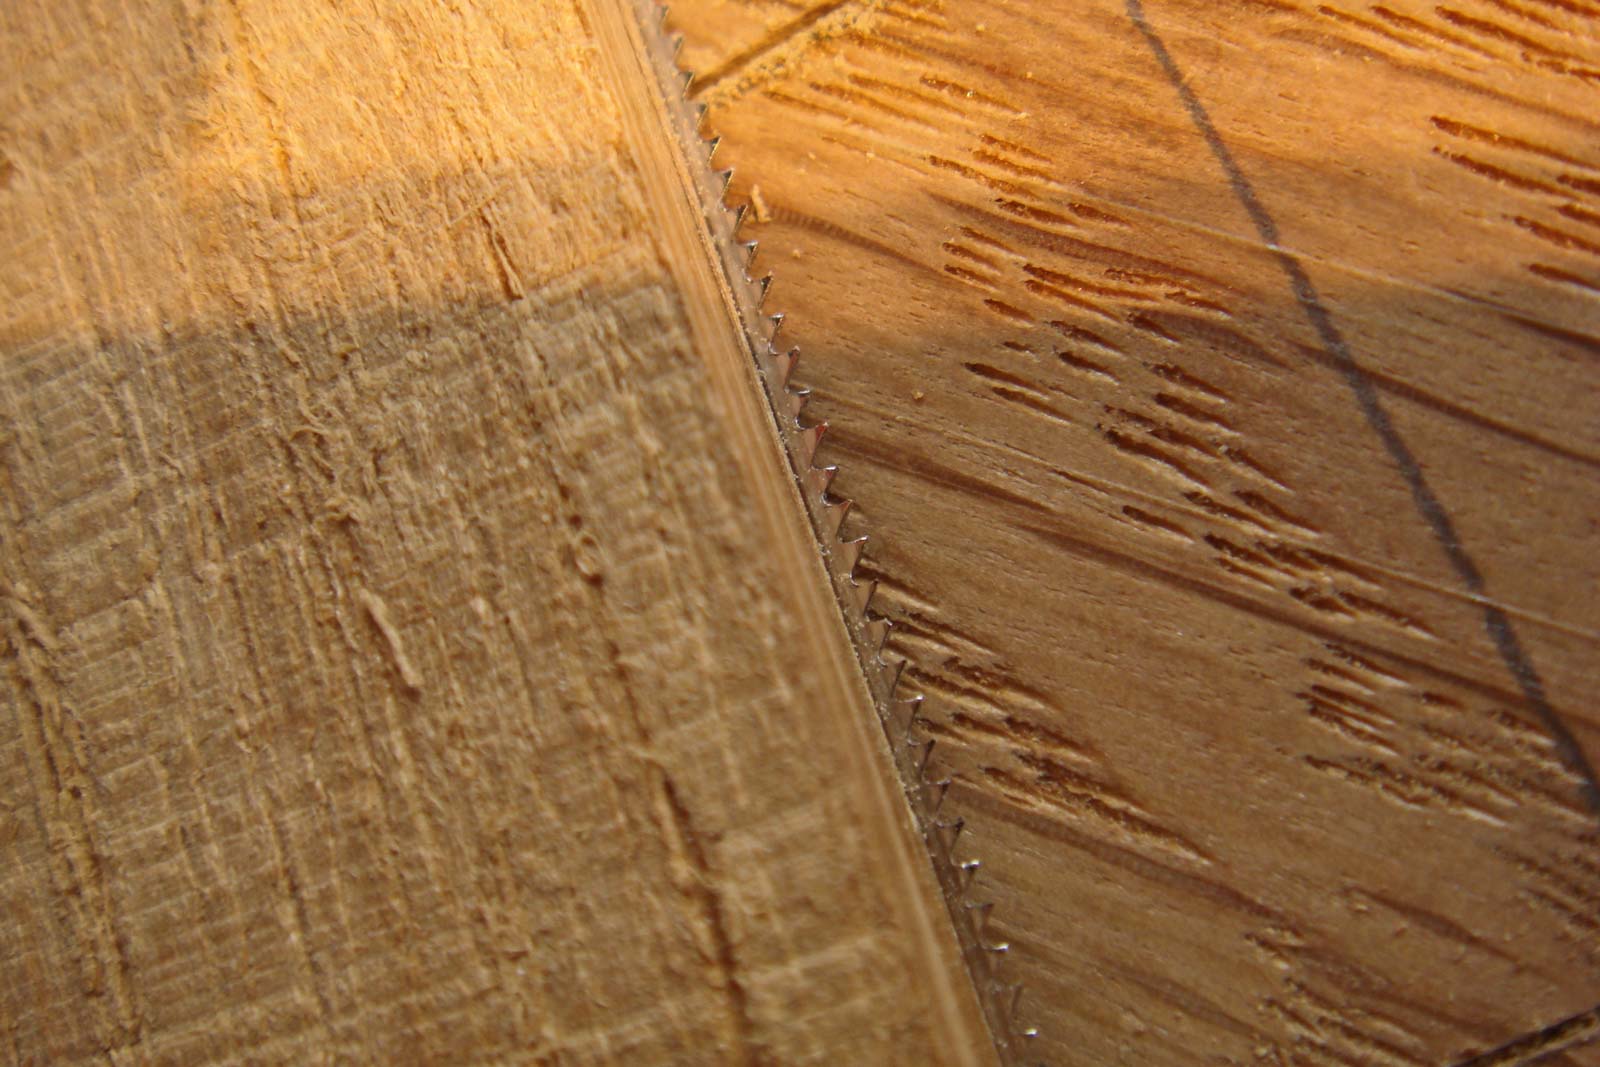
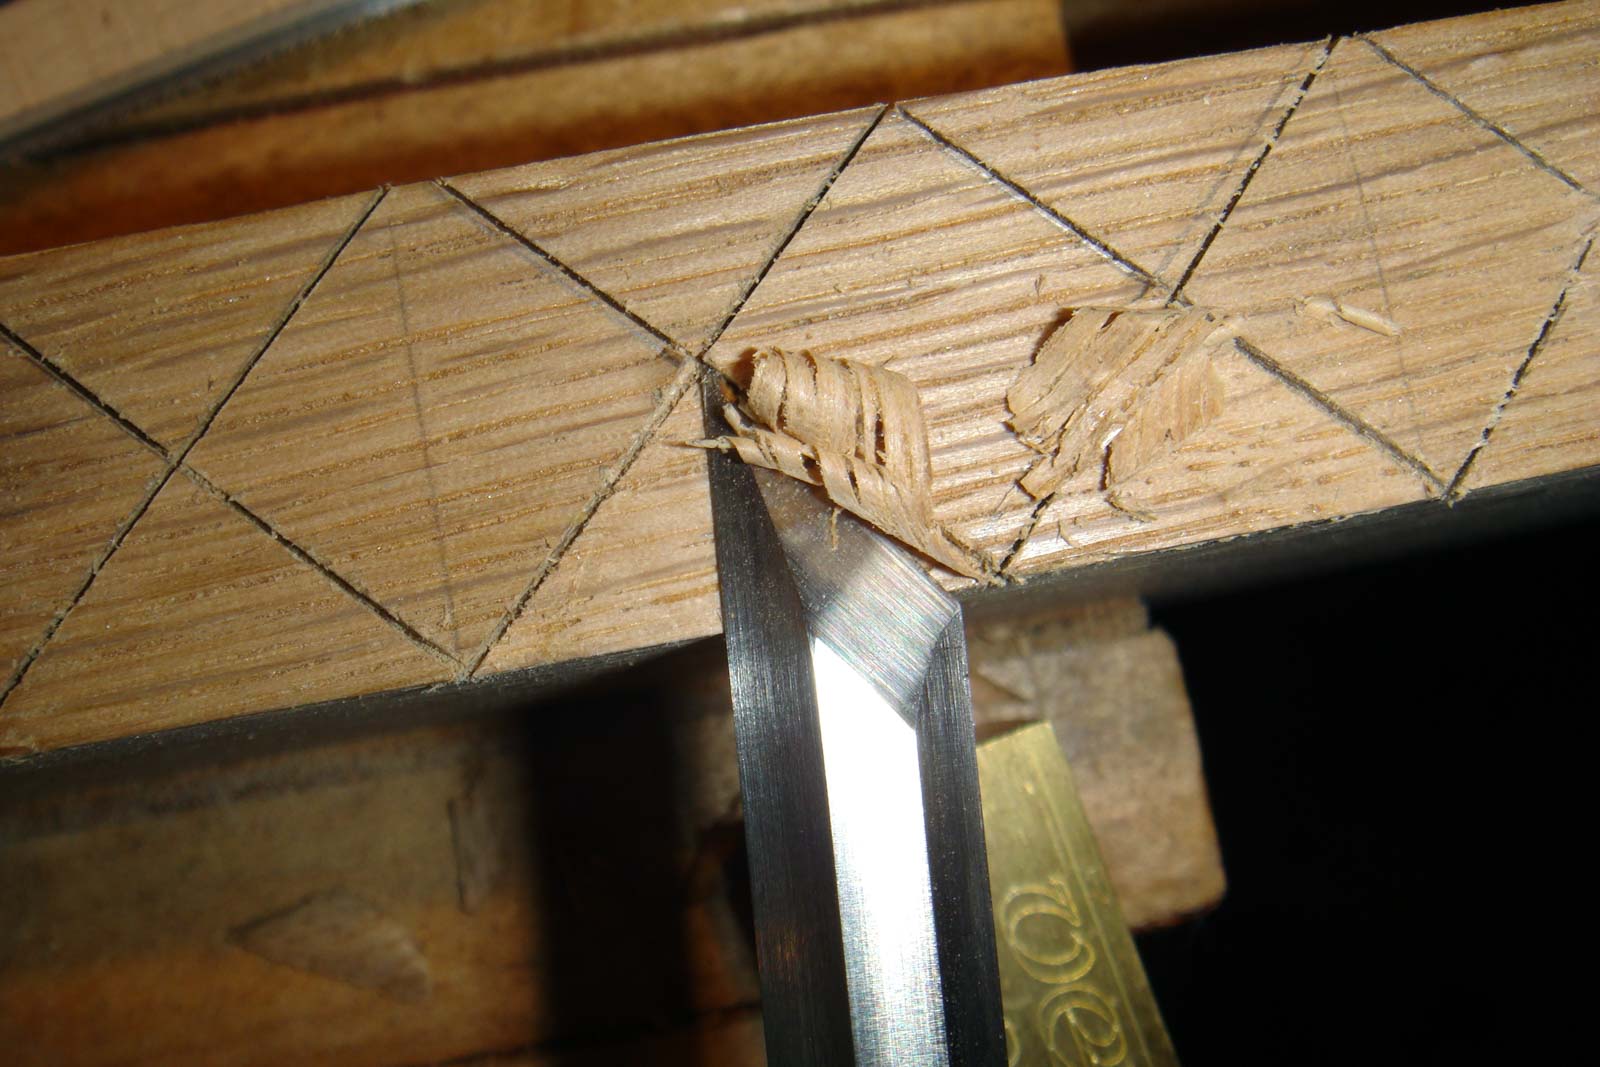
The other style uses a fine-toothed saw with something to limit it’s depth of cut to about 1.5-2.00mm. Once the diamonds are marked out in pencil, the saw is used to follow those lines to differentiate the parts to be chiselled away, leaving the proud diamonds.
That’s a small gents saw with 32 tpi. The cutting depth is confined to 1.5 - 2.00mm by sticking a thin piece of wood on to one side of the blade with double-sided sticky tape.
The lines are cut across each other but the blade is so thin that the points where the diamonds abut each other seem to still touch.
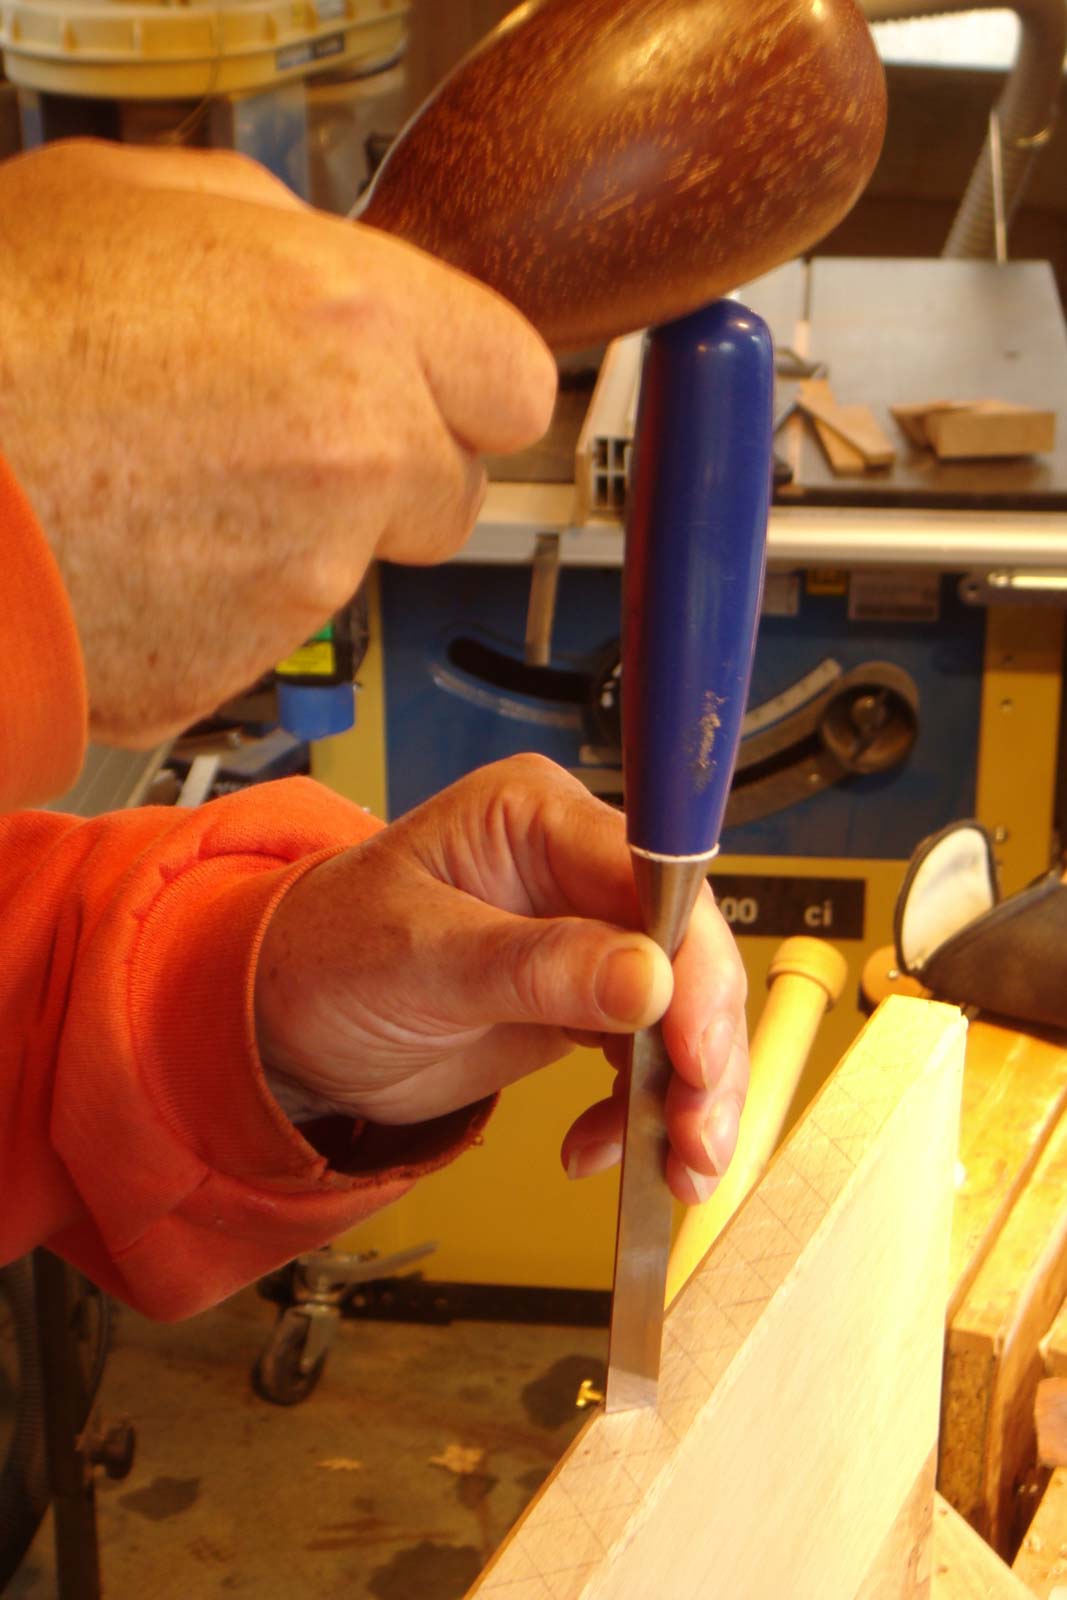
A chisel is then used to take fine shavings from the waste areas to leave the diamonds proud. Again, fibrous wood like oak requires multiple thin, careful cuts with a very sharp chisel to avoid tear-out.
One technique is to make the first cut at a steepish angle, to take a thick chip out of the waste down to the full depth of the diamond edge. You can just see the first cut result in the picture. The hump of waste remaining can then be shaved out with less chance of chopping into the edge of the diamond.
Another technique is to use a slicing cut with a skew chisel, if this seems to offer easier cutting (i.e more with the grain).
A hayrake table was the prompt to learn how to carve these diamonds. I got the curator at the Cheltenham museum to let me take a photo or three of theirs then experimented with various chopping techniques until I found some that didn’t end up with a gawdawful mess!
Here it is:
1 Like
Thank you so much for sharing your techniques. I am in the process of making a hayrack dinning room table and plan on incorporating some of your carved decorations. “Imitation is the sincerest form of flattery"
Beautiful work and thanks for the demonstration.