Ok I relented.
I know there are more than a couple of people interested in Picture framing and it has been suggested that a separate thread may be needed, so to kick it off:
https://www.wealdentool.eu/reviews/picture-framing-techniques-steve-prescott/
And:
https://www.wealdentool.eu/reviews/making-picture-frames-wealdens-exclusive-cutters/
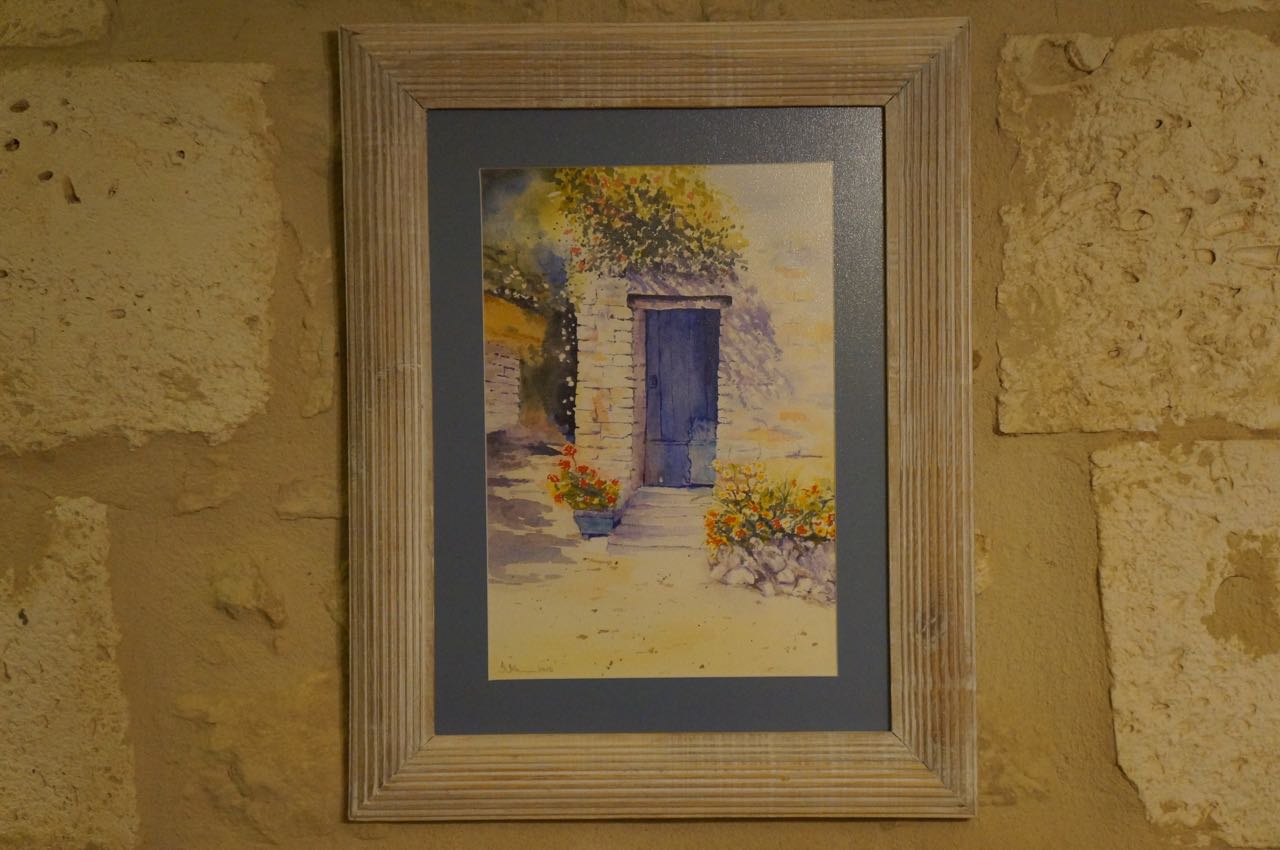
I have all the Wealdon picture frame cutters and used the Venezia to make this frame:
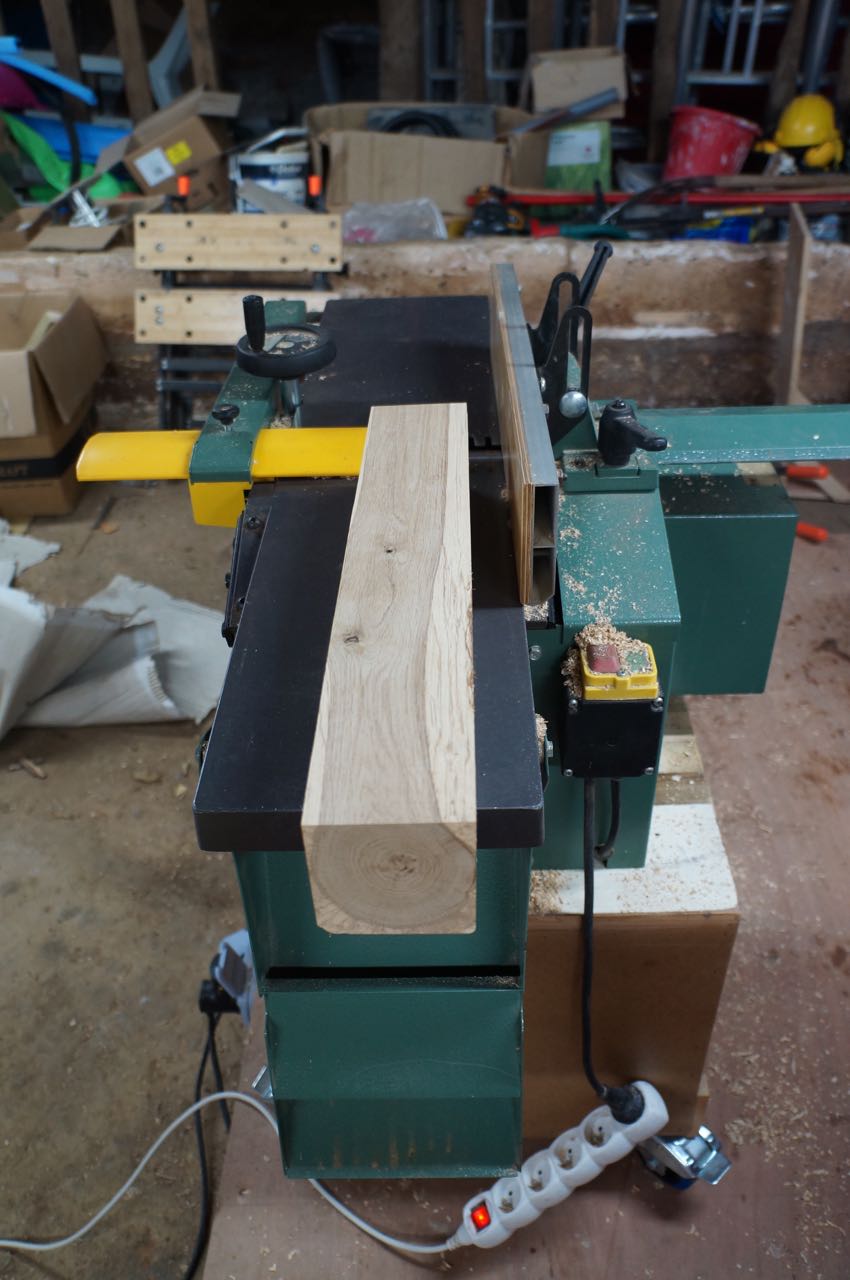
The Oak came in the form of a log from our wood pile:
And worked on to produce a usable piece of stock:
This was then re-sawn on the Bandsaw to size and put through the thickening bed to size each piece to each other, after that through the router table with the Wealdon Venezia bit, then on to the chop saw, this has been fettled to be exactly 45 degs on both sides, its an Makita 1013 and IMO was the best chop saw around for a sensible cost when I bought it.
I have missed out a couple of stages where the size of picture is needed to make the recess in the back of the frame for the picture, back board and glass, if anyone is interested I will post later how I decide on what to do when.
TBC
Good start on this thread. As and when I begin my next framing for another woodblock print, I’ll chip in. Meantime, this little bit from The Knowledge;
…shows how I do my frames, albeit that this was an ‘upside down’ one for a ceramic trivet, but the same principle applies for a proper picture frame. Incidentally, the text was ‘edited’ and bears little relation to how it was originally submitted as it’s now a bit of dog’s dinner to read.
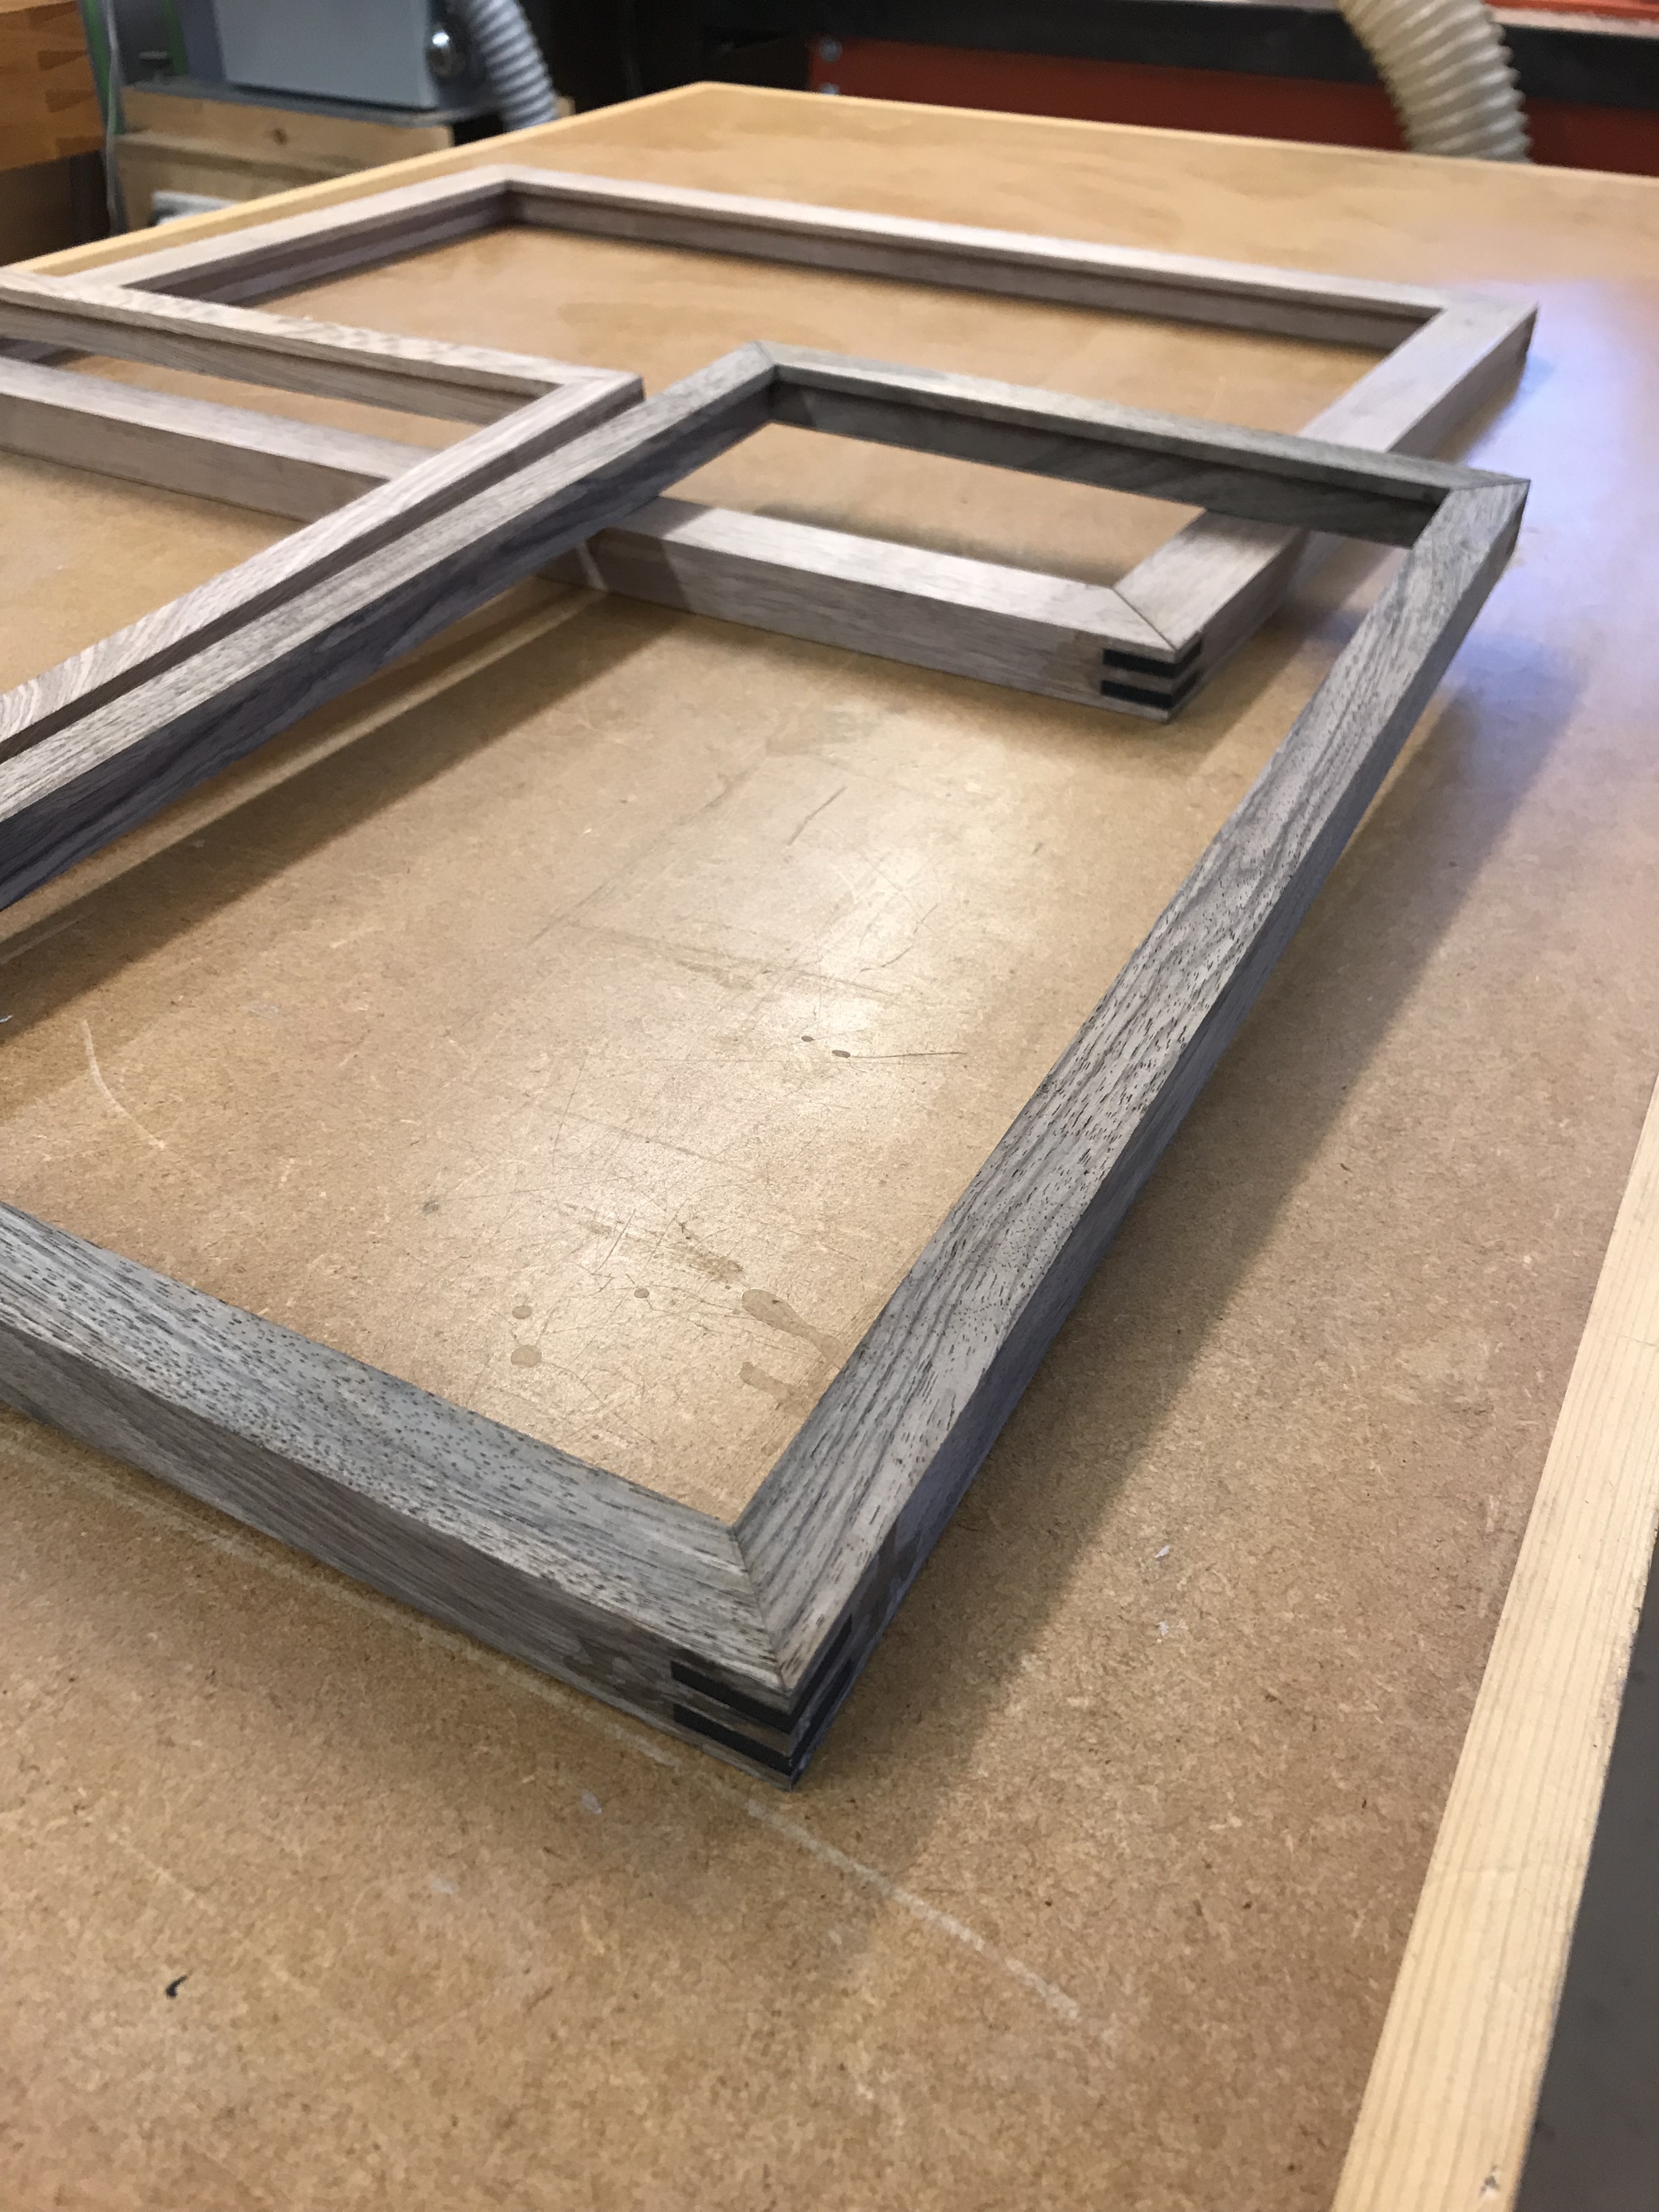
These are the next three frames which have been made but yet to be cleaned up. Two are in English Walnut, the other in some very swirly Brown Ash for Hokusai’s ‘The Great Wave’
It looks like there’s a gap in the mitre on the largest frame; it’s not as it’s a ‘step’ as the mitred surfaces have yet to be planed flat. The crucial thing when assembling the frames is that the underside of the rebate that touches the glass must me co-planar, in other words, level. Inside surfaces of the frames must also be planed, scraped and/or sanded (if that’s your bag) prior to gluing. Splines here are 4mm Bog Oak and Ash.
Very good for a read in the wee hours. Thanks
Very much slower but I cut my mitres after marking 45deg on all 4 sides…scribed with knife the cut on the waste with a screwfix chop saw (49.99) well spent. Waste down to scribed line using shooting board and T5 plane ( look on eBay for picture of)
Mitres come out pretty well perfect …my prob is by using circa 1900 moulding planes, getting mould at mitre intersection to be perfect…but I am working on it
For corner strengtheners I use kebab sticks set and glued into a drilled hole.
Best John
Getting the mitres level is where the thickener comes in, getting the stock the same size is the secret to good mitres.
Love the frames …I would like to come back later with questions, busy making shaker doors at the mo.
Best John
When you say “thickener” do you mean No 4 plane :-))
Mitres should be perfect (check with a mitre square) but more importantly you need two pairs of identical sides, which is where the ‘finger tip’ test is useful. Any discrepancy in a mitre or length of a side(s) is magnified by a factor of eight (could be wrong here?) when the frame goes together, which is why absolute precision is needed to make them.
Frames that are glued but not reinforced somehow (splines, dowels, biscuits, veneer, kebaber sticks etc) are very fragile as the mitred faces aren’t glued long/long grain.
Yes thanks I think my mitre on shooting board…sharp plane set square…bit candle wax and I get really fine shavings, so I am happy with that.
Yes accuracy is important …this is where experience comes in and I am very keen to learn at the same time will not use routers only beach moulders and my own make of rebate plane. 1" firmer wedged into scrap beach…depth stop and fillister beneath almost perfect …then use Stanley 90J shoulder plane to for glass rebate
I use hollows and round, edge beads, scratch stock and brass screw set in block to form lovely edge details.
I will continue to practice to be able, as you say, to pass the finger test
All this waffle and I know I could earn my living at it, BUT I don’t need to earn I am retired…and love it
1 Like
Should read “I could not earn a living” and beech not beach
I think a thread on shooting boards would be useful here. I’ve used loads over the decades but have recently discovered the best of the lot, in my 'umble opinion.
I have a 410 and a 12 Gauge. 
Ok you show me yours and I’ll show you mine…how about a sticking board to follow on Best John
Very good…good job it’s New Years Eve! Have a gud’n.
Very new to both here and woodworking, and having a wife who paints I am sure I will be making frames soon.
I can buy oak easily and fairly cheaply from British Hardwoods and have used it for other things, how suitable is it for fairly small section frames?
I do not mind the odd bad one but I would like them to last.
Also a recommendation for a good glue for oak would be appreciated, I am still learning.
Any pointers would be appreciated!
Bob
Almost any wood is suitable provided it’s reasonably dry and stable. I’ve done a fair few frames in oak but the tricky bit with picture frames is producing two pairs of identical…and I do mean identical parts. This is where an accurate shooting board in so useful as well as the ‘finger tip’ test across the mitres on each pair.