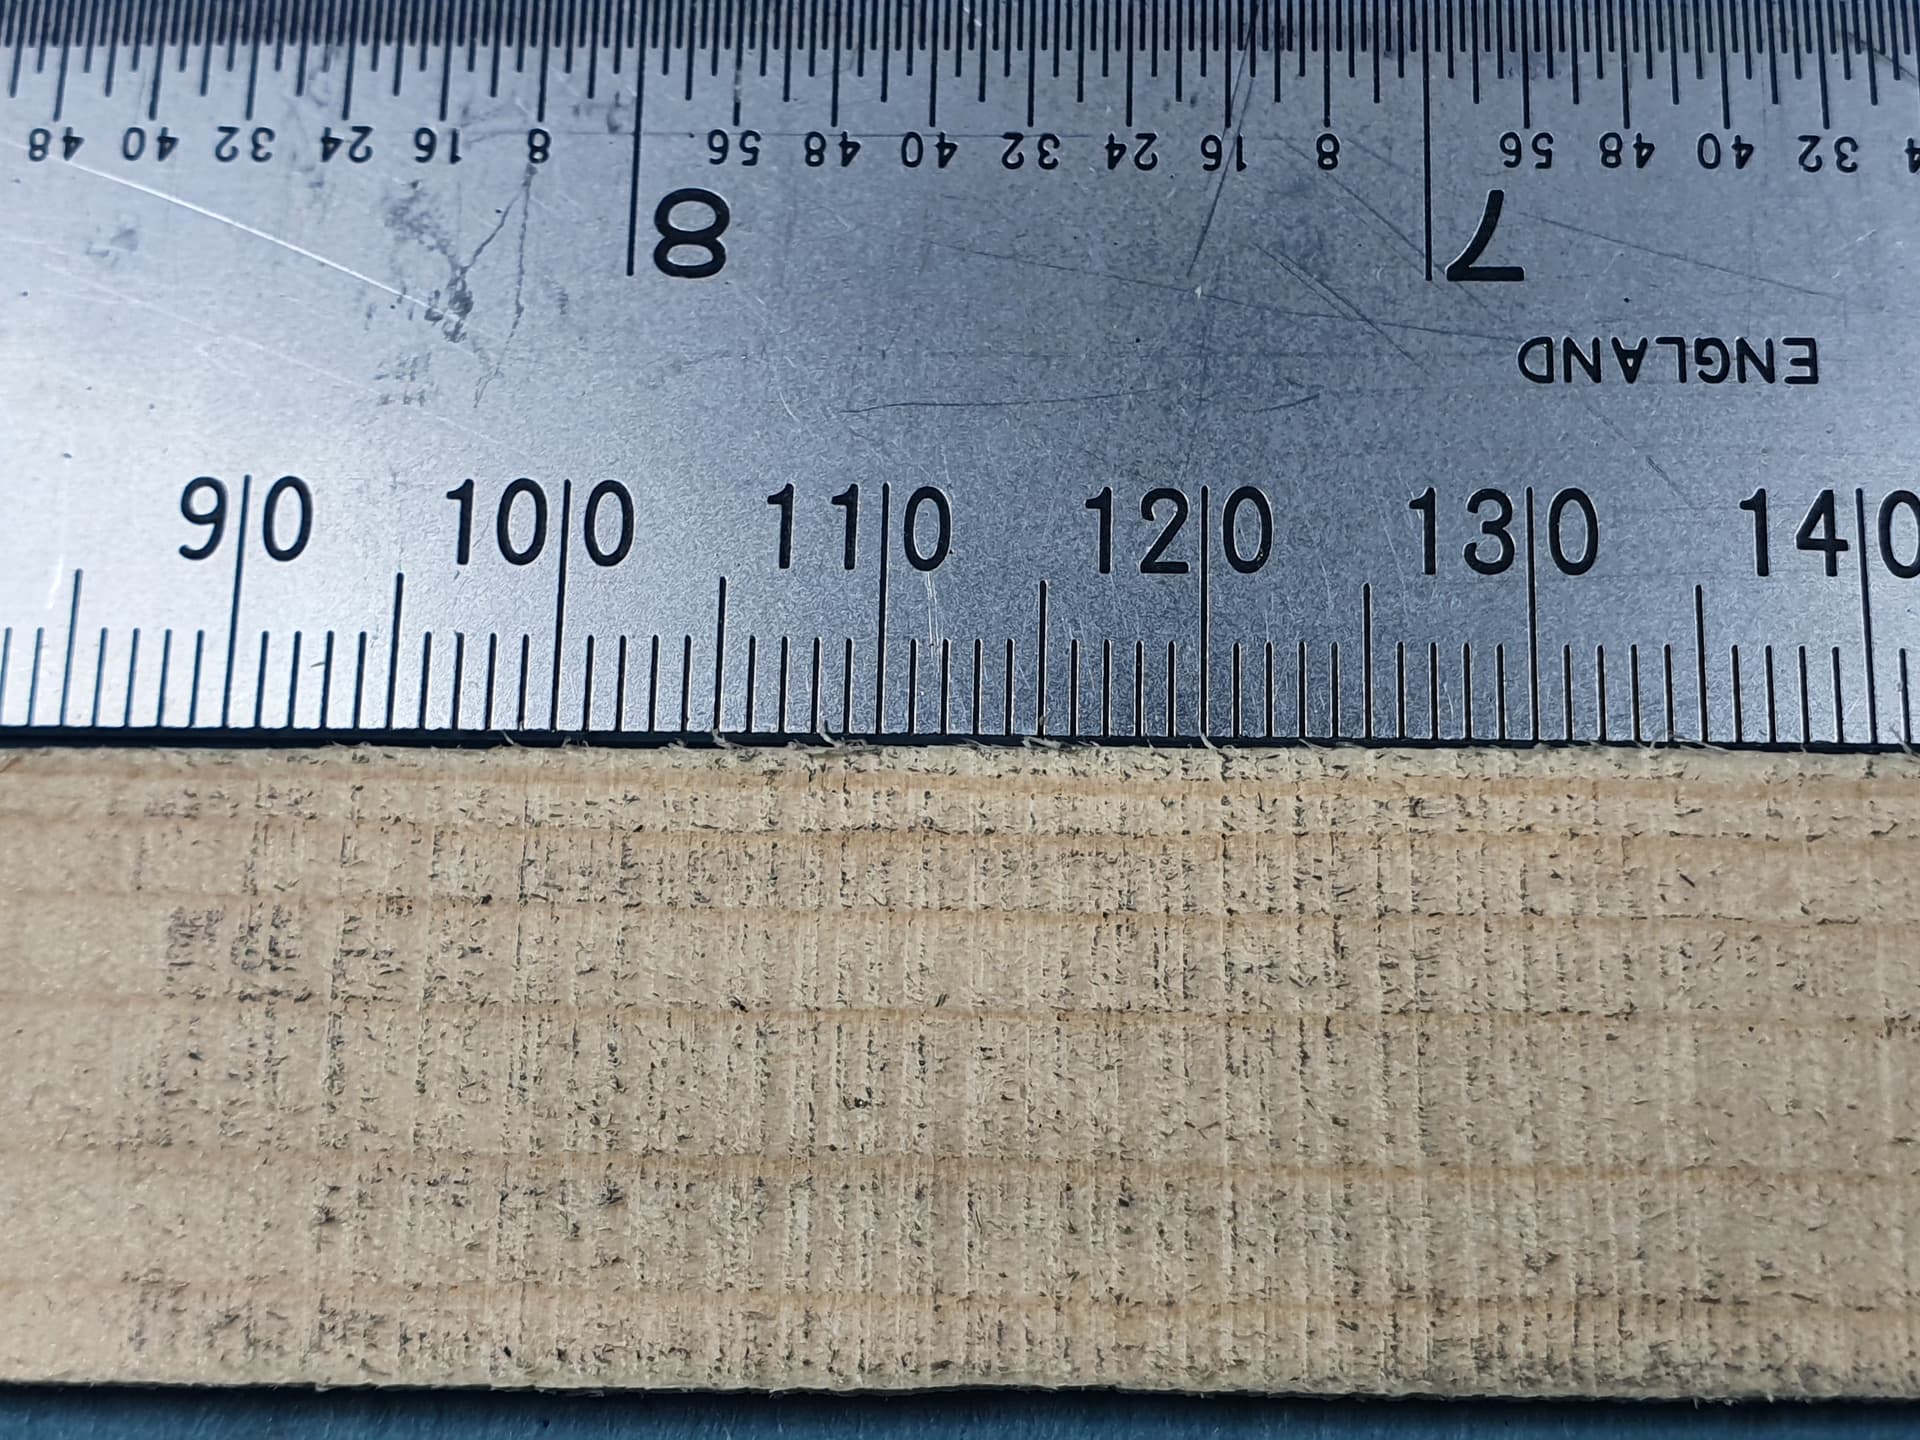
Just got myself a freshcut blade ( 12.7mm 6 Tpi) for my Craft AC1950B Bandsaw, having fitted it and set up all the guides and stops I have done some test cuts but I am not sure if I have got everything right and I have nothing to compare the finish with. The image below shows a typical cut (I have gone over the wood with a pencil to highlight the cut finish), the cut marks are approximately 1mm apart and about 0.1mm in depth (very approximately).
I have also noticed the back of the blade moves away from the backstop as it rotates by approximately 1mm with the max deviation coinciding with the weld, but again I am not sure if this is normal. I have check the tracking and reset it up a couple of times and it looks to be OK and stable, this I suspect this is something to do with the geometry of the blade.
Any confirmation / guidance / comparison world be useful.
I found this instructional video from Axminster Tools on setting up a bandsaw very good. The only deviation I recommend is instead of aligning the guide fence to the blade as they recommend, align the table’s mitre guide slot to the blade using something like the Axminster Tools Bandsaw Buddy* and then align the guide fence to the mitre guide slot.
*I used the rule from my combination square attached to the flat part of the blade with a couple of flat button magnets behind the saw teeth. The rule needs to be slightly above the the table so it’s free to swing. Then adjust the table so that is equidistant at both ends to the table’s mitre guide slots.
Patrick
Many thanks for the suggestions. When I did my initial alignment I ensured the fence was parallel with the mitre guide slot and then using the Bandsaw Buddy, I then aligned the fence with the blade by adjusting the bed, so in theory it should all be true, but as that was one of the first things I did (and it was with the previous blade), I will give it a check to see it I have knocked things out of alignment.
I guess the preference for alignment is really dependent on whether you use the Mitre slot or fence more for guiding the work through. I currently only have a cheap Mitre Gauge Fence that came with my table saw, so it is not something I would rely upon for angles.
I looked at the premium blades you mention but, 1950 is one of the sizes that Axminster does not do
Checked out the guides and am happy with the the settings, the 1950 has ceramic guides rather than bearings, the ceramic guides feel a lot easier to set up.
I checked the alignment, the fence is nicely aligned with the Mitre slot but checking the blade alignment to the fence, showed that was not properly aligned, so I realigned it but what I did find on close inspection was that the blade teeth were toeing in slightly and that this was changed by the blade tension and tracking so my learning point is if you change the blade then you need to check the bed alignment.
I did some more test cuts and there was no change to the cut-marks.
I have the original general purpose blade that came with the handsaw and an extra GT blade, so I think I would do a couple of blade swaps and do some test pieces for comparison.
The number of times I’ve heard this rubbish; Tuffsaw blades are good but no better than the ones sold by Axminster. I’ve used both and now exclusively use the Ax Diamond Ground blades which last for ever.
To the opening poster; setting up a bandsaw is dead easy. Align the blade on the top of the crown wheel, use a Bandaw Buddy to set the fence dead parallel to the blade (adjust the fence, not the table and forget about mitre slots…not needed). Align the roller bearings so they just skim the blade…they shouldn’t touch it in any way. Check that the fence is at 90deg to the blade (use a try square) and set the pressure to maximum (disregard the settings on the machine) but ALWAYS slacken off at the end of the day. Easy peasy!
I will kick off by saying I have three blades and at this point I am not looking to add more until I am used to the pros and cons of the blades and the machine (I would have got a premium blade but they are not in Axminsters range for my saw). I have got the hang of adjusting the guides having change blades a few times, the only thing that is a pain is adjusting the lower guide clamp so that the ceramic guides are just behind the blade gullets as the wheel brush gets in the way
See page 11, figures 19 and 20 for reference
The blades I have are as follows:
General Purpose blade (came with the machine) - 6tpi, 3/8" (9.5mm) width
Axminster GT - 10tpi, 1/4" (6.3mm) width
Axminster Freshcut - 6tpi, 1/2" (12.7mm) width
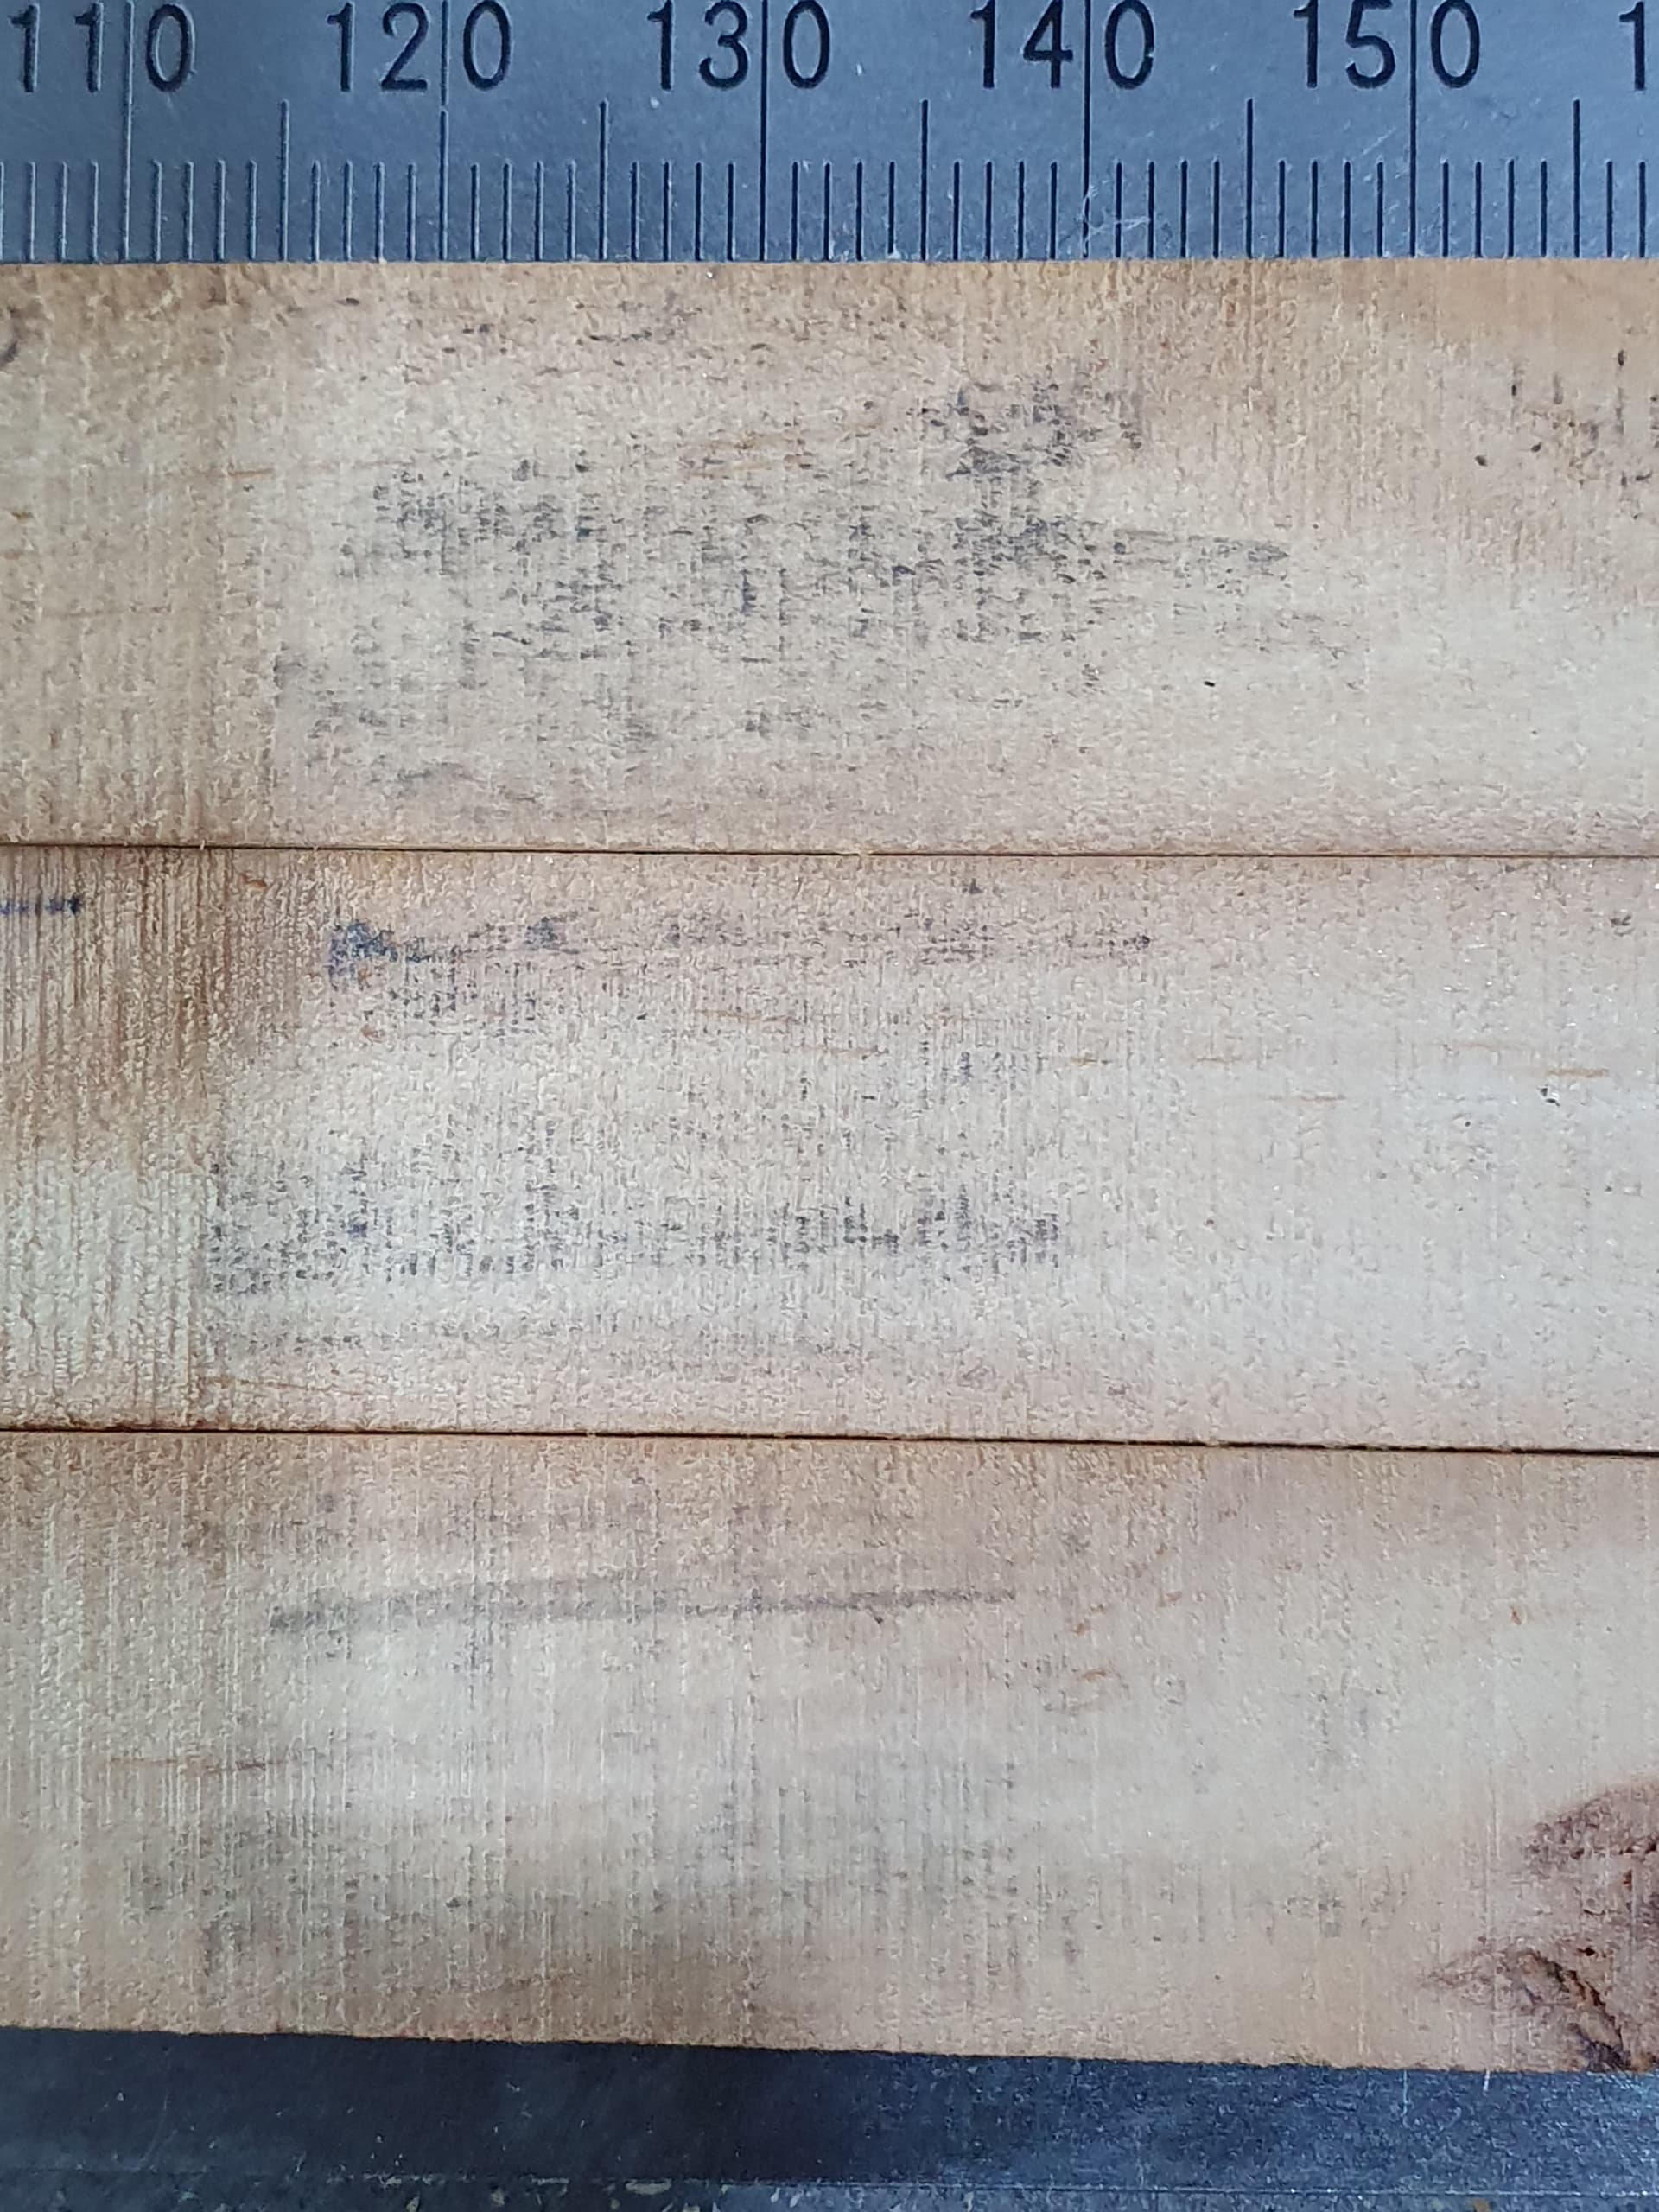
The image below are the results of my test. again I have rubbed a pencil over them to highlight the peaks. The test pieces in the image are in the order above, the top general purpose results are as yo would expect the roughest, the GT and Freshcuts test are fairly similar but I think the freshcut at the bottom just about produces the best results.