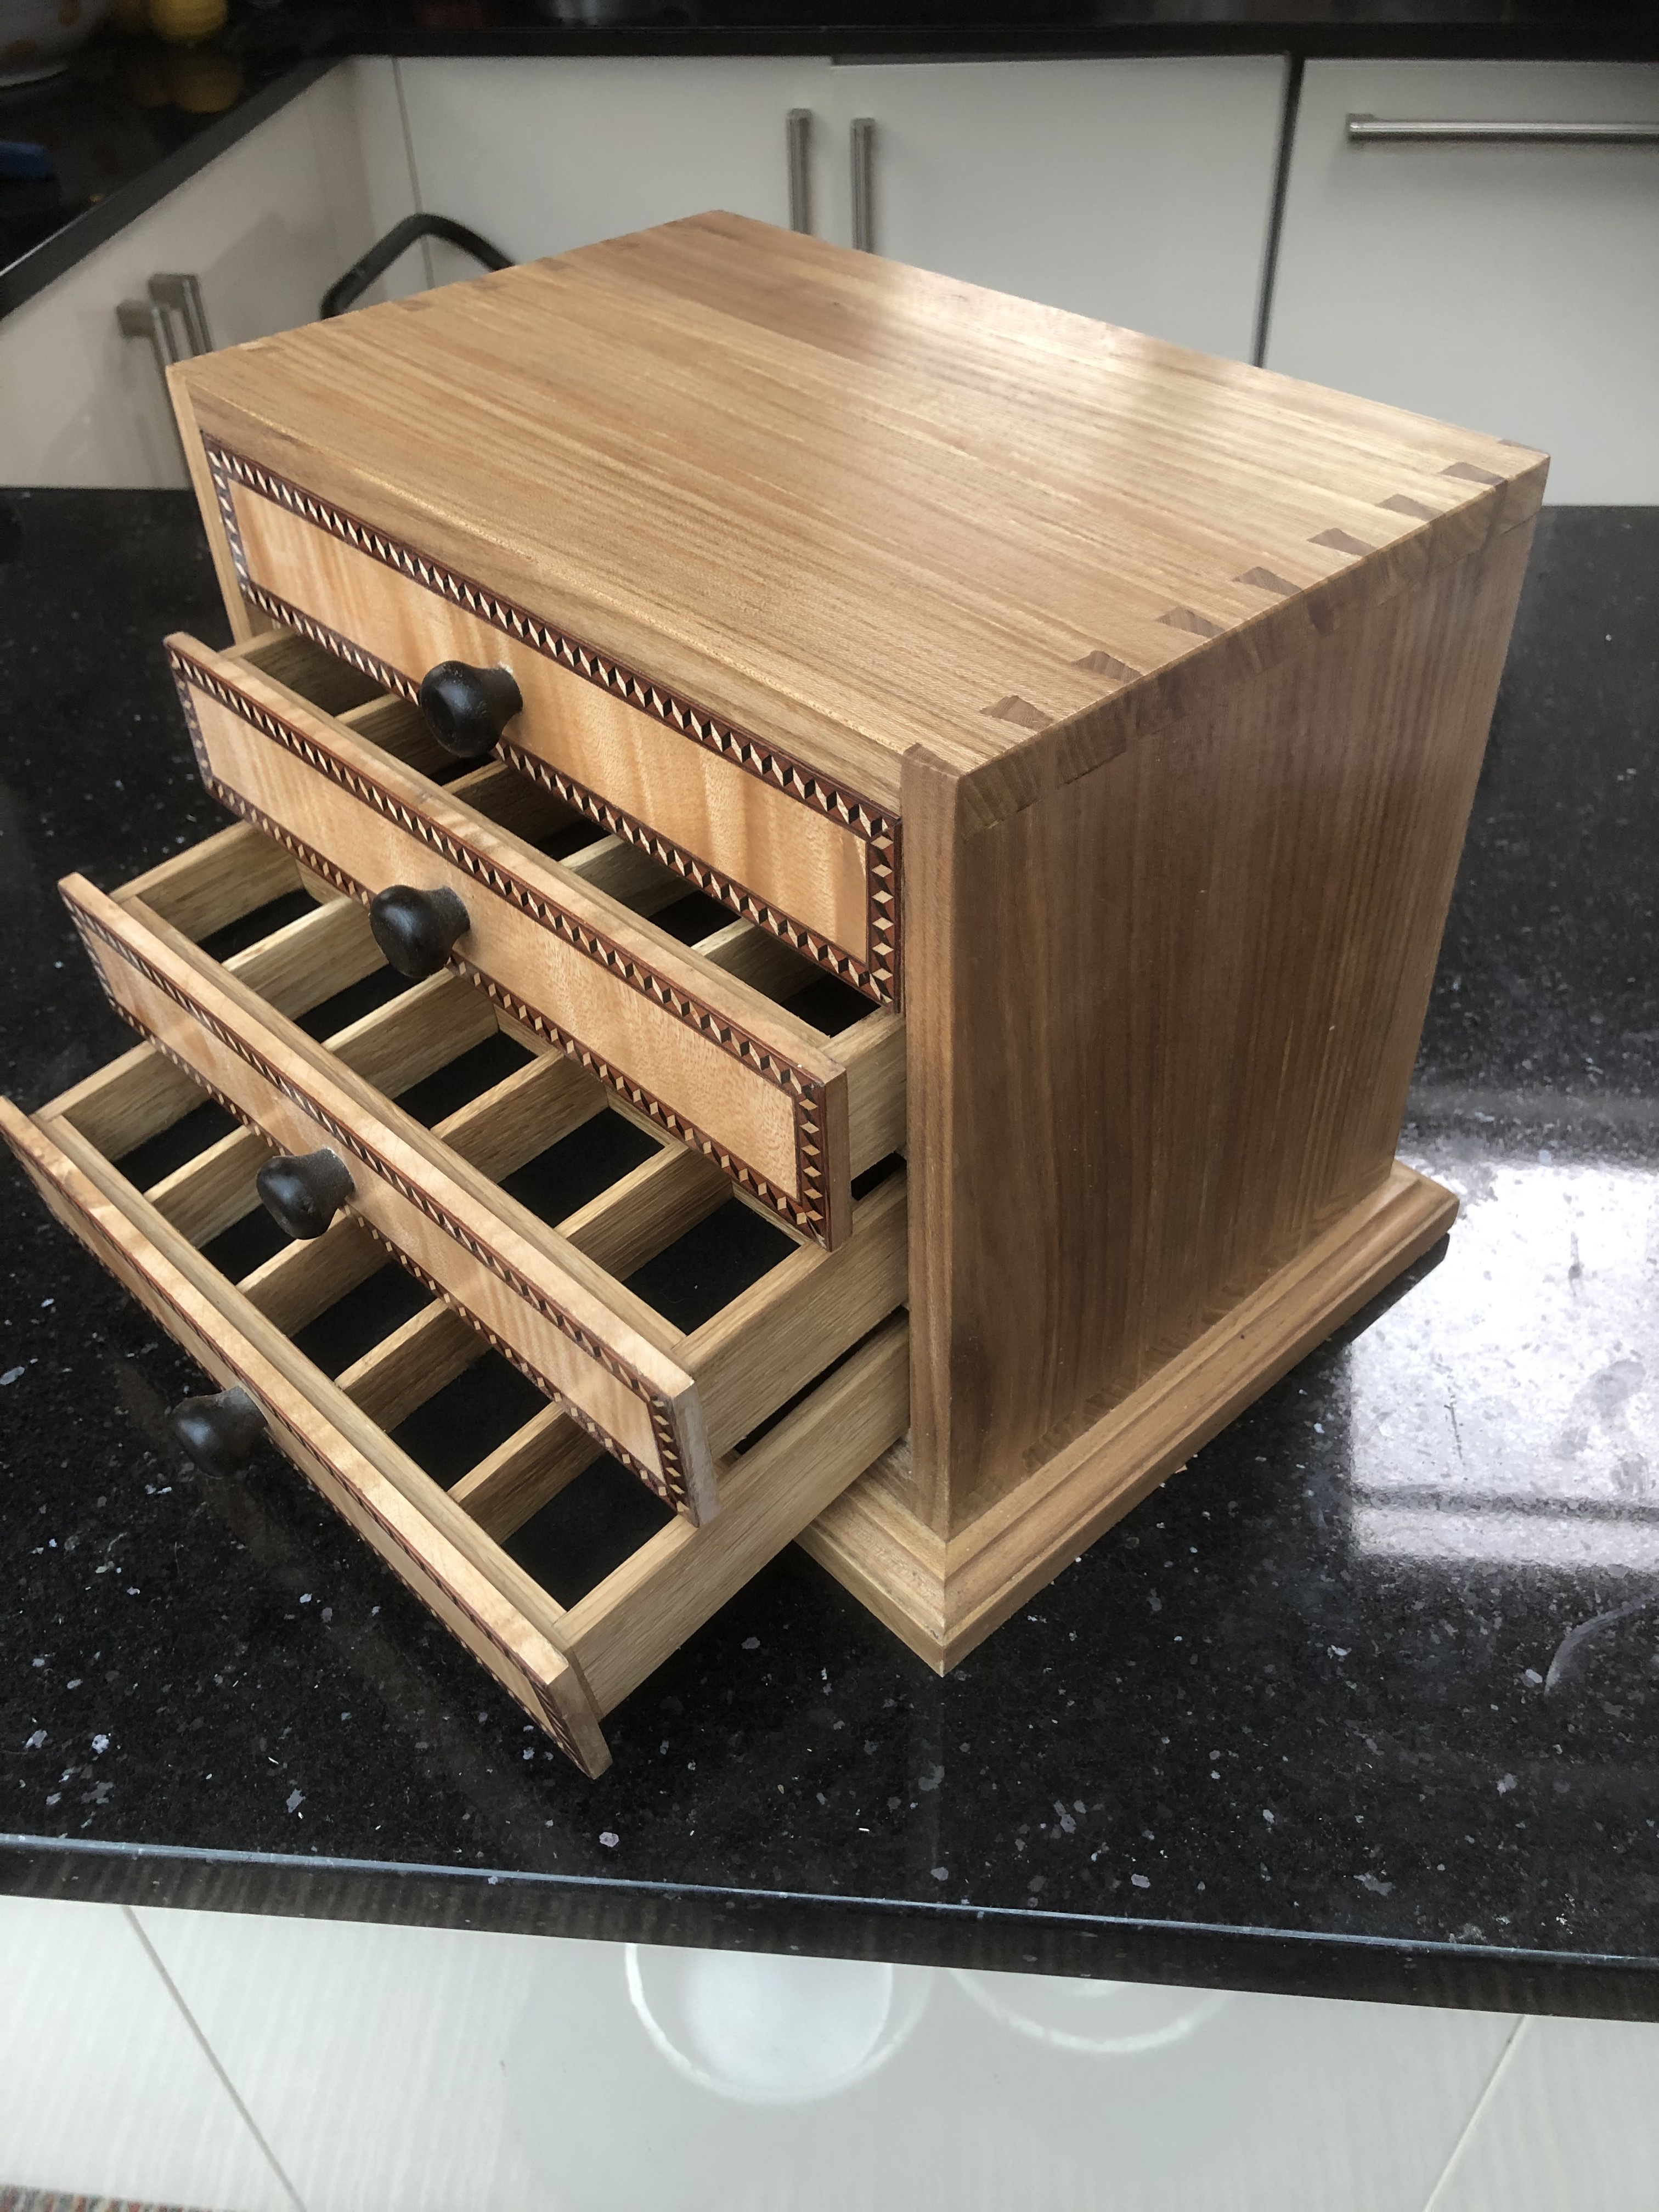
Made this jewelery box for my daughter’s 40th Birthday on 11 March.
Elm carcase with hand cut dovetails, Oak drawers with Sycamore fronts with crossband veneer inlay to edges.
Made the base , with each row ,put on lathe to sand it . Will upload photos to help you later Les
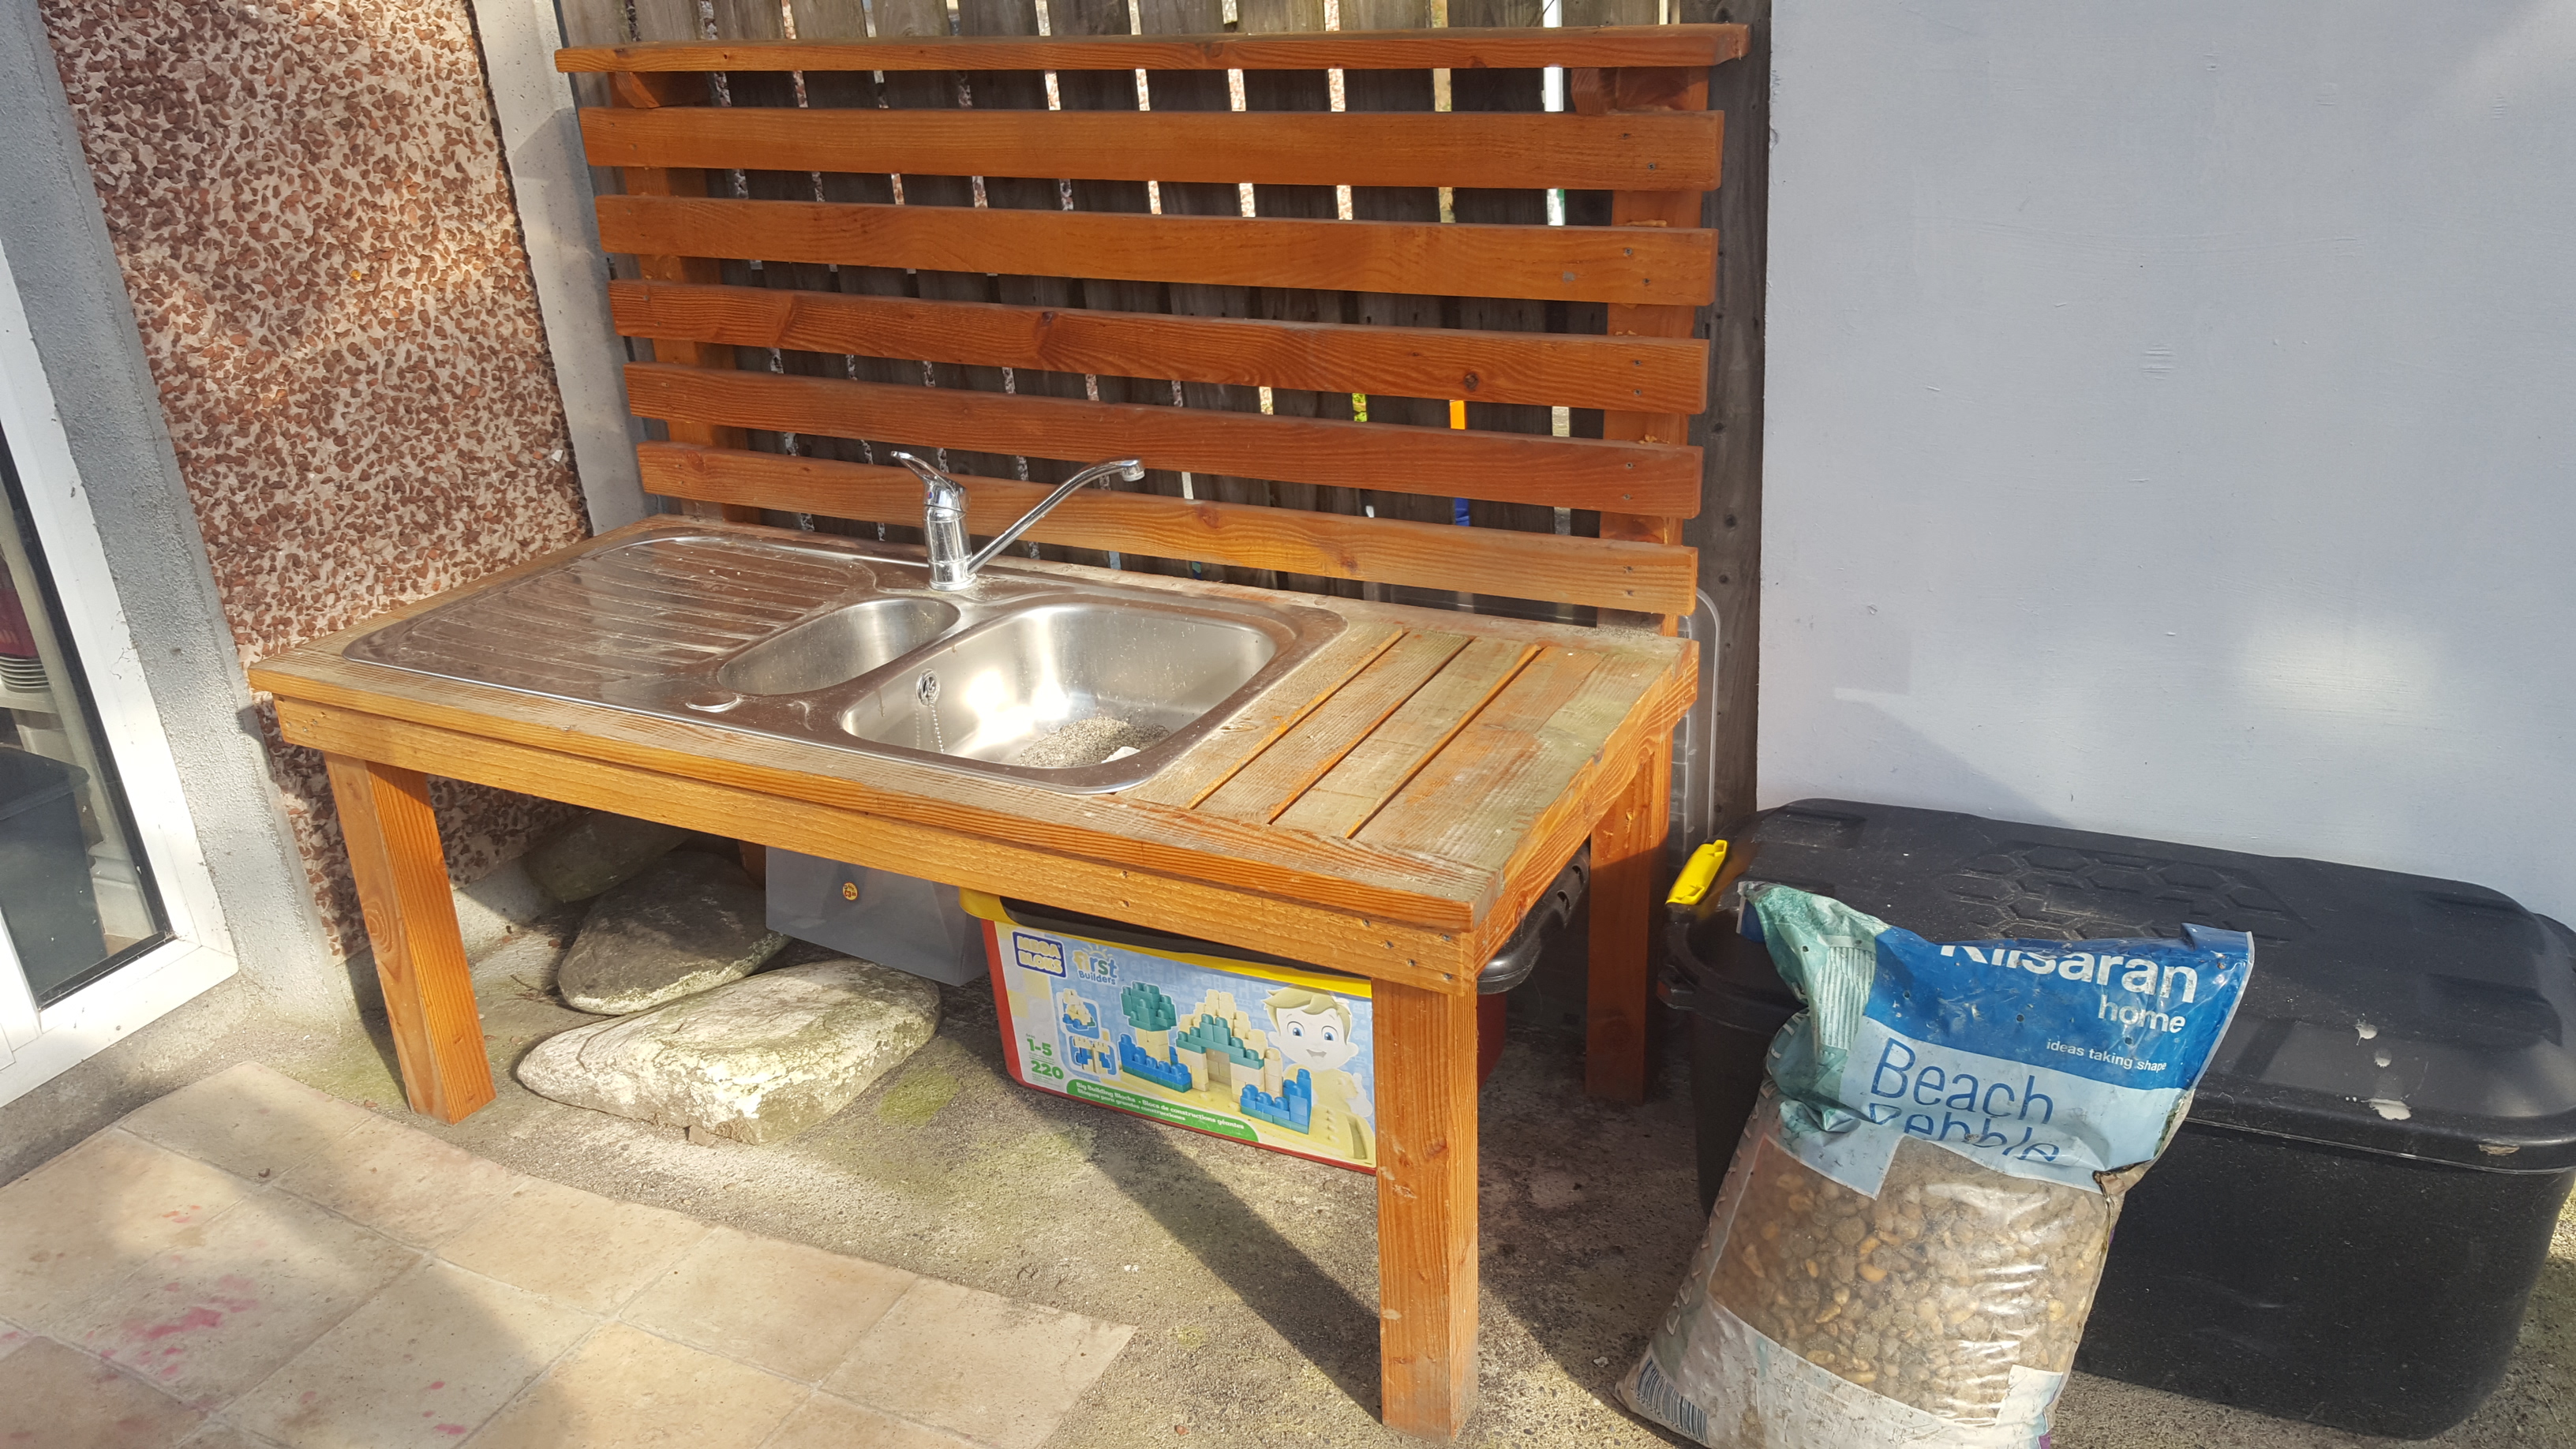
My wife runs a preschool and wanted and outdoor kitchen for the children.
Some neighbours were having their kitchen remodelled and we were able to get their old sink.
The kitchen is building using larch and finished with an outdoor varnish.
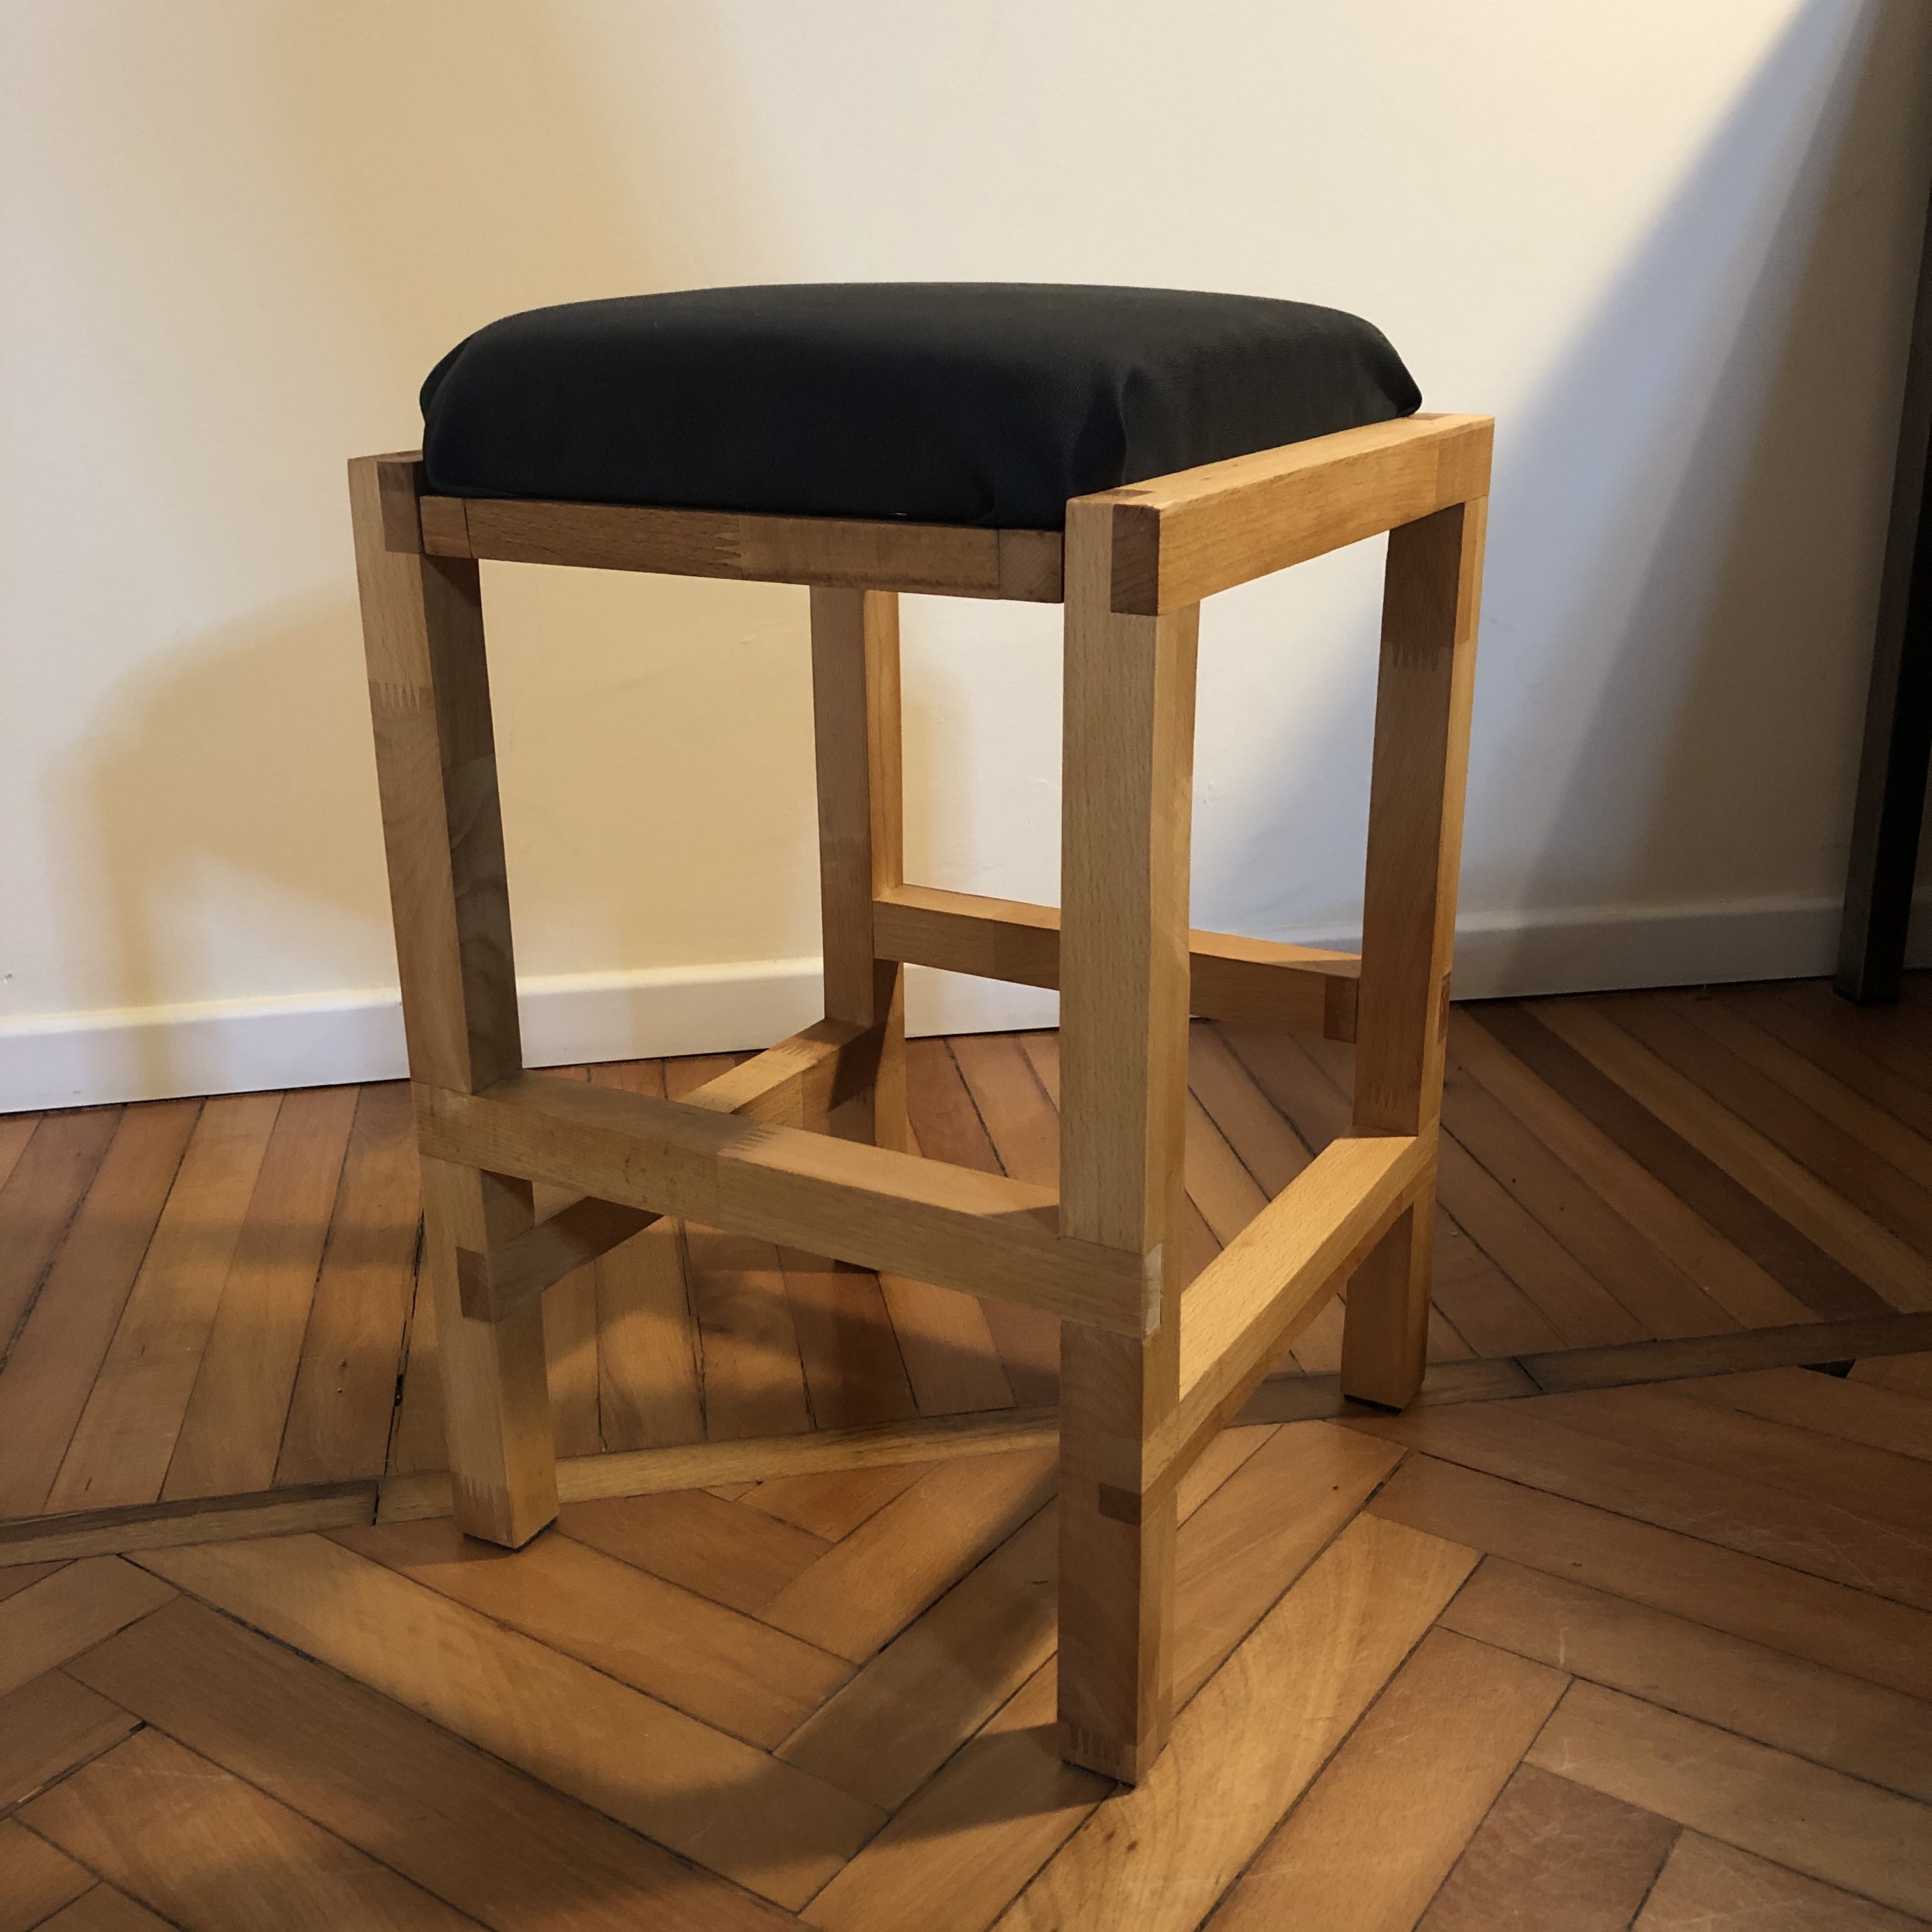
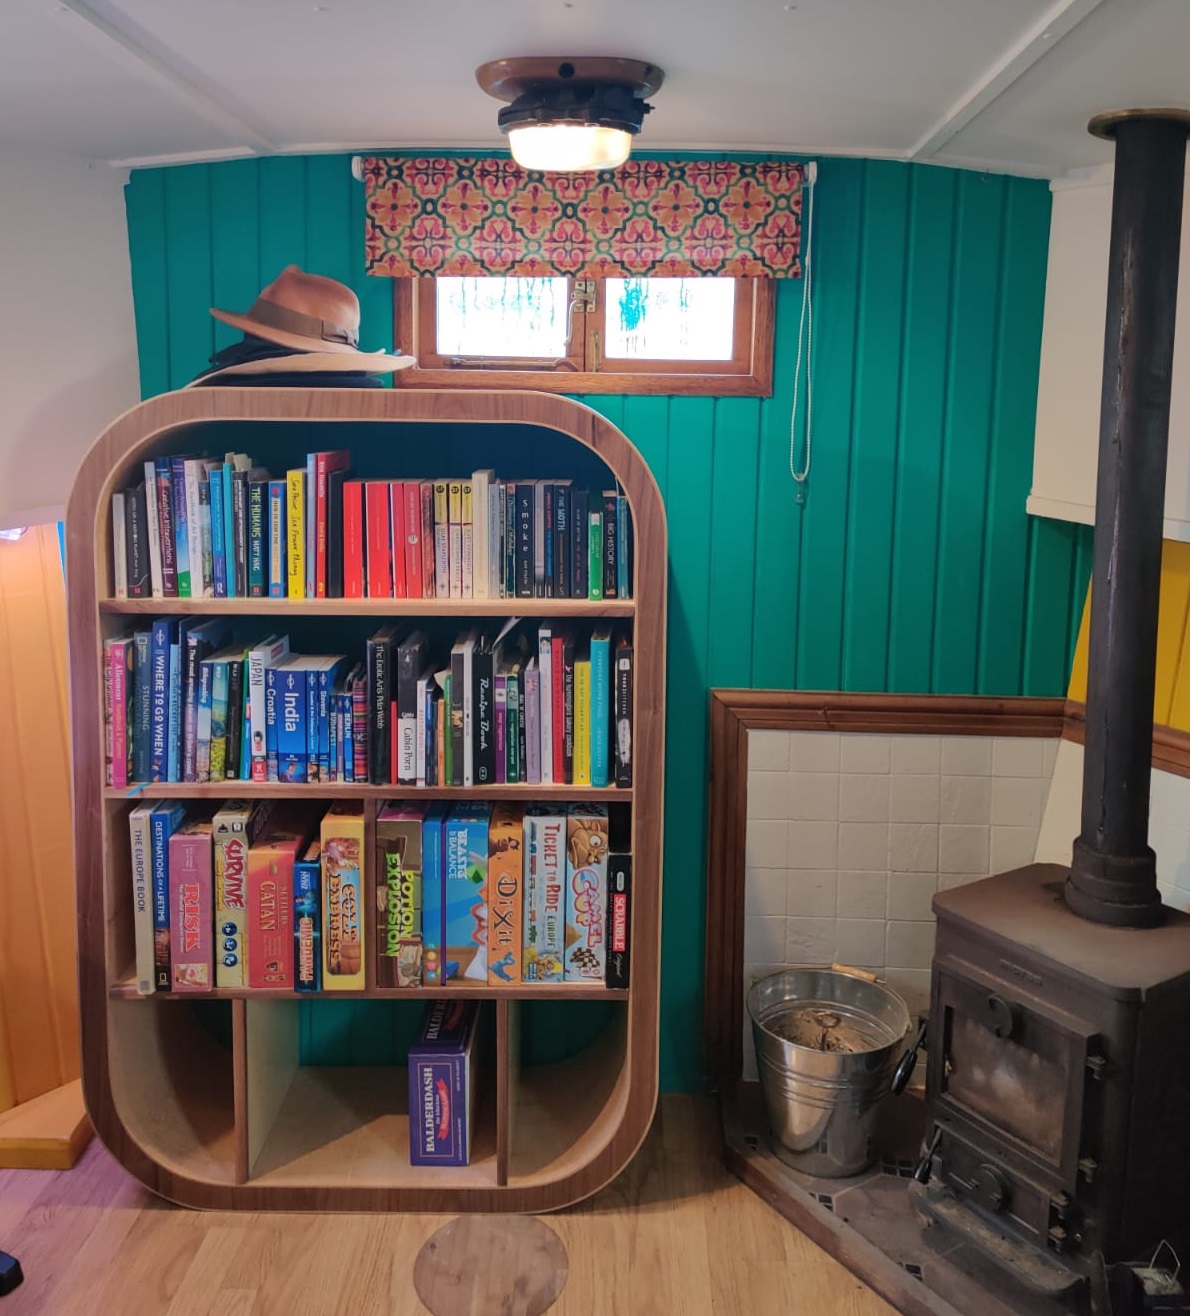
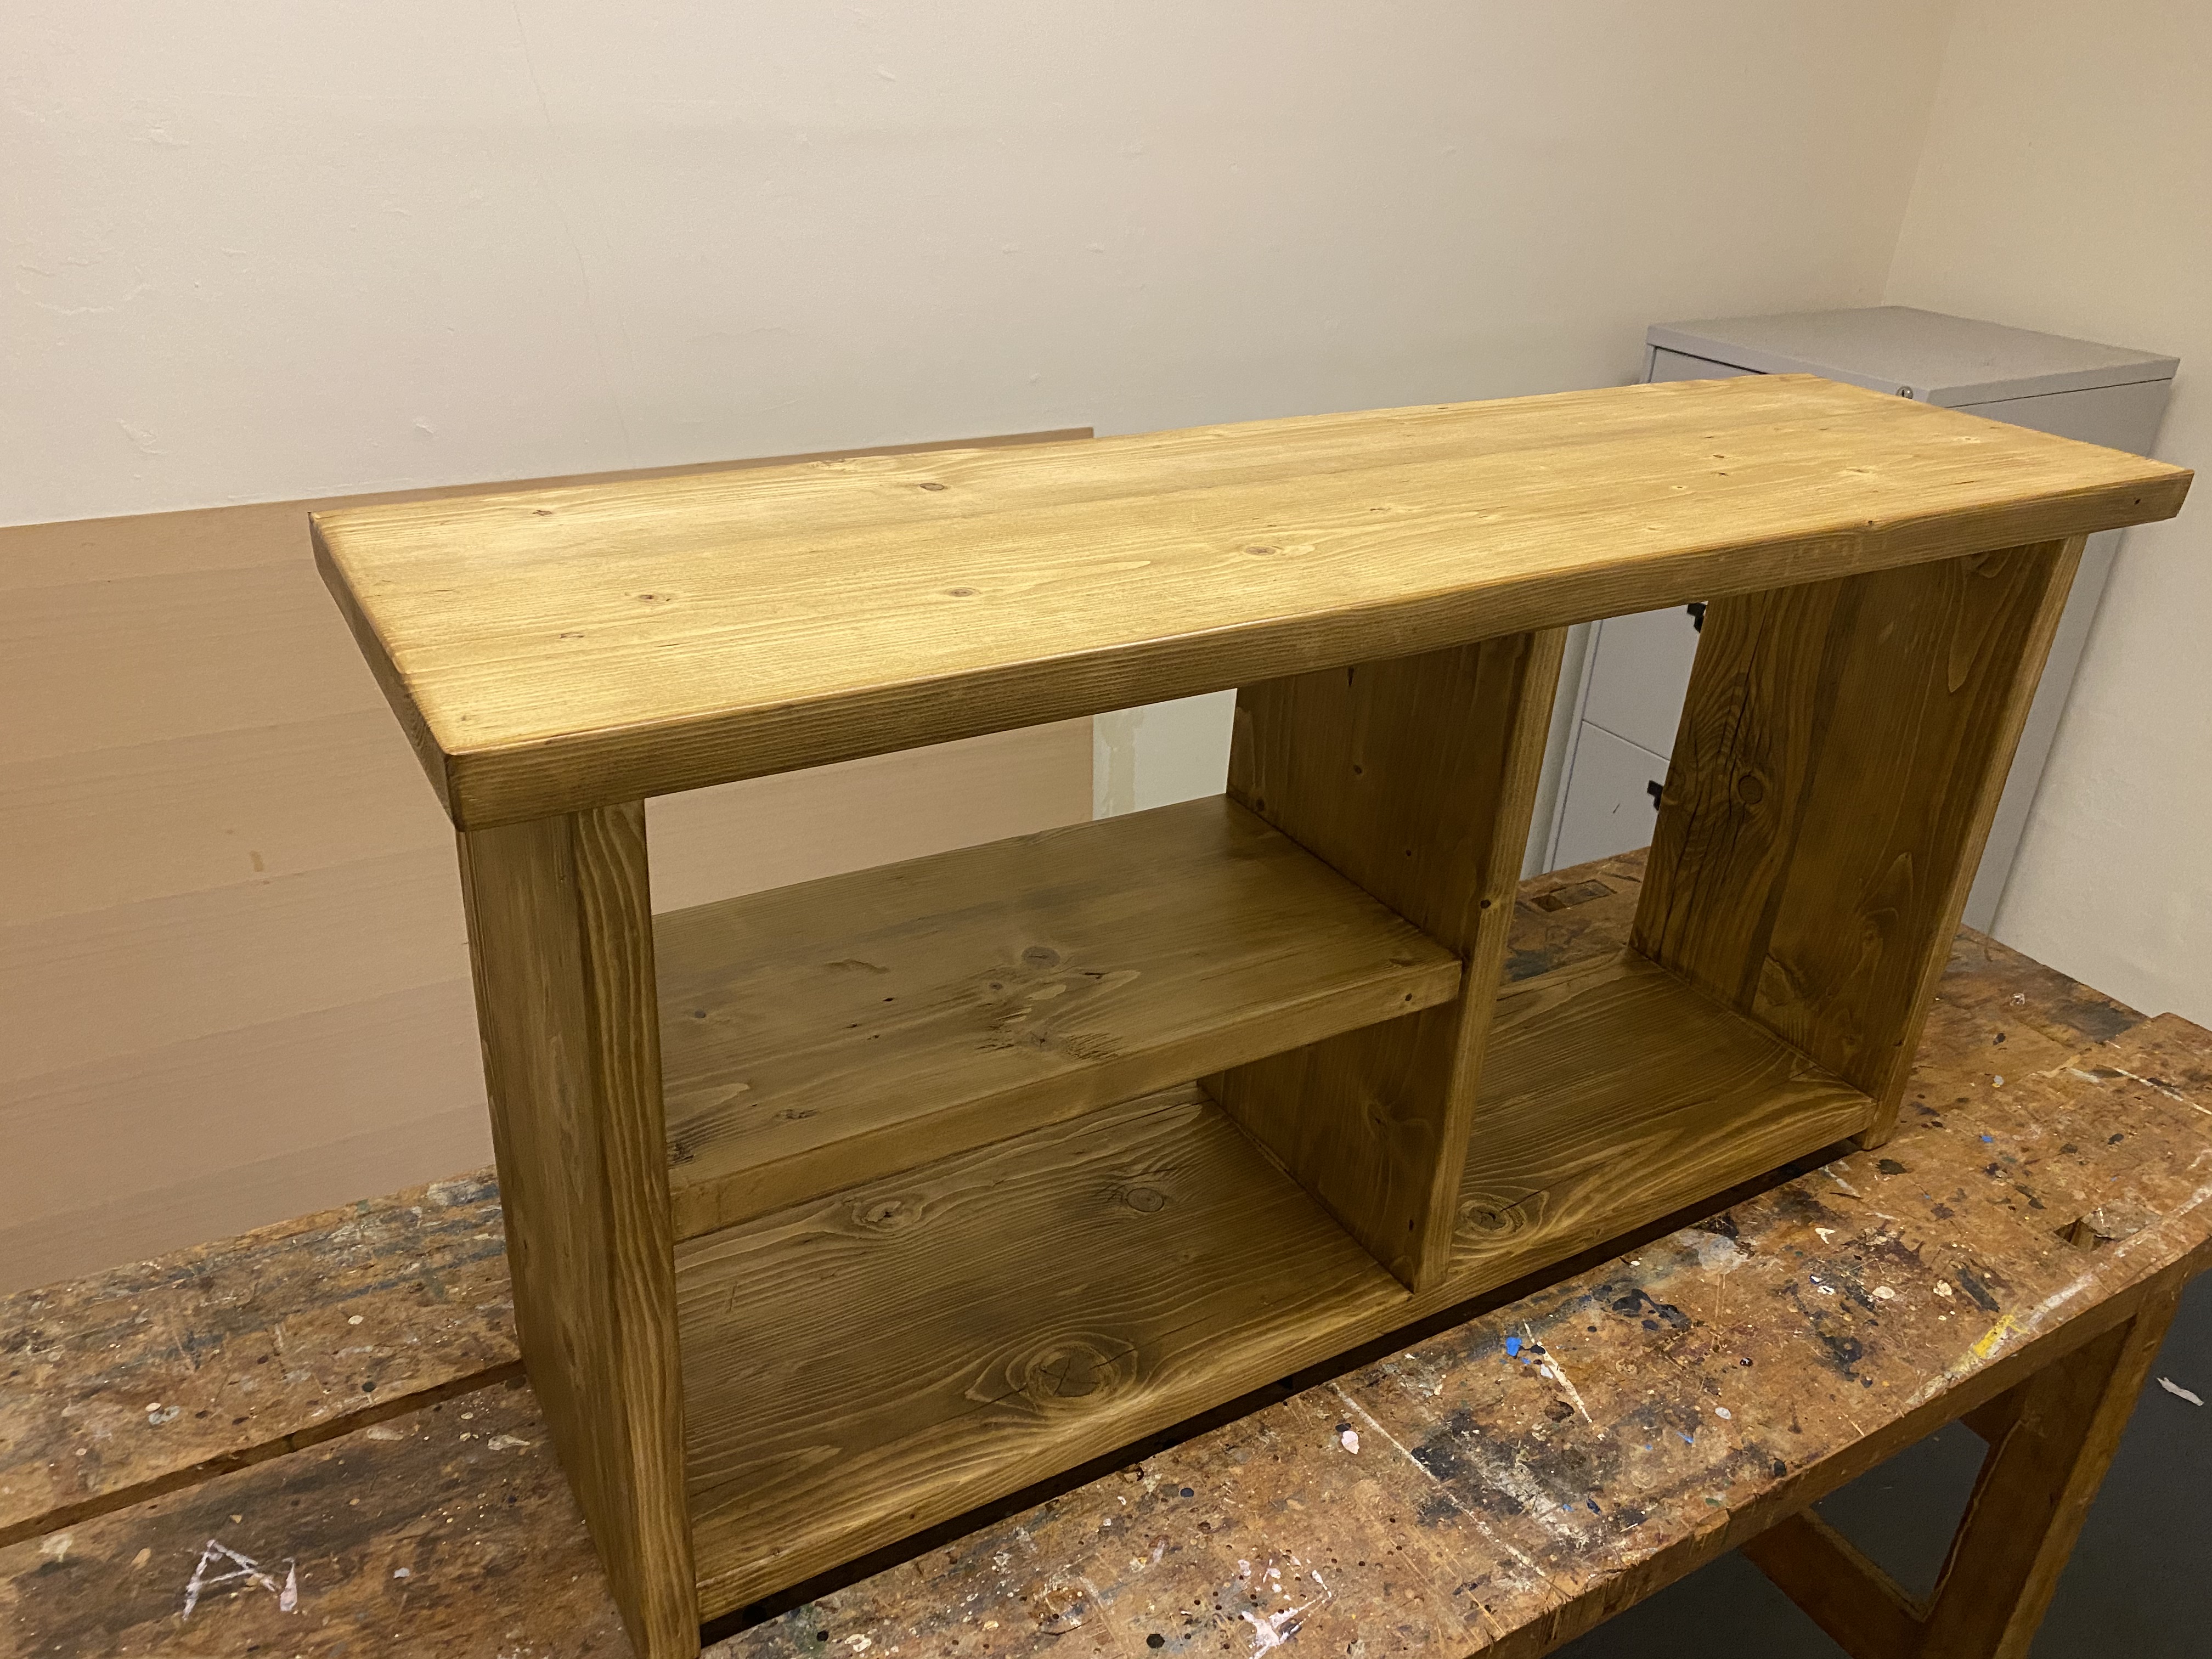
I just wanted to add this piccie of it installed at home with the books and board games it was made for.
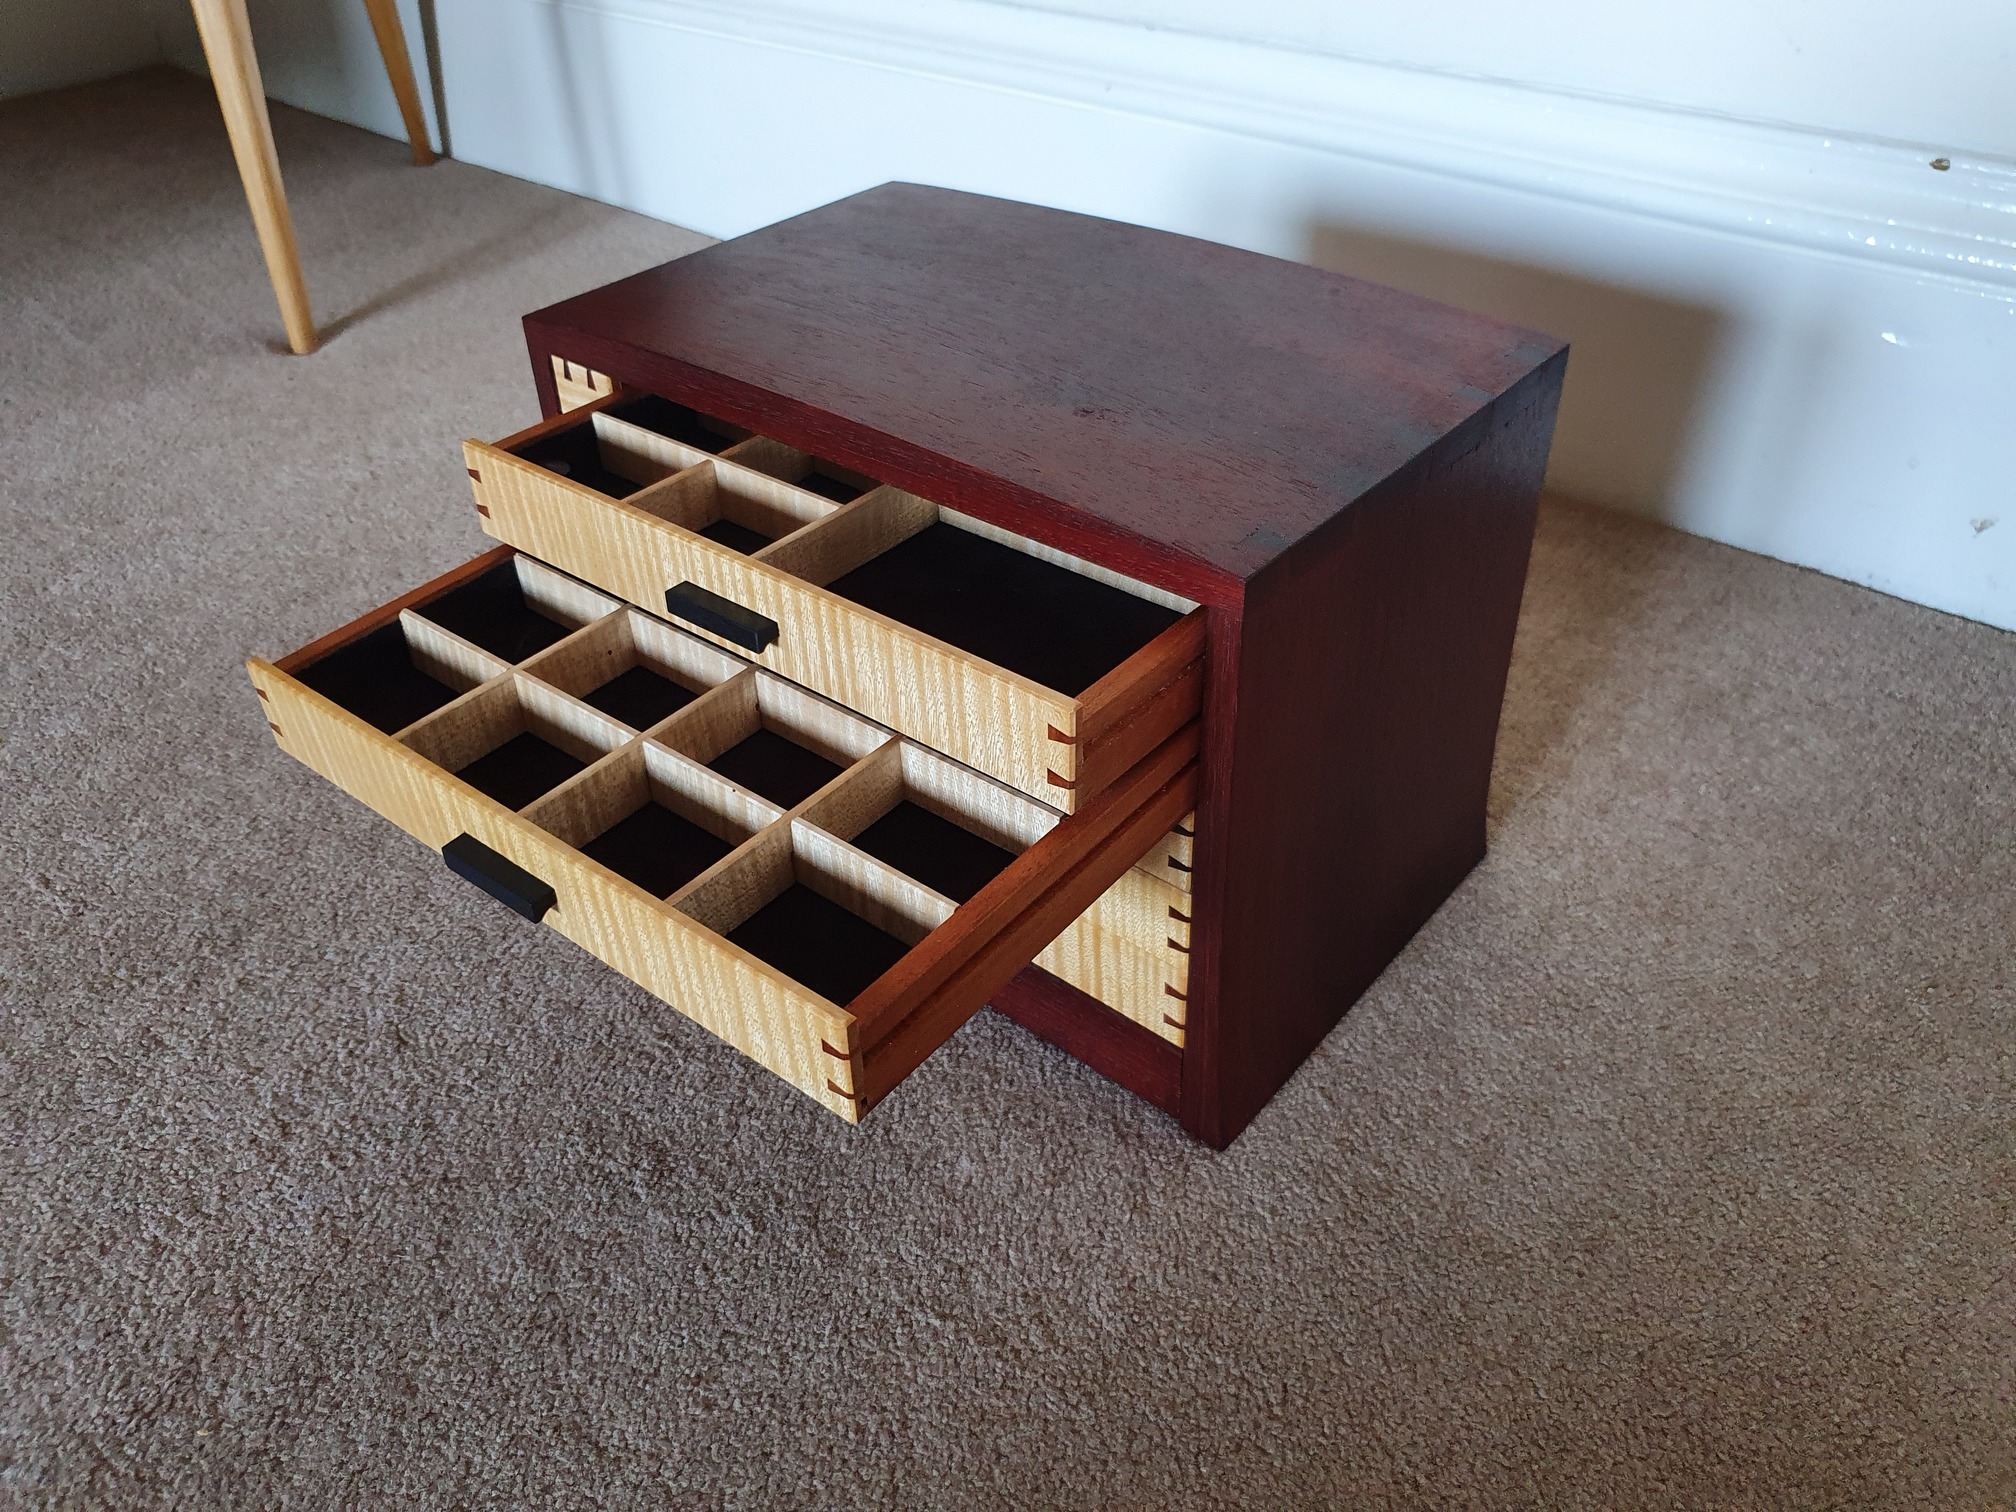
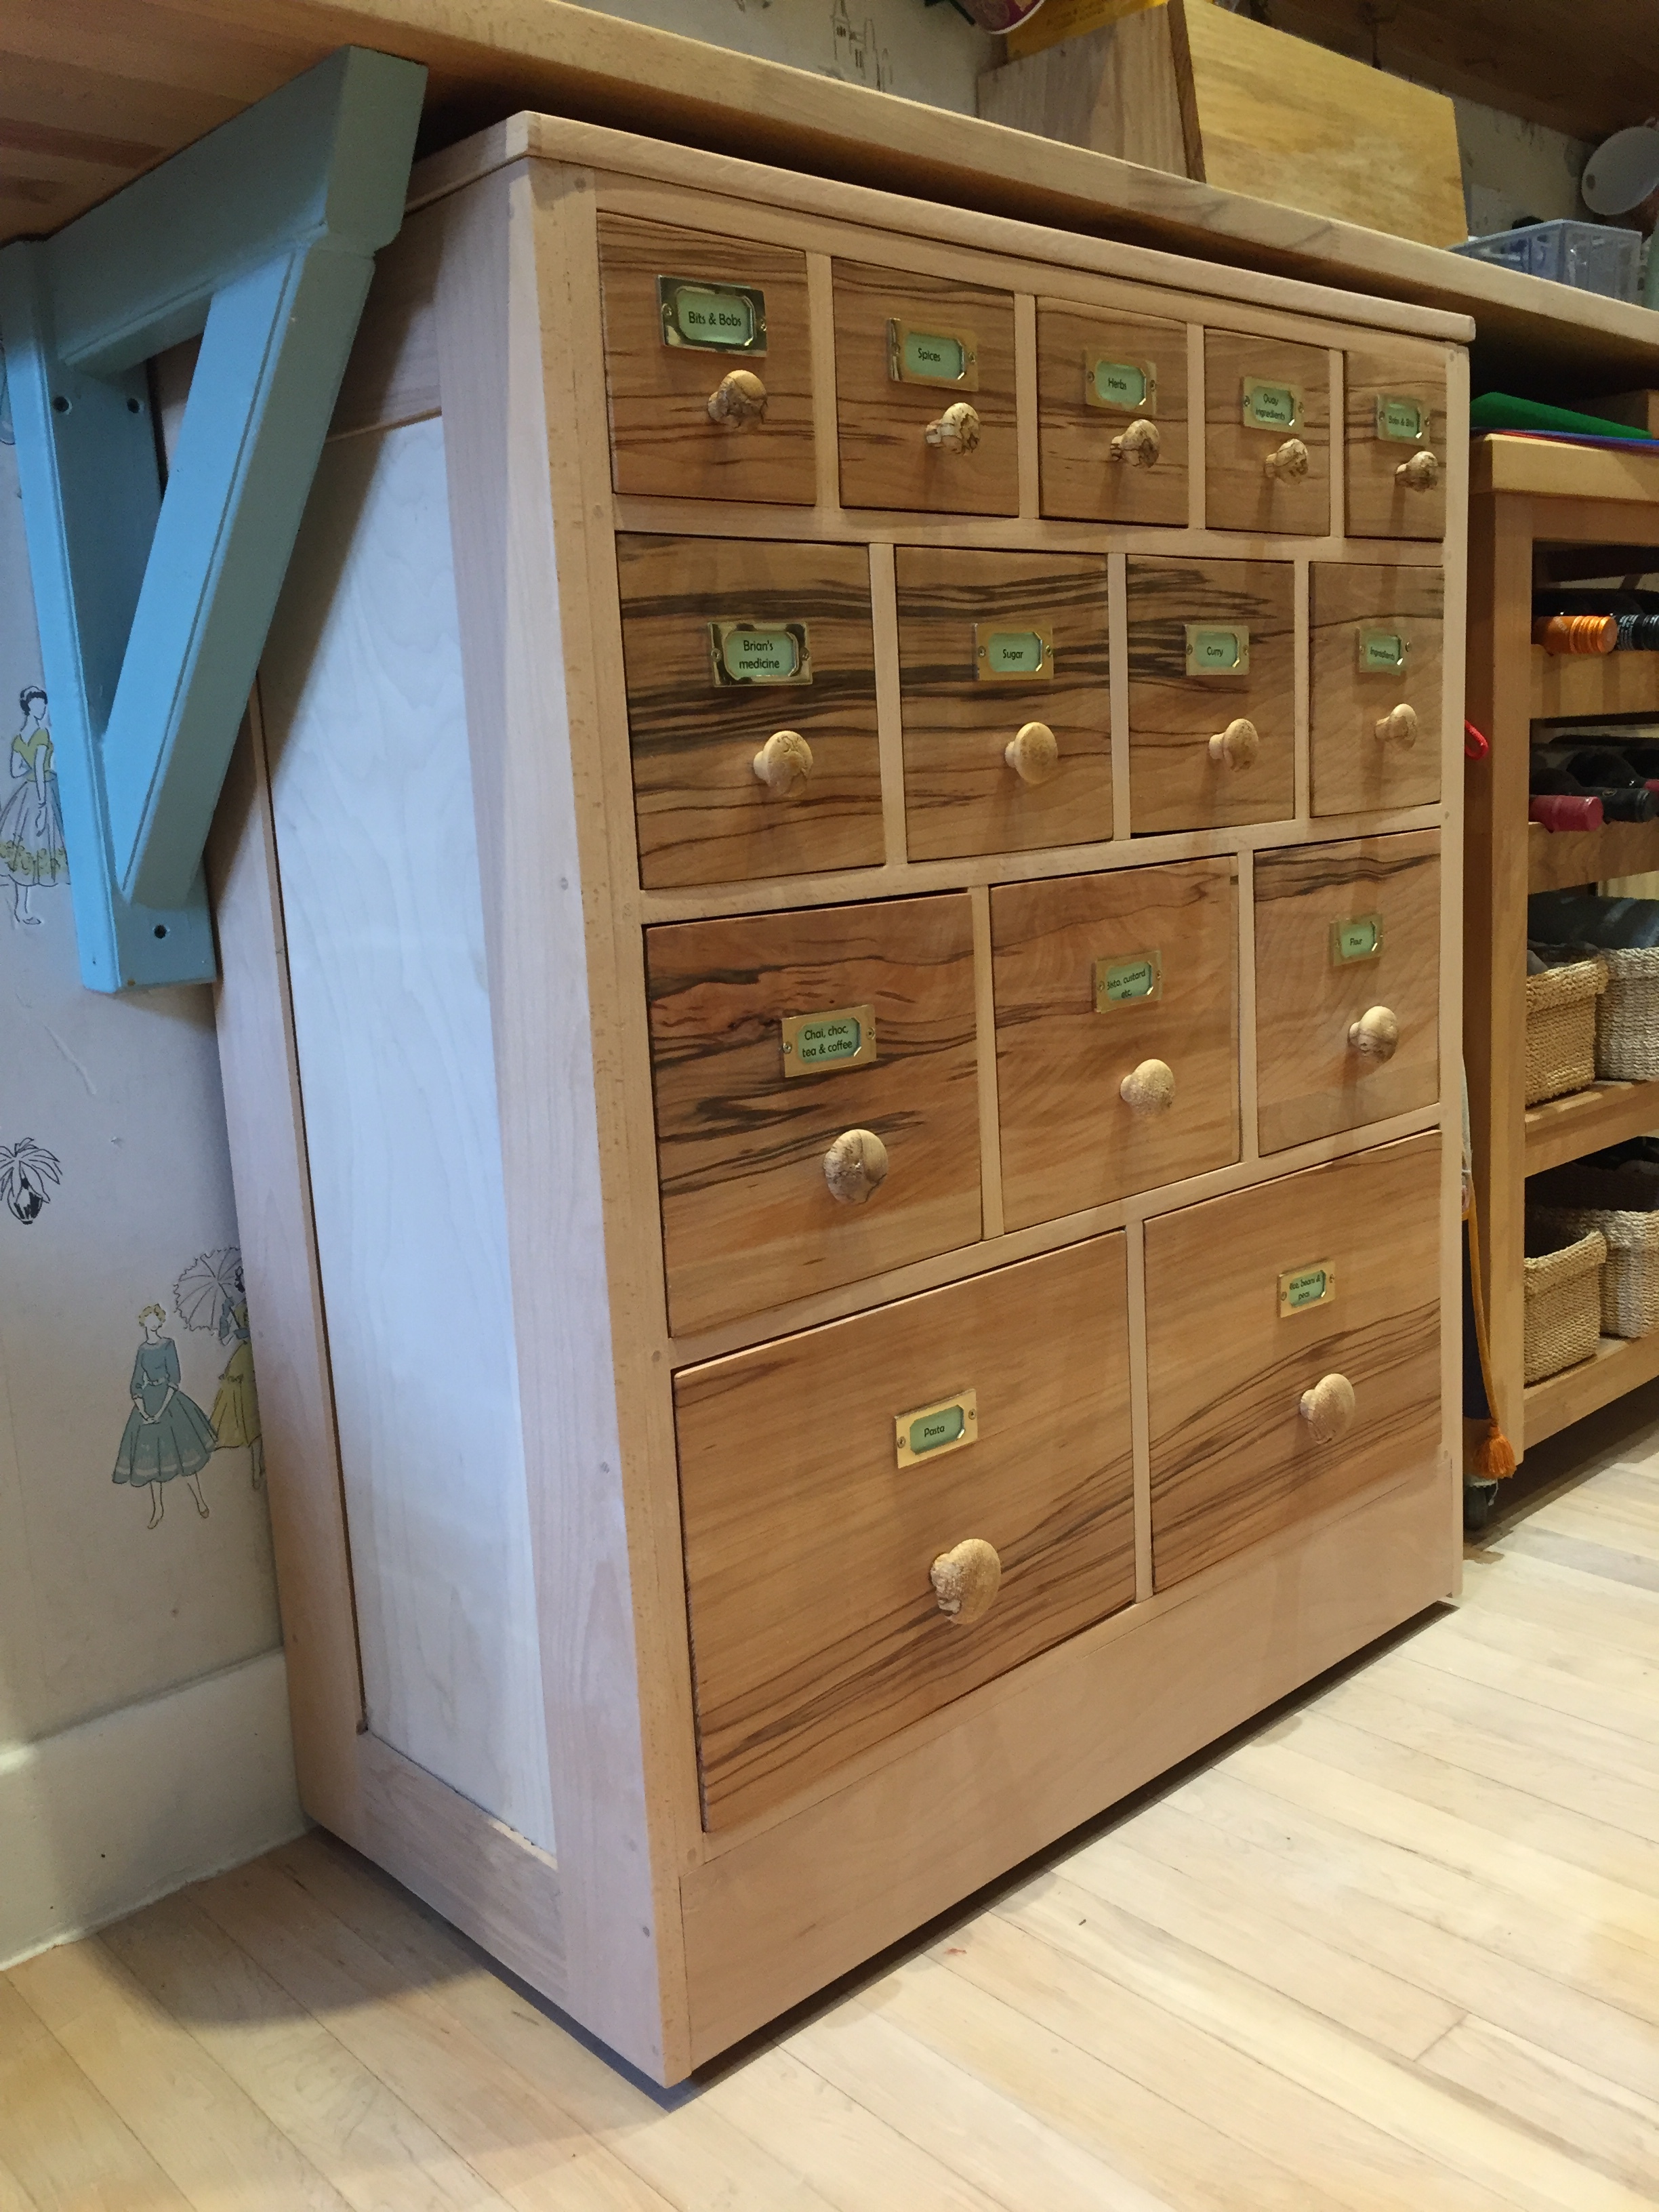
My wife wanted an apothecary cabinet to fit under the breakfast bar that we no longer use. I made it out of beech, with some particularly figured pieces for the drawer fronts. Finished it last week!
My new work bench in oak, maple, beech and sapele - been planning this for a long time!
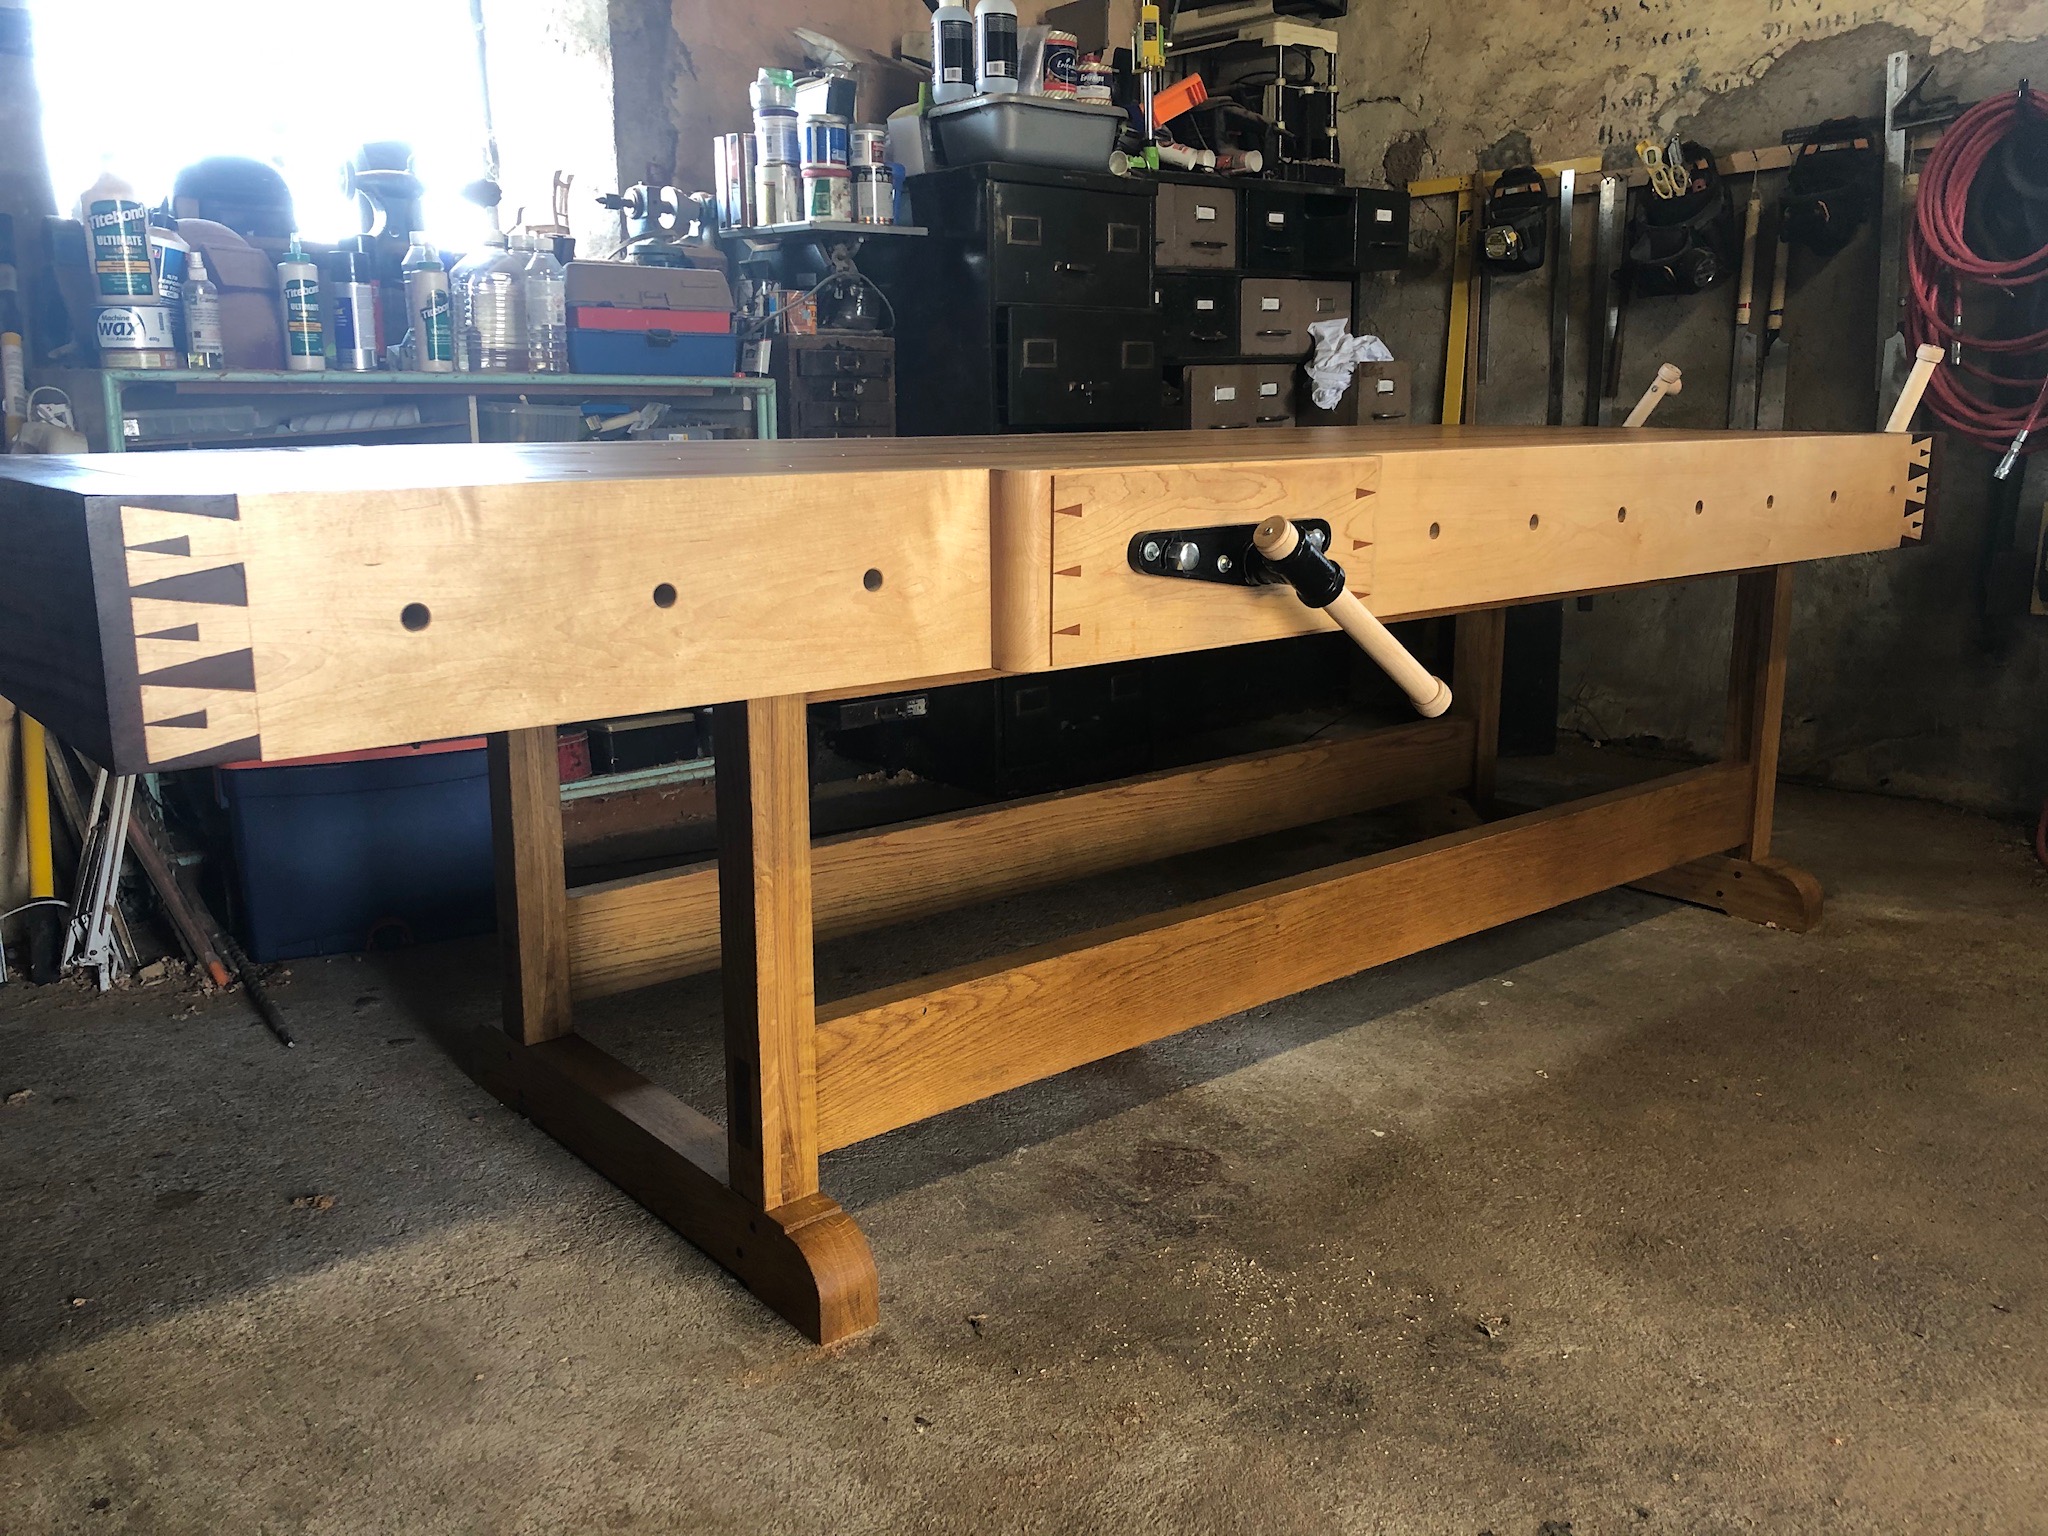
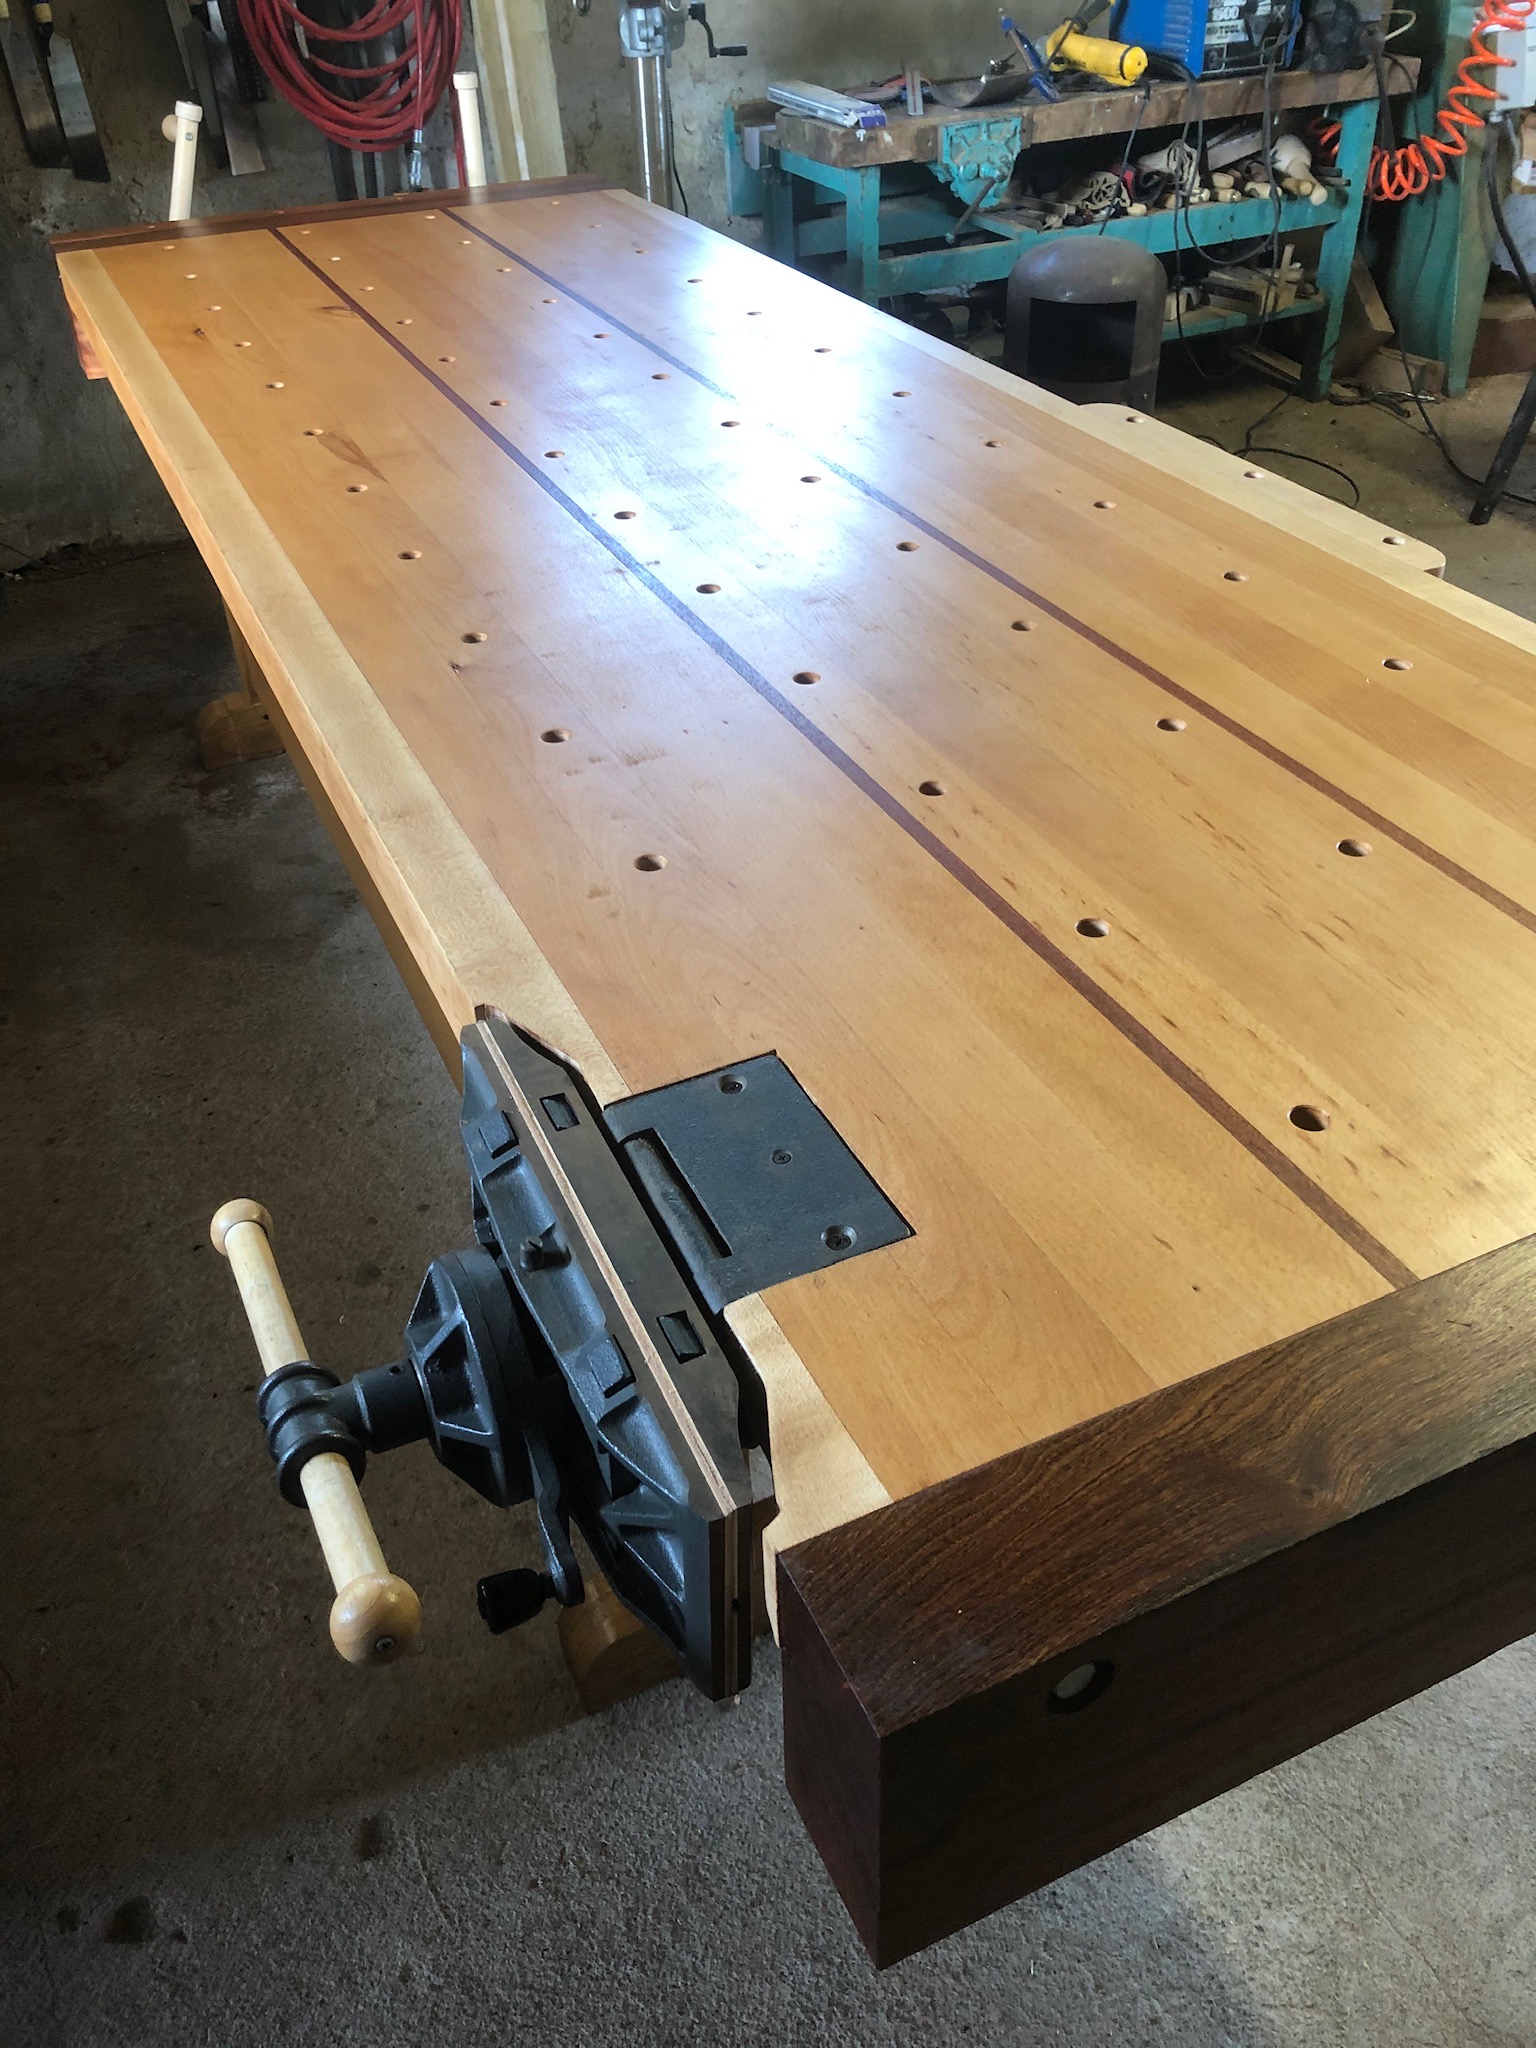
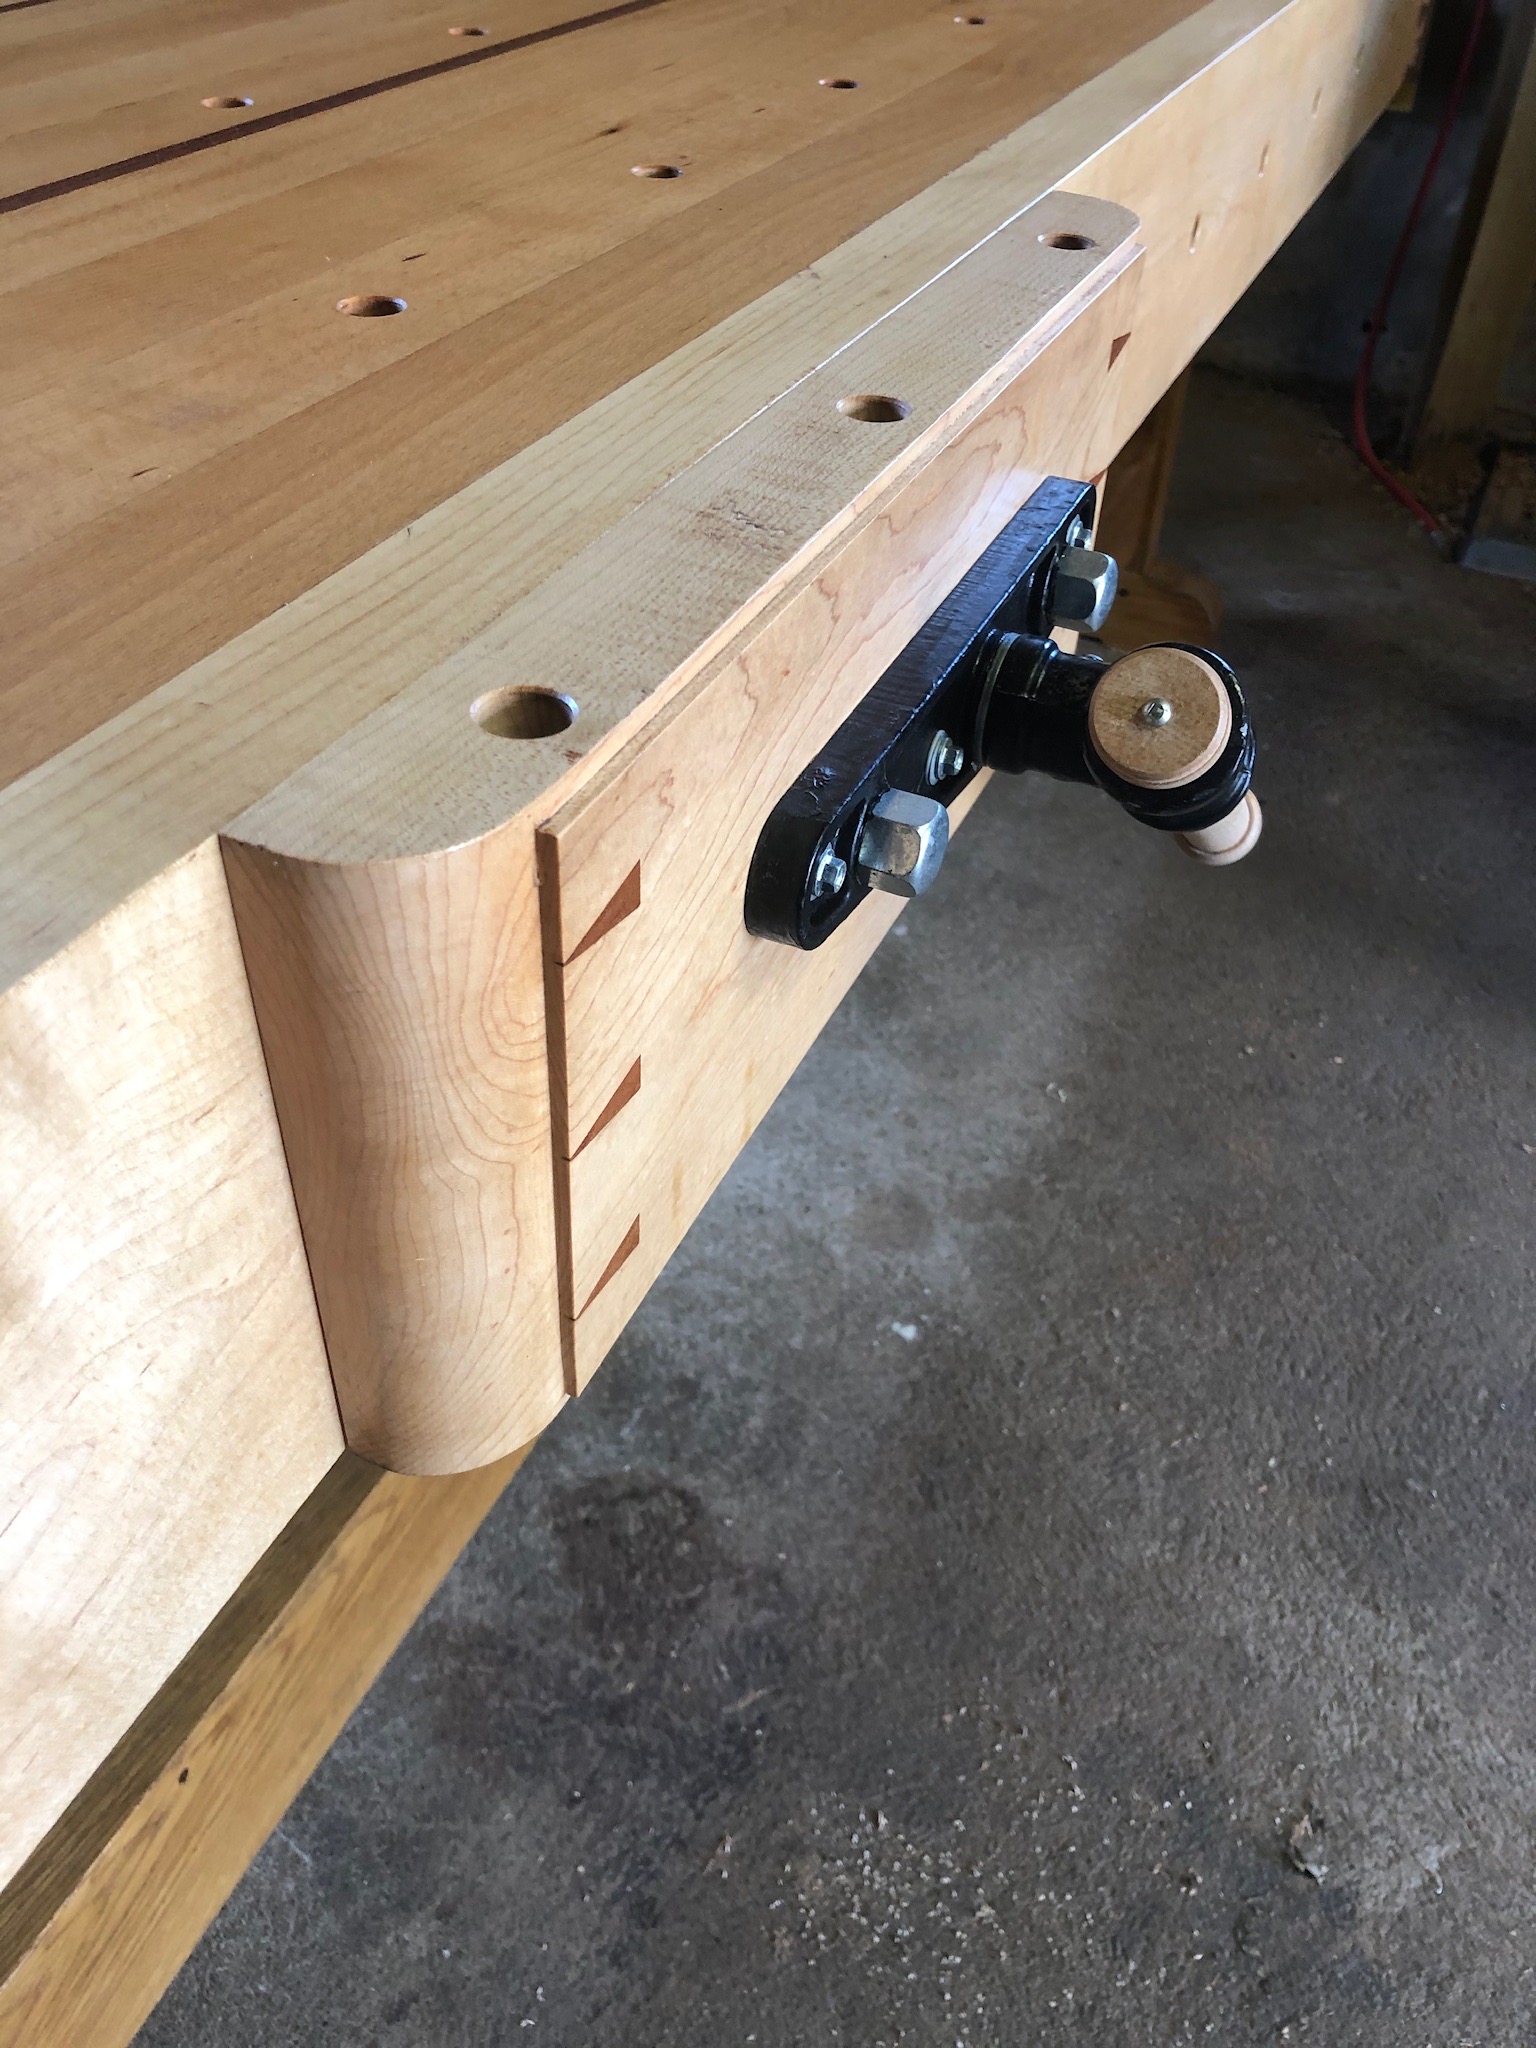
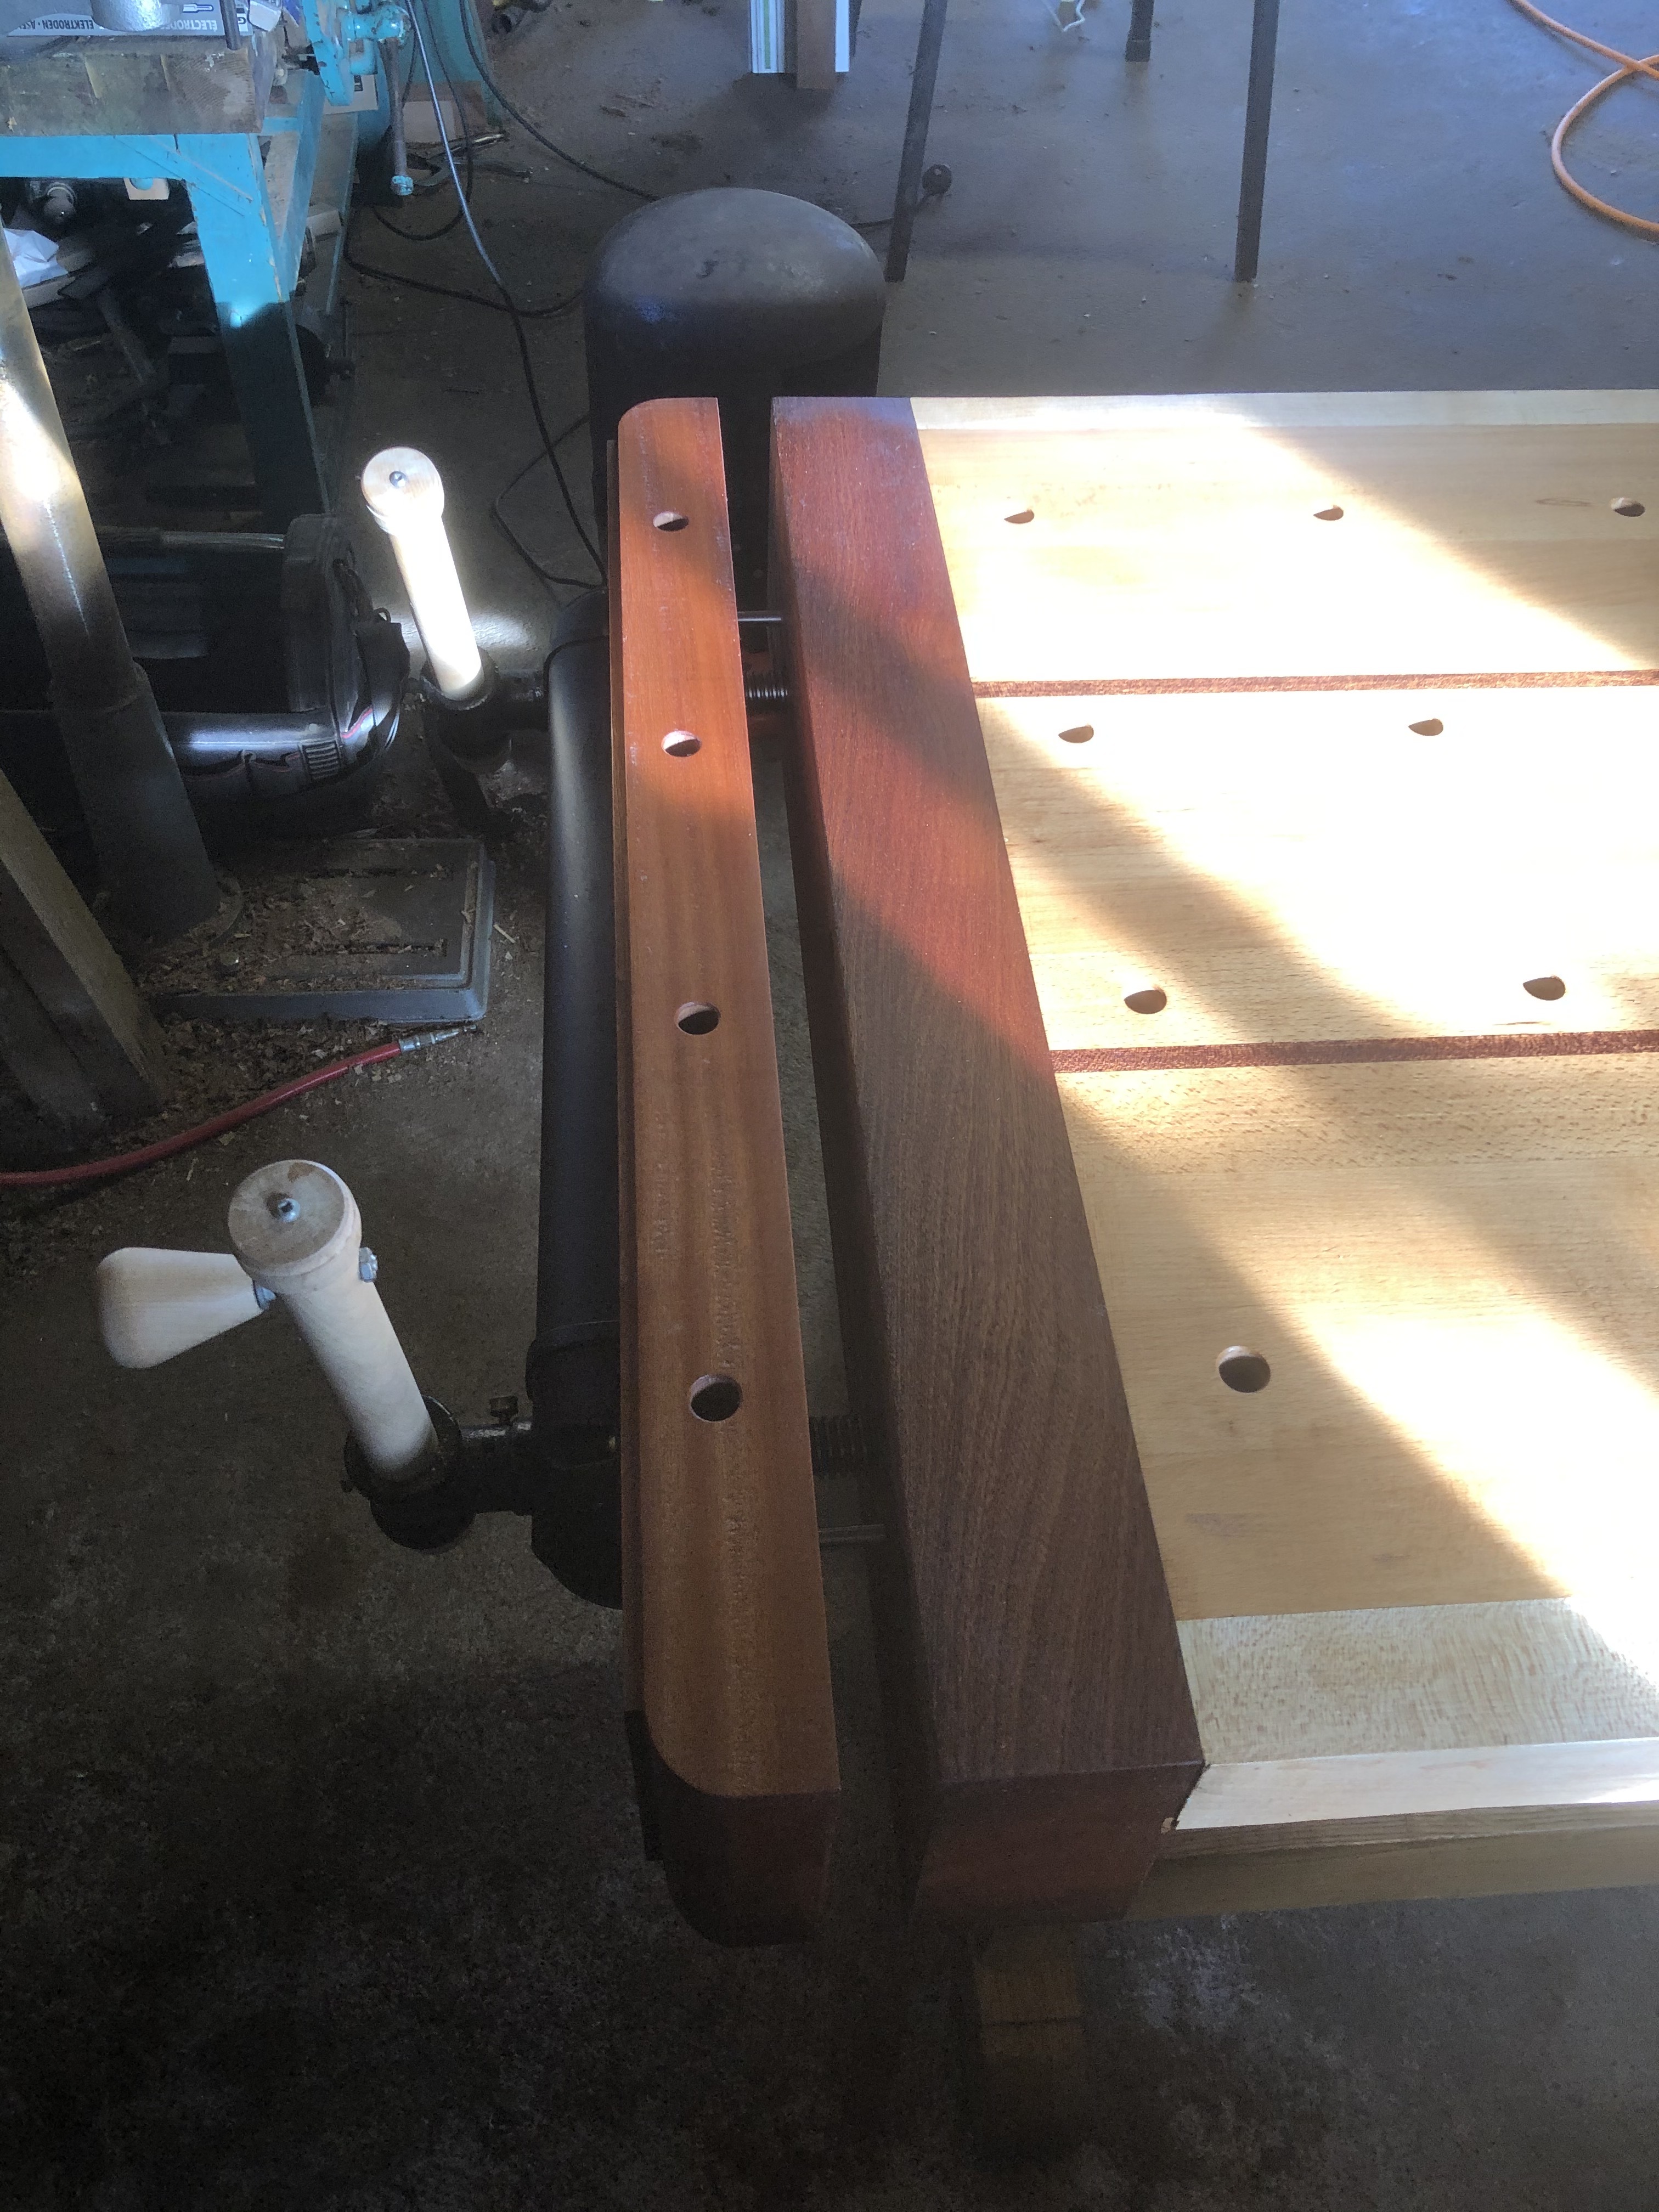
Really impressed by everyone’s work,
Cheers.
Matt
#makeitinmarch2020
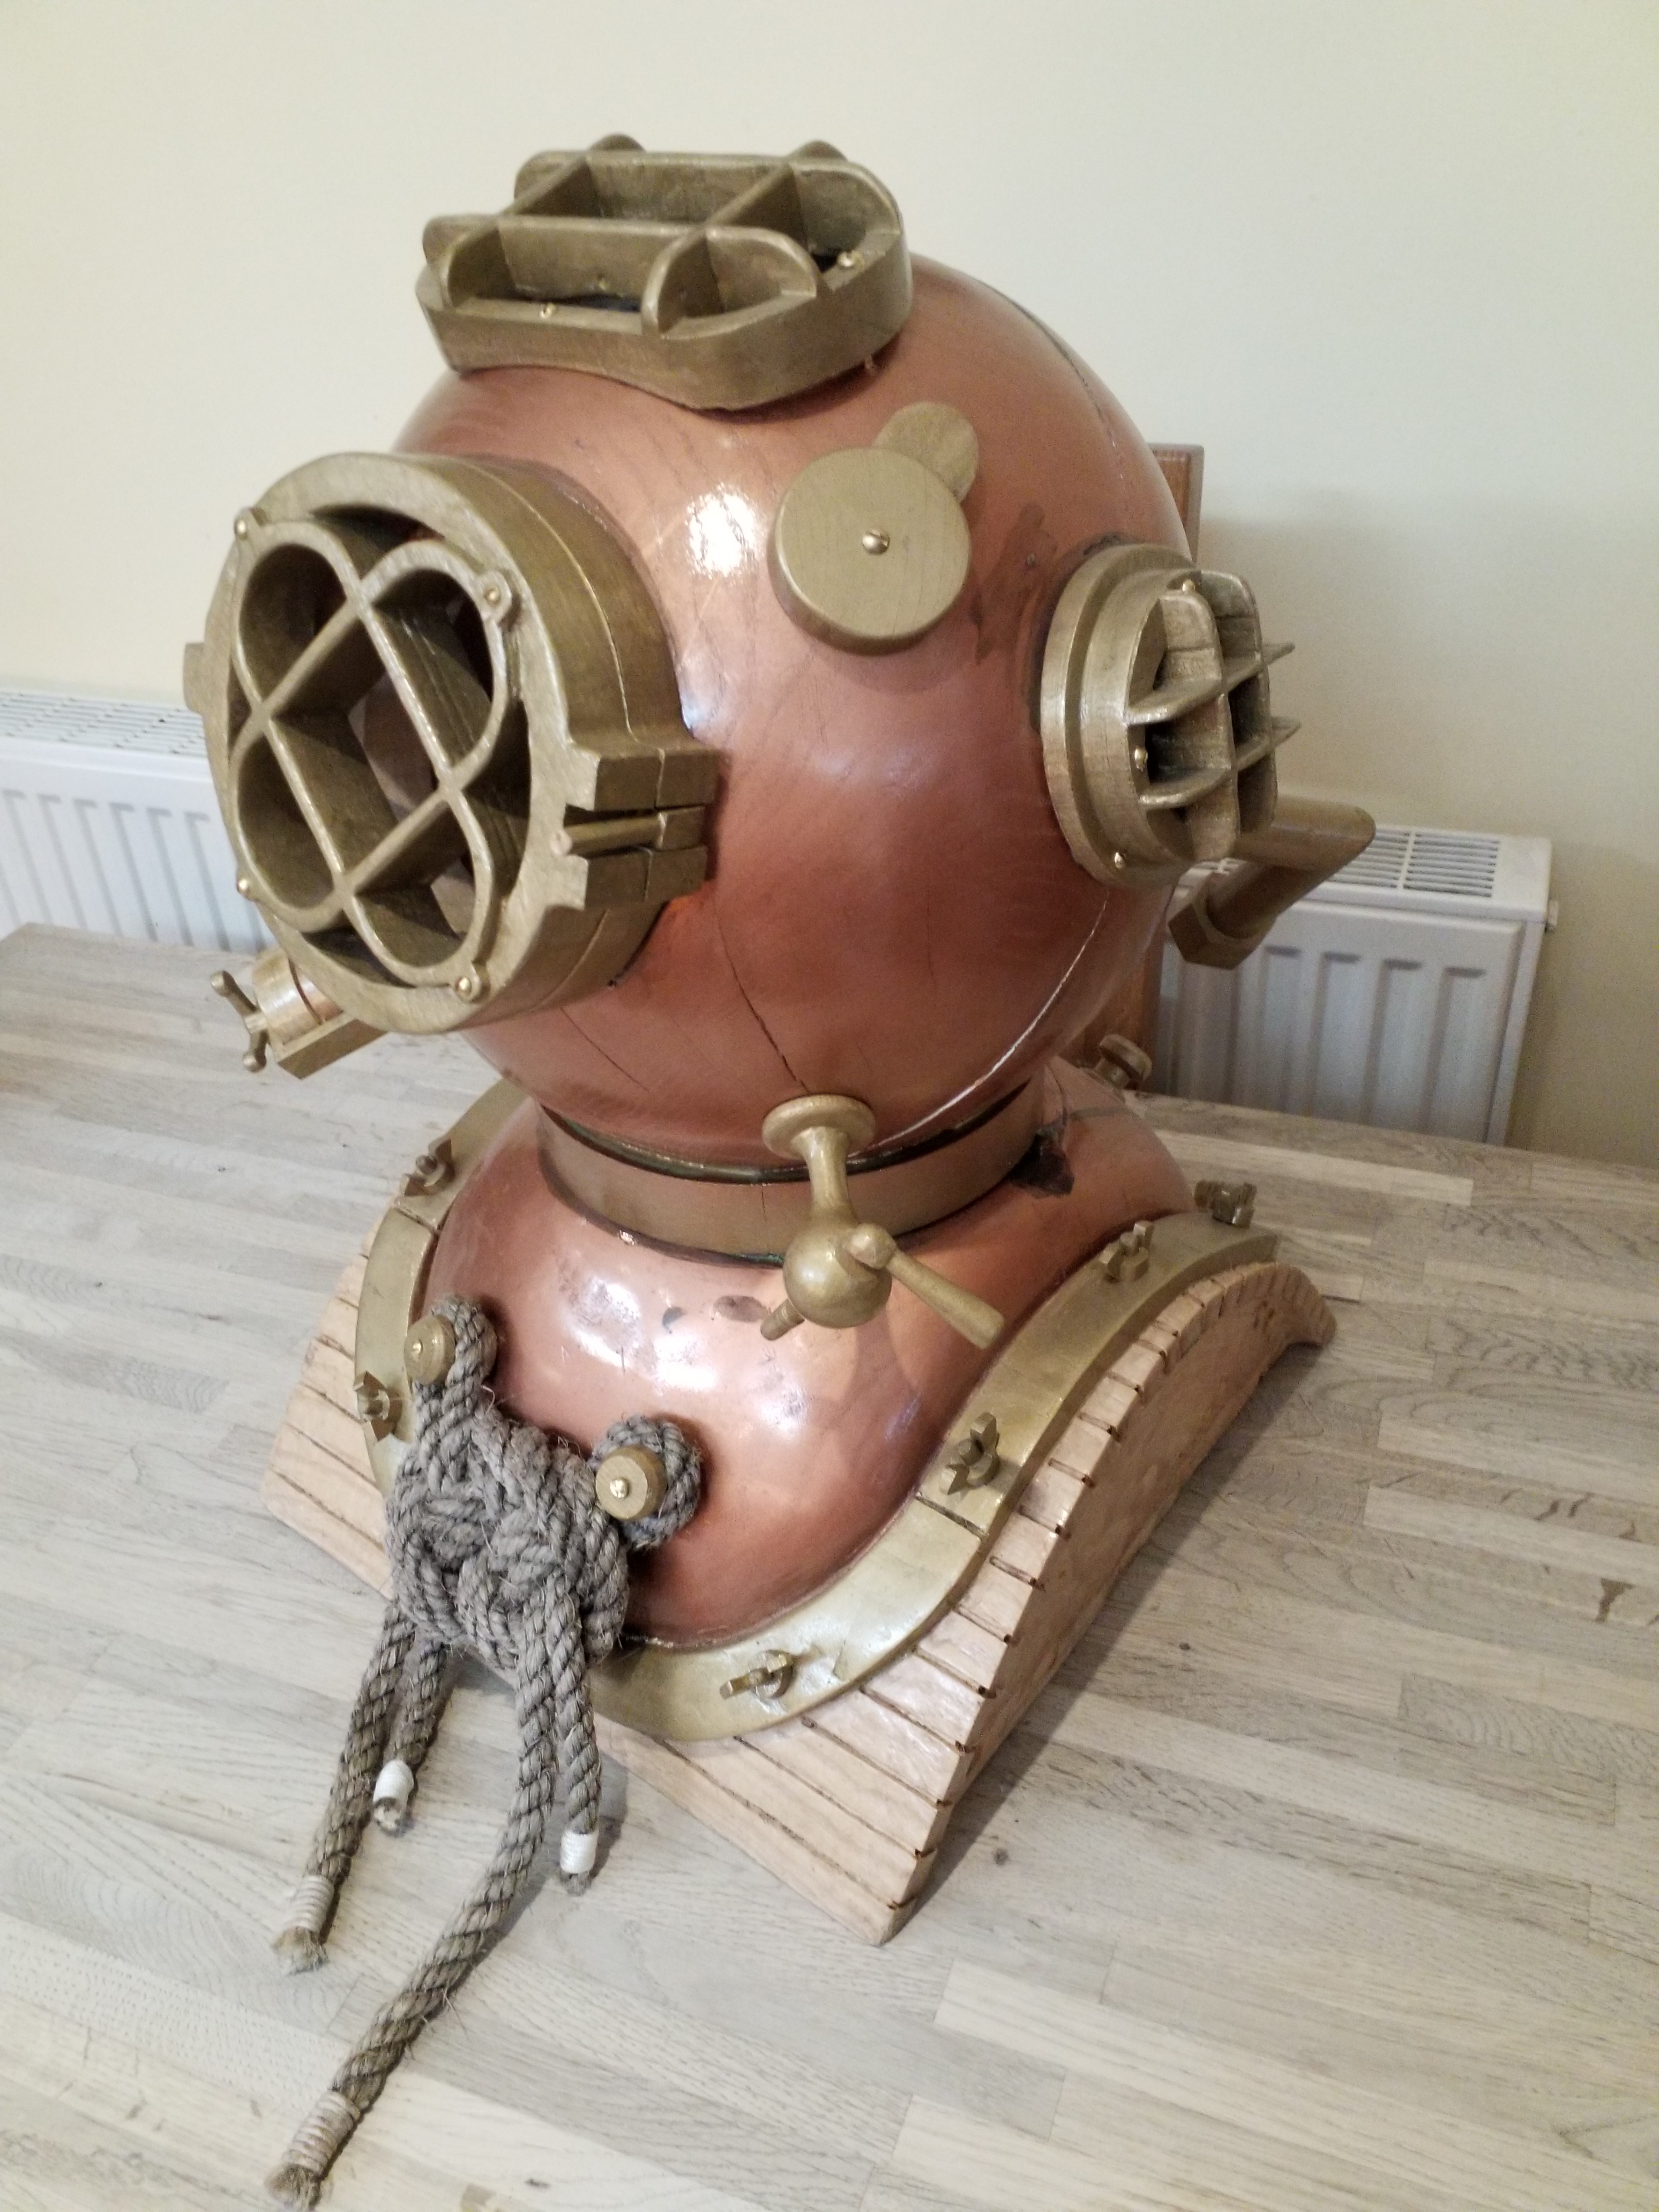
Posting on behalf of Gordon Price:
This project took 3 months to build. I normally buy the drawings and then make them out of scrap wood, ( old furniture) normally that’s best.
#makeitinmarch

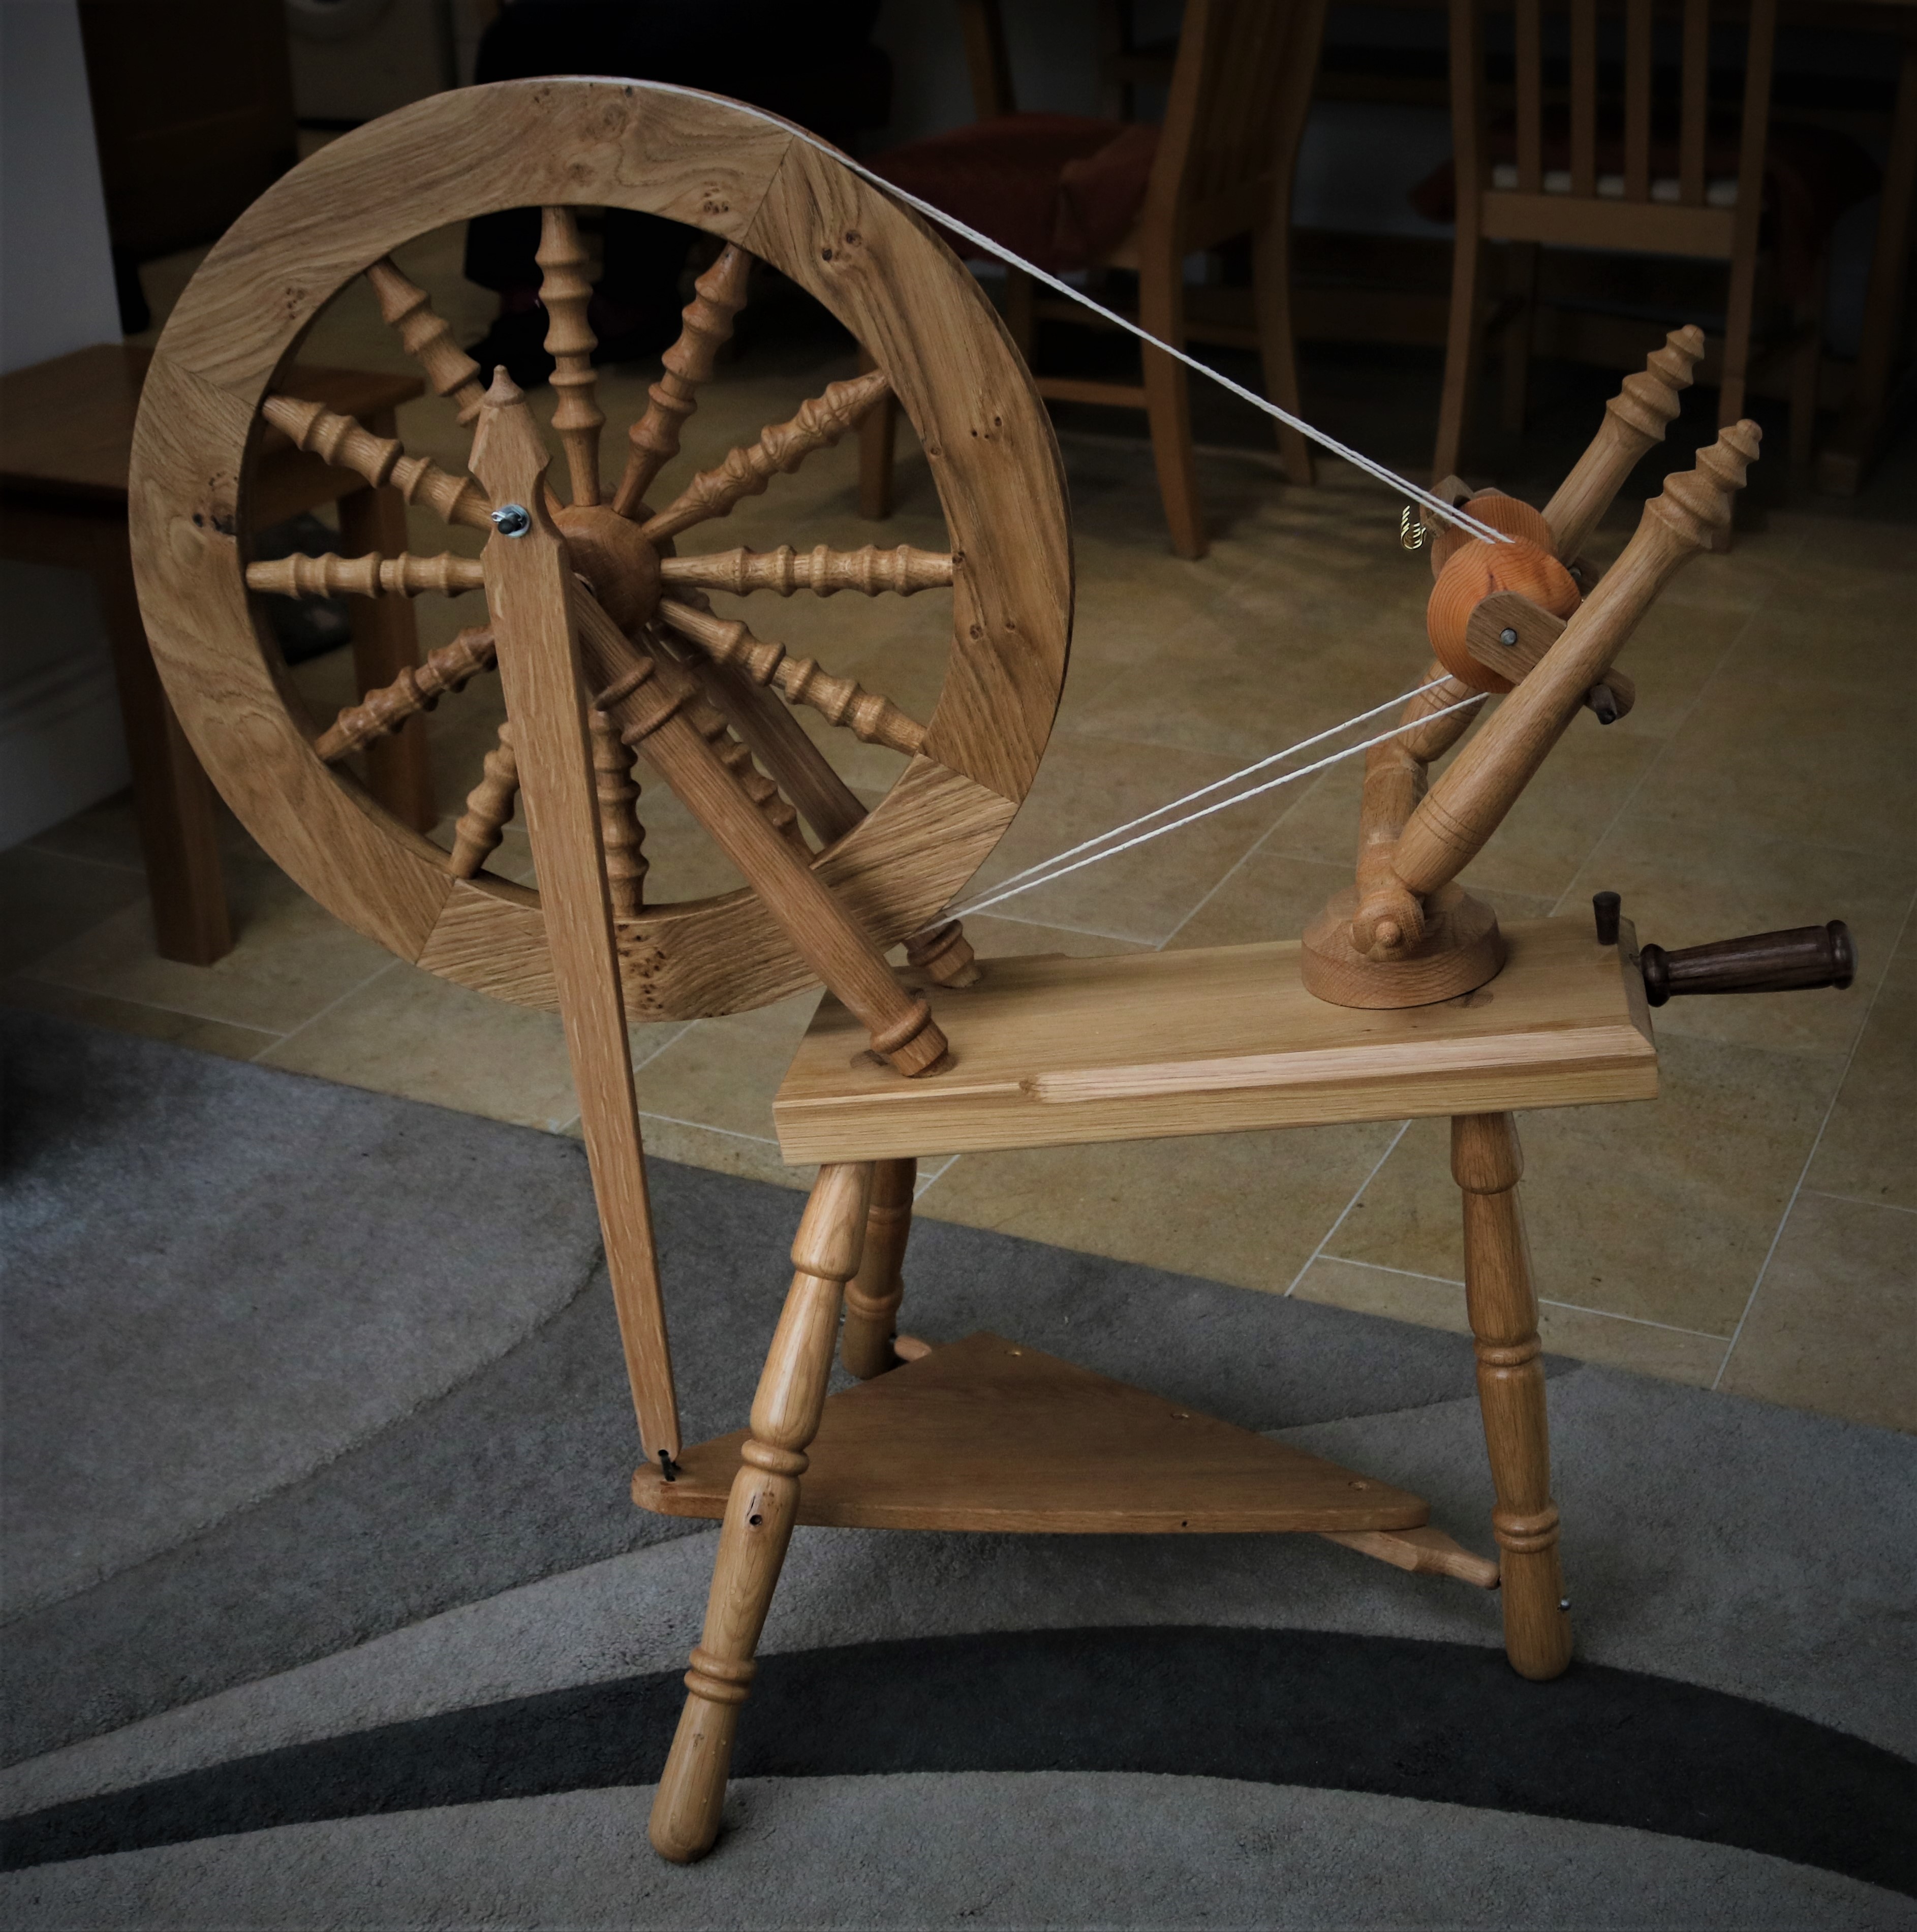
Posting on behalf of Duncan Hall:
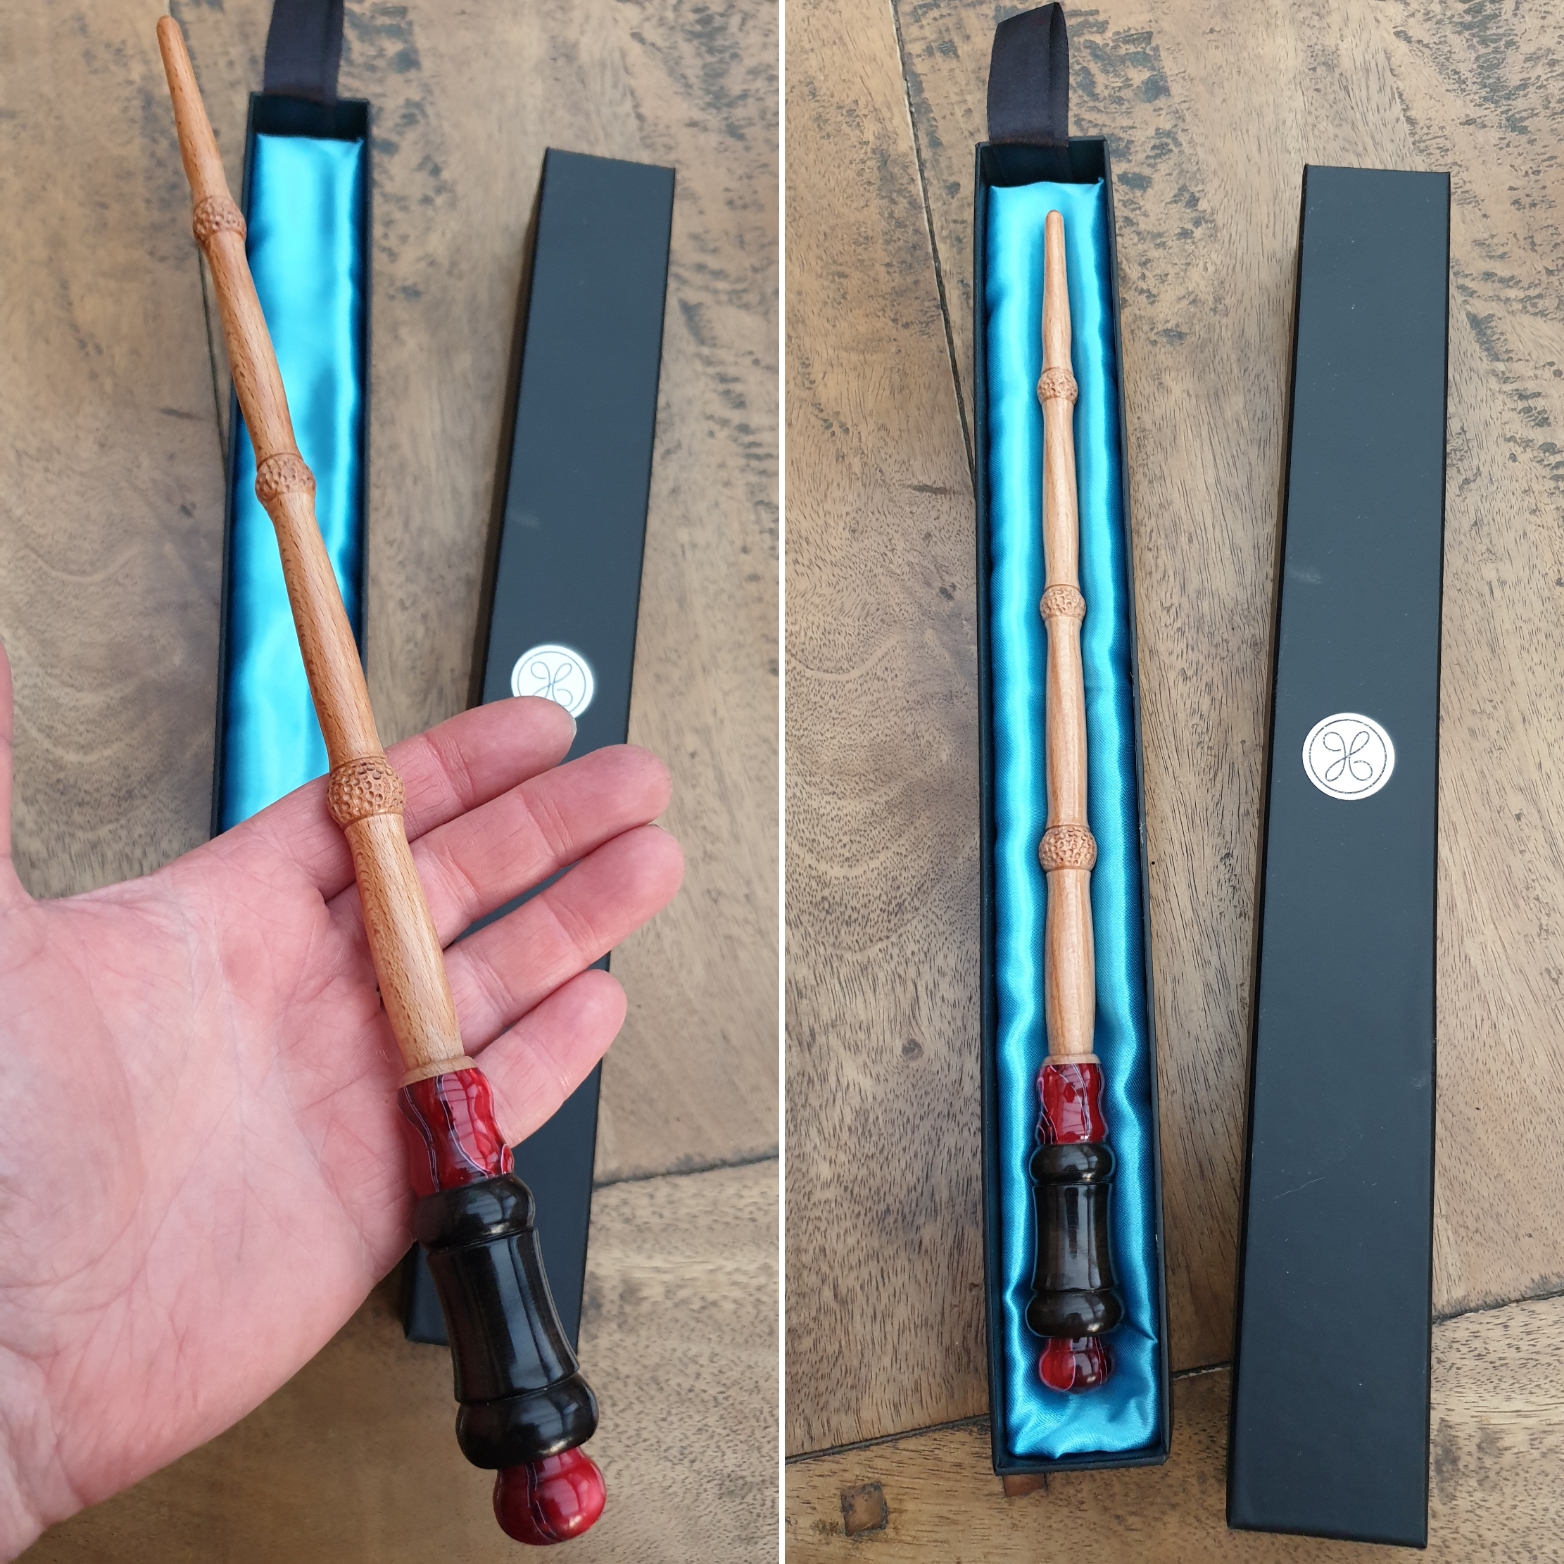
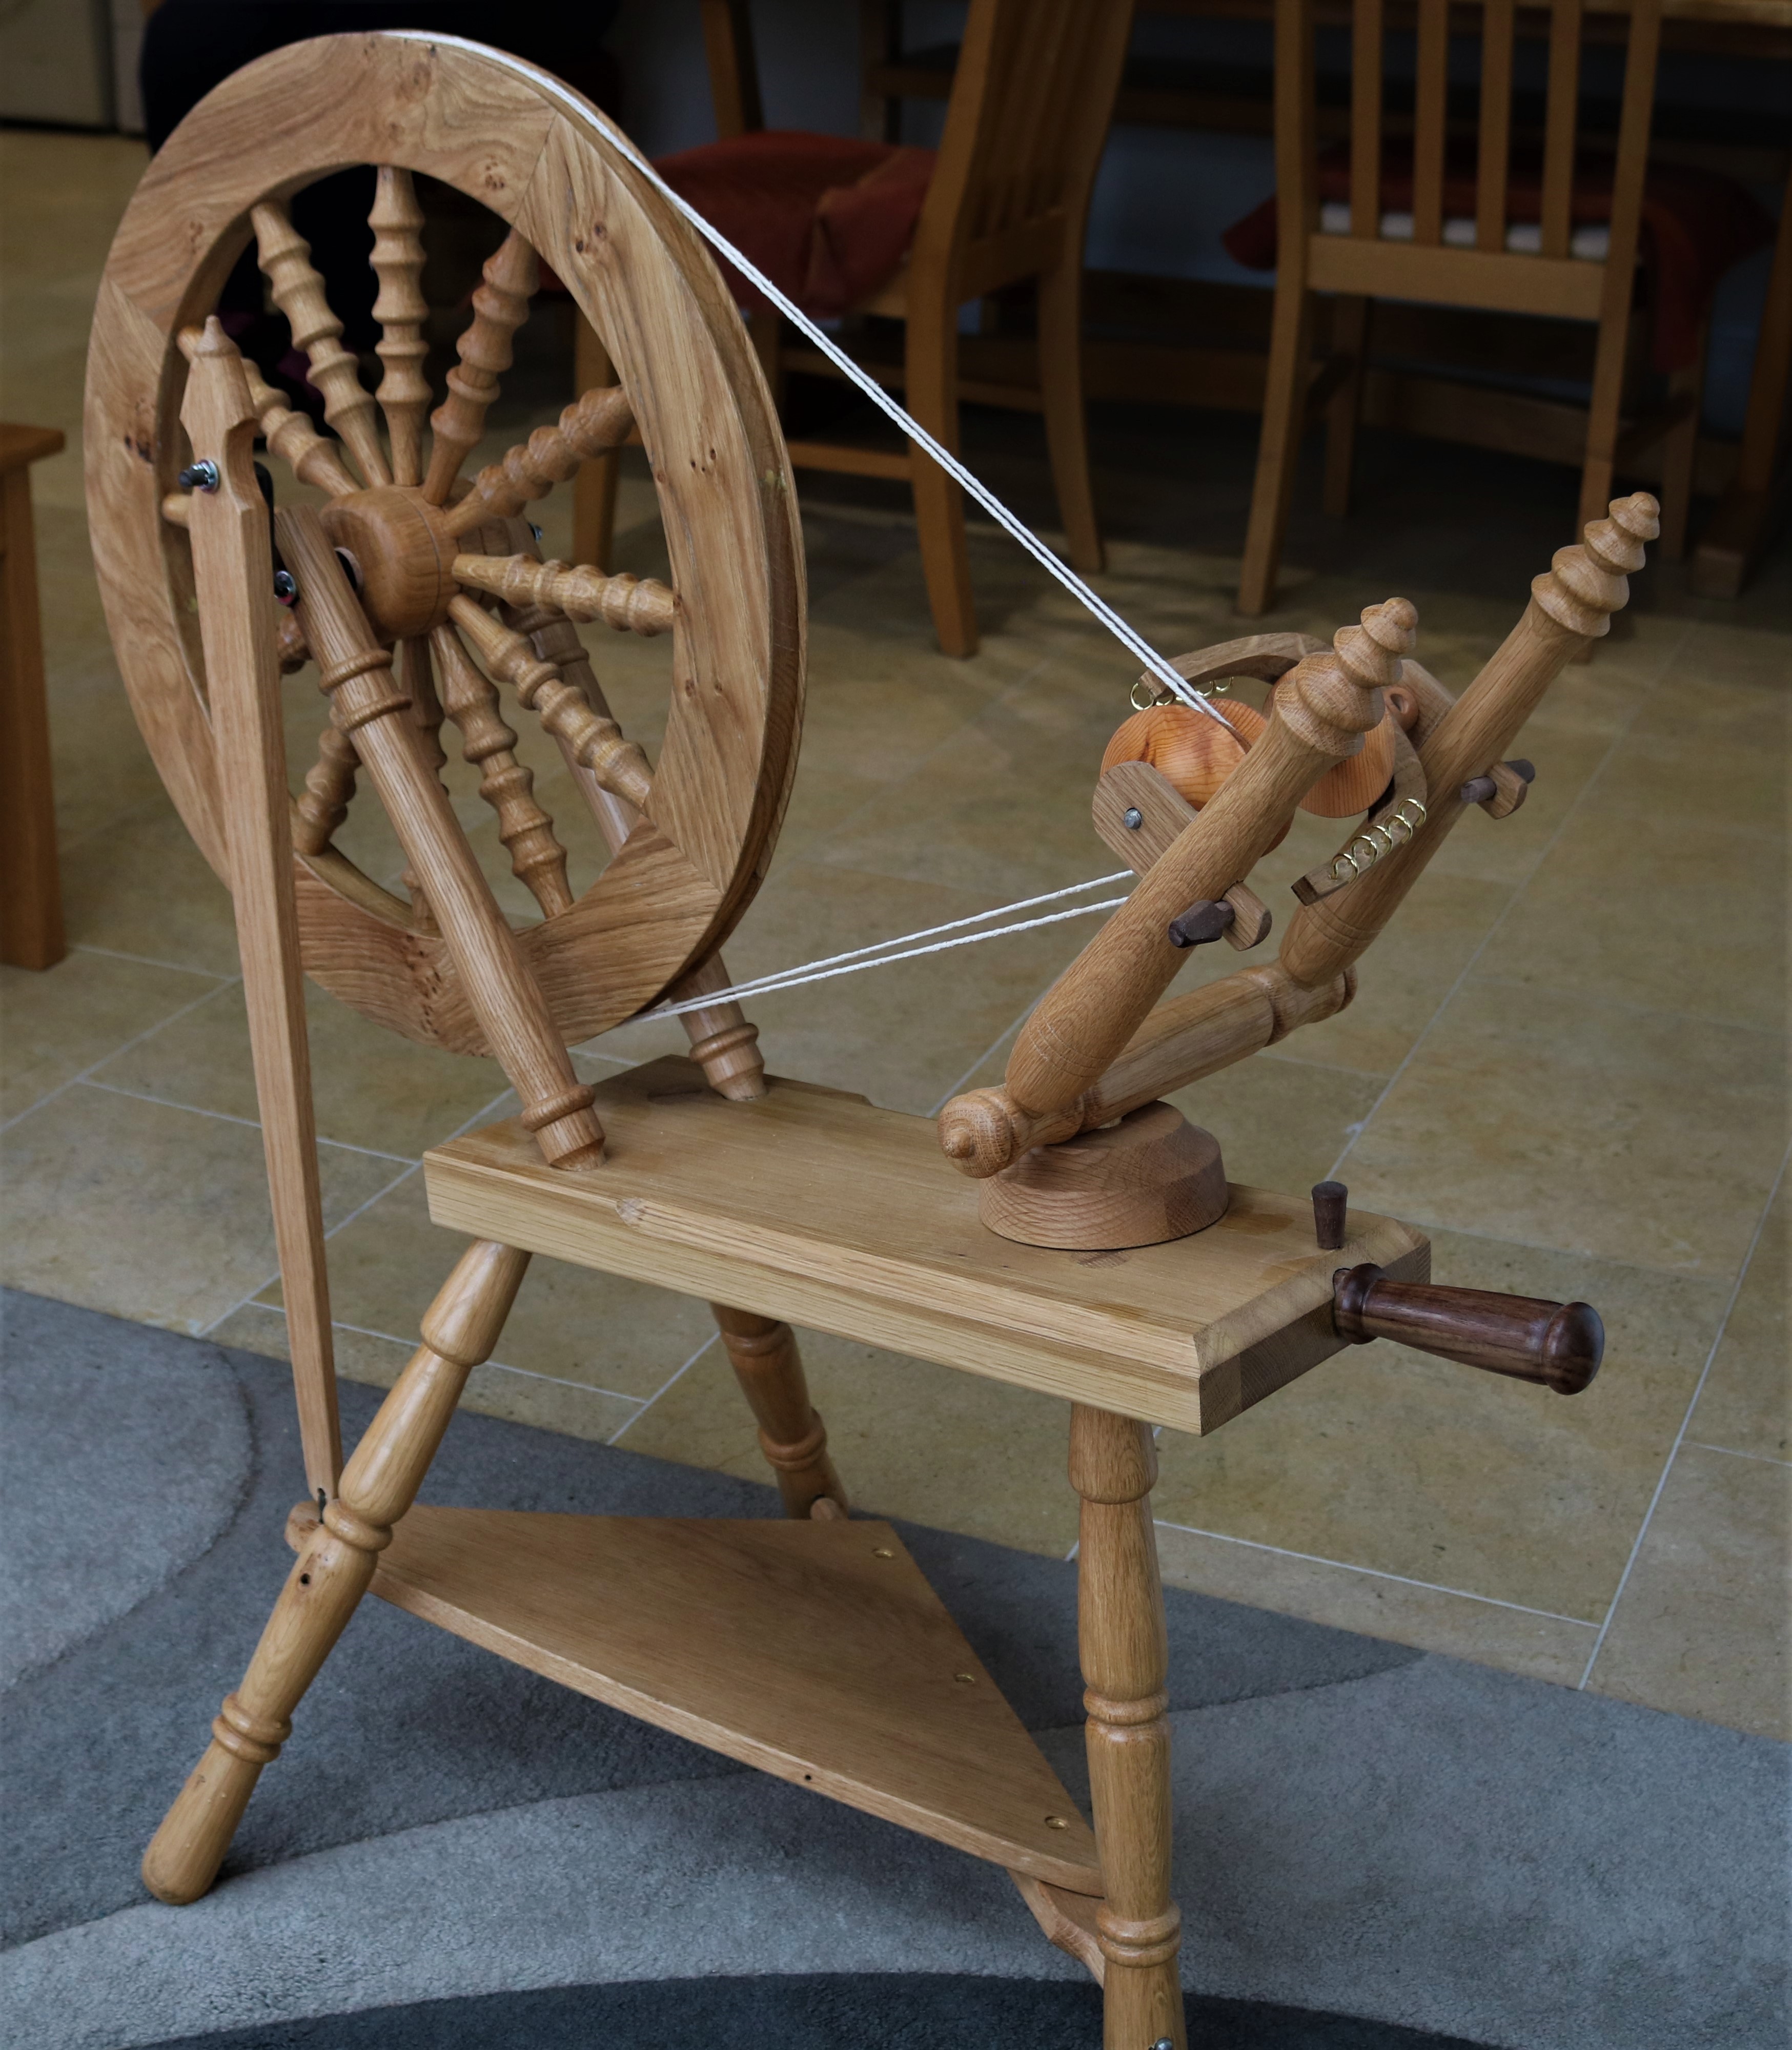
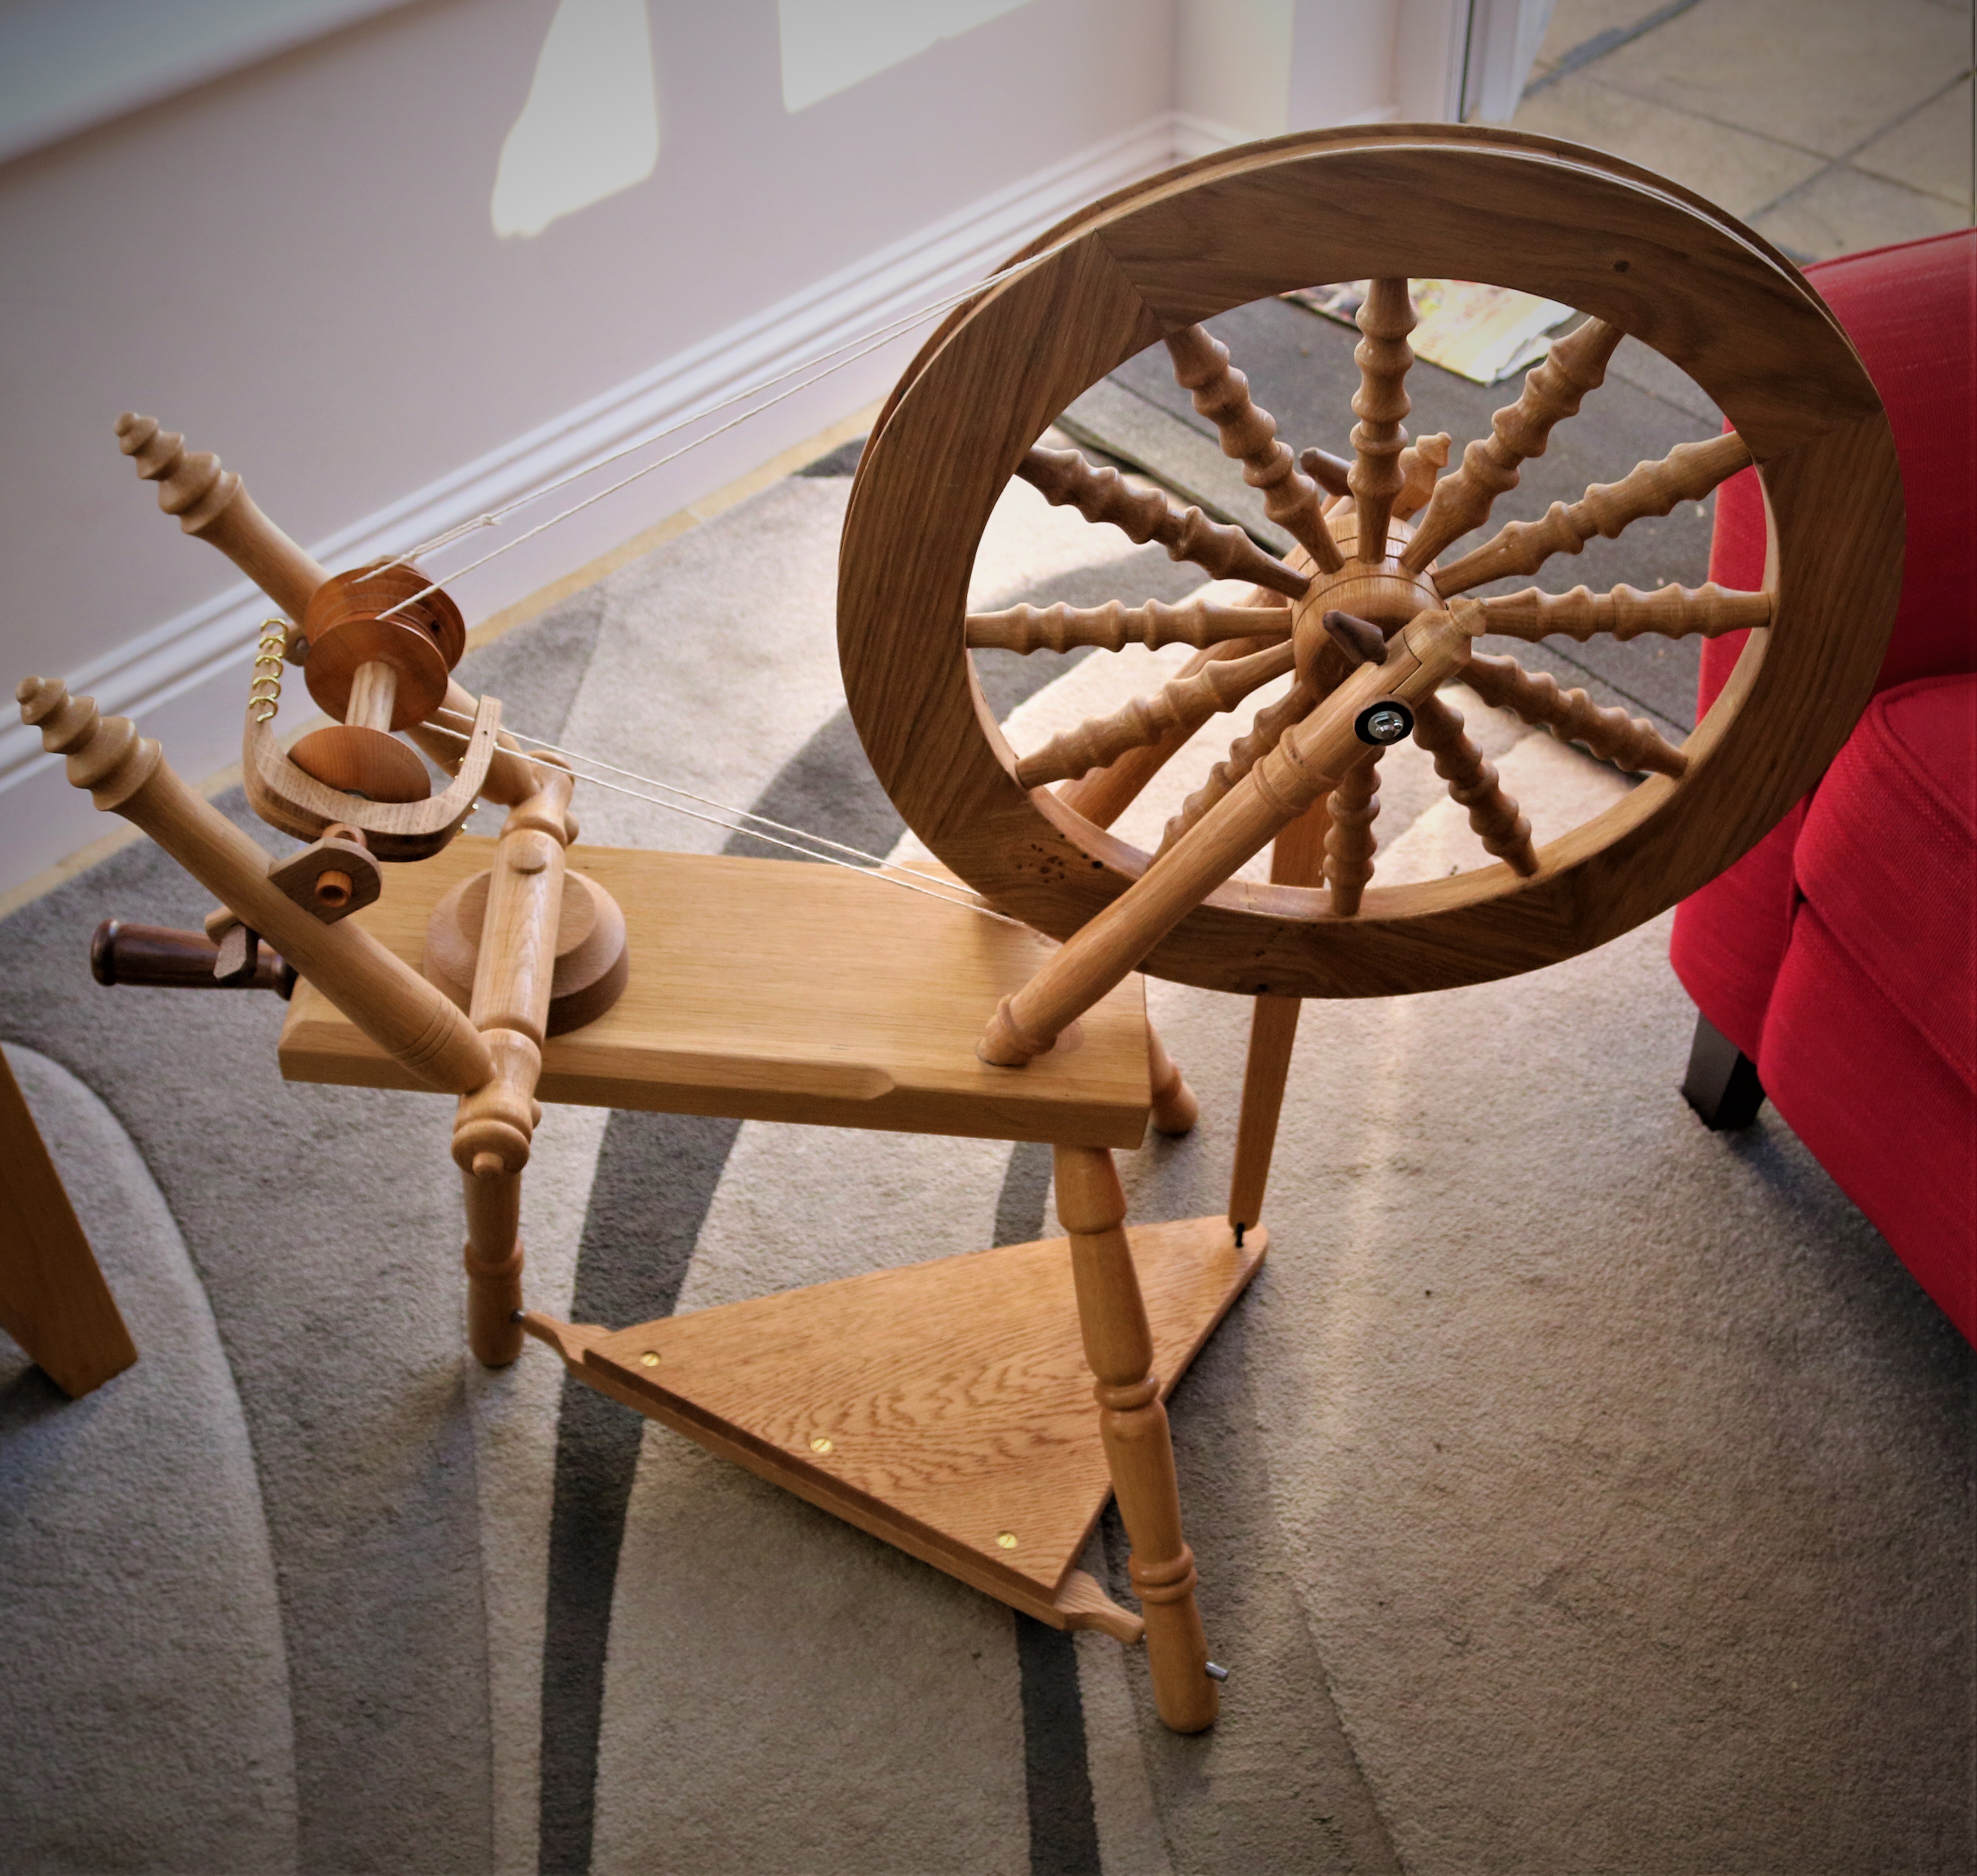
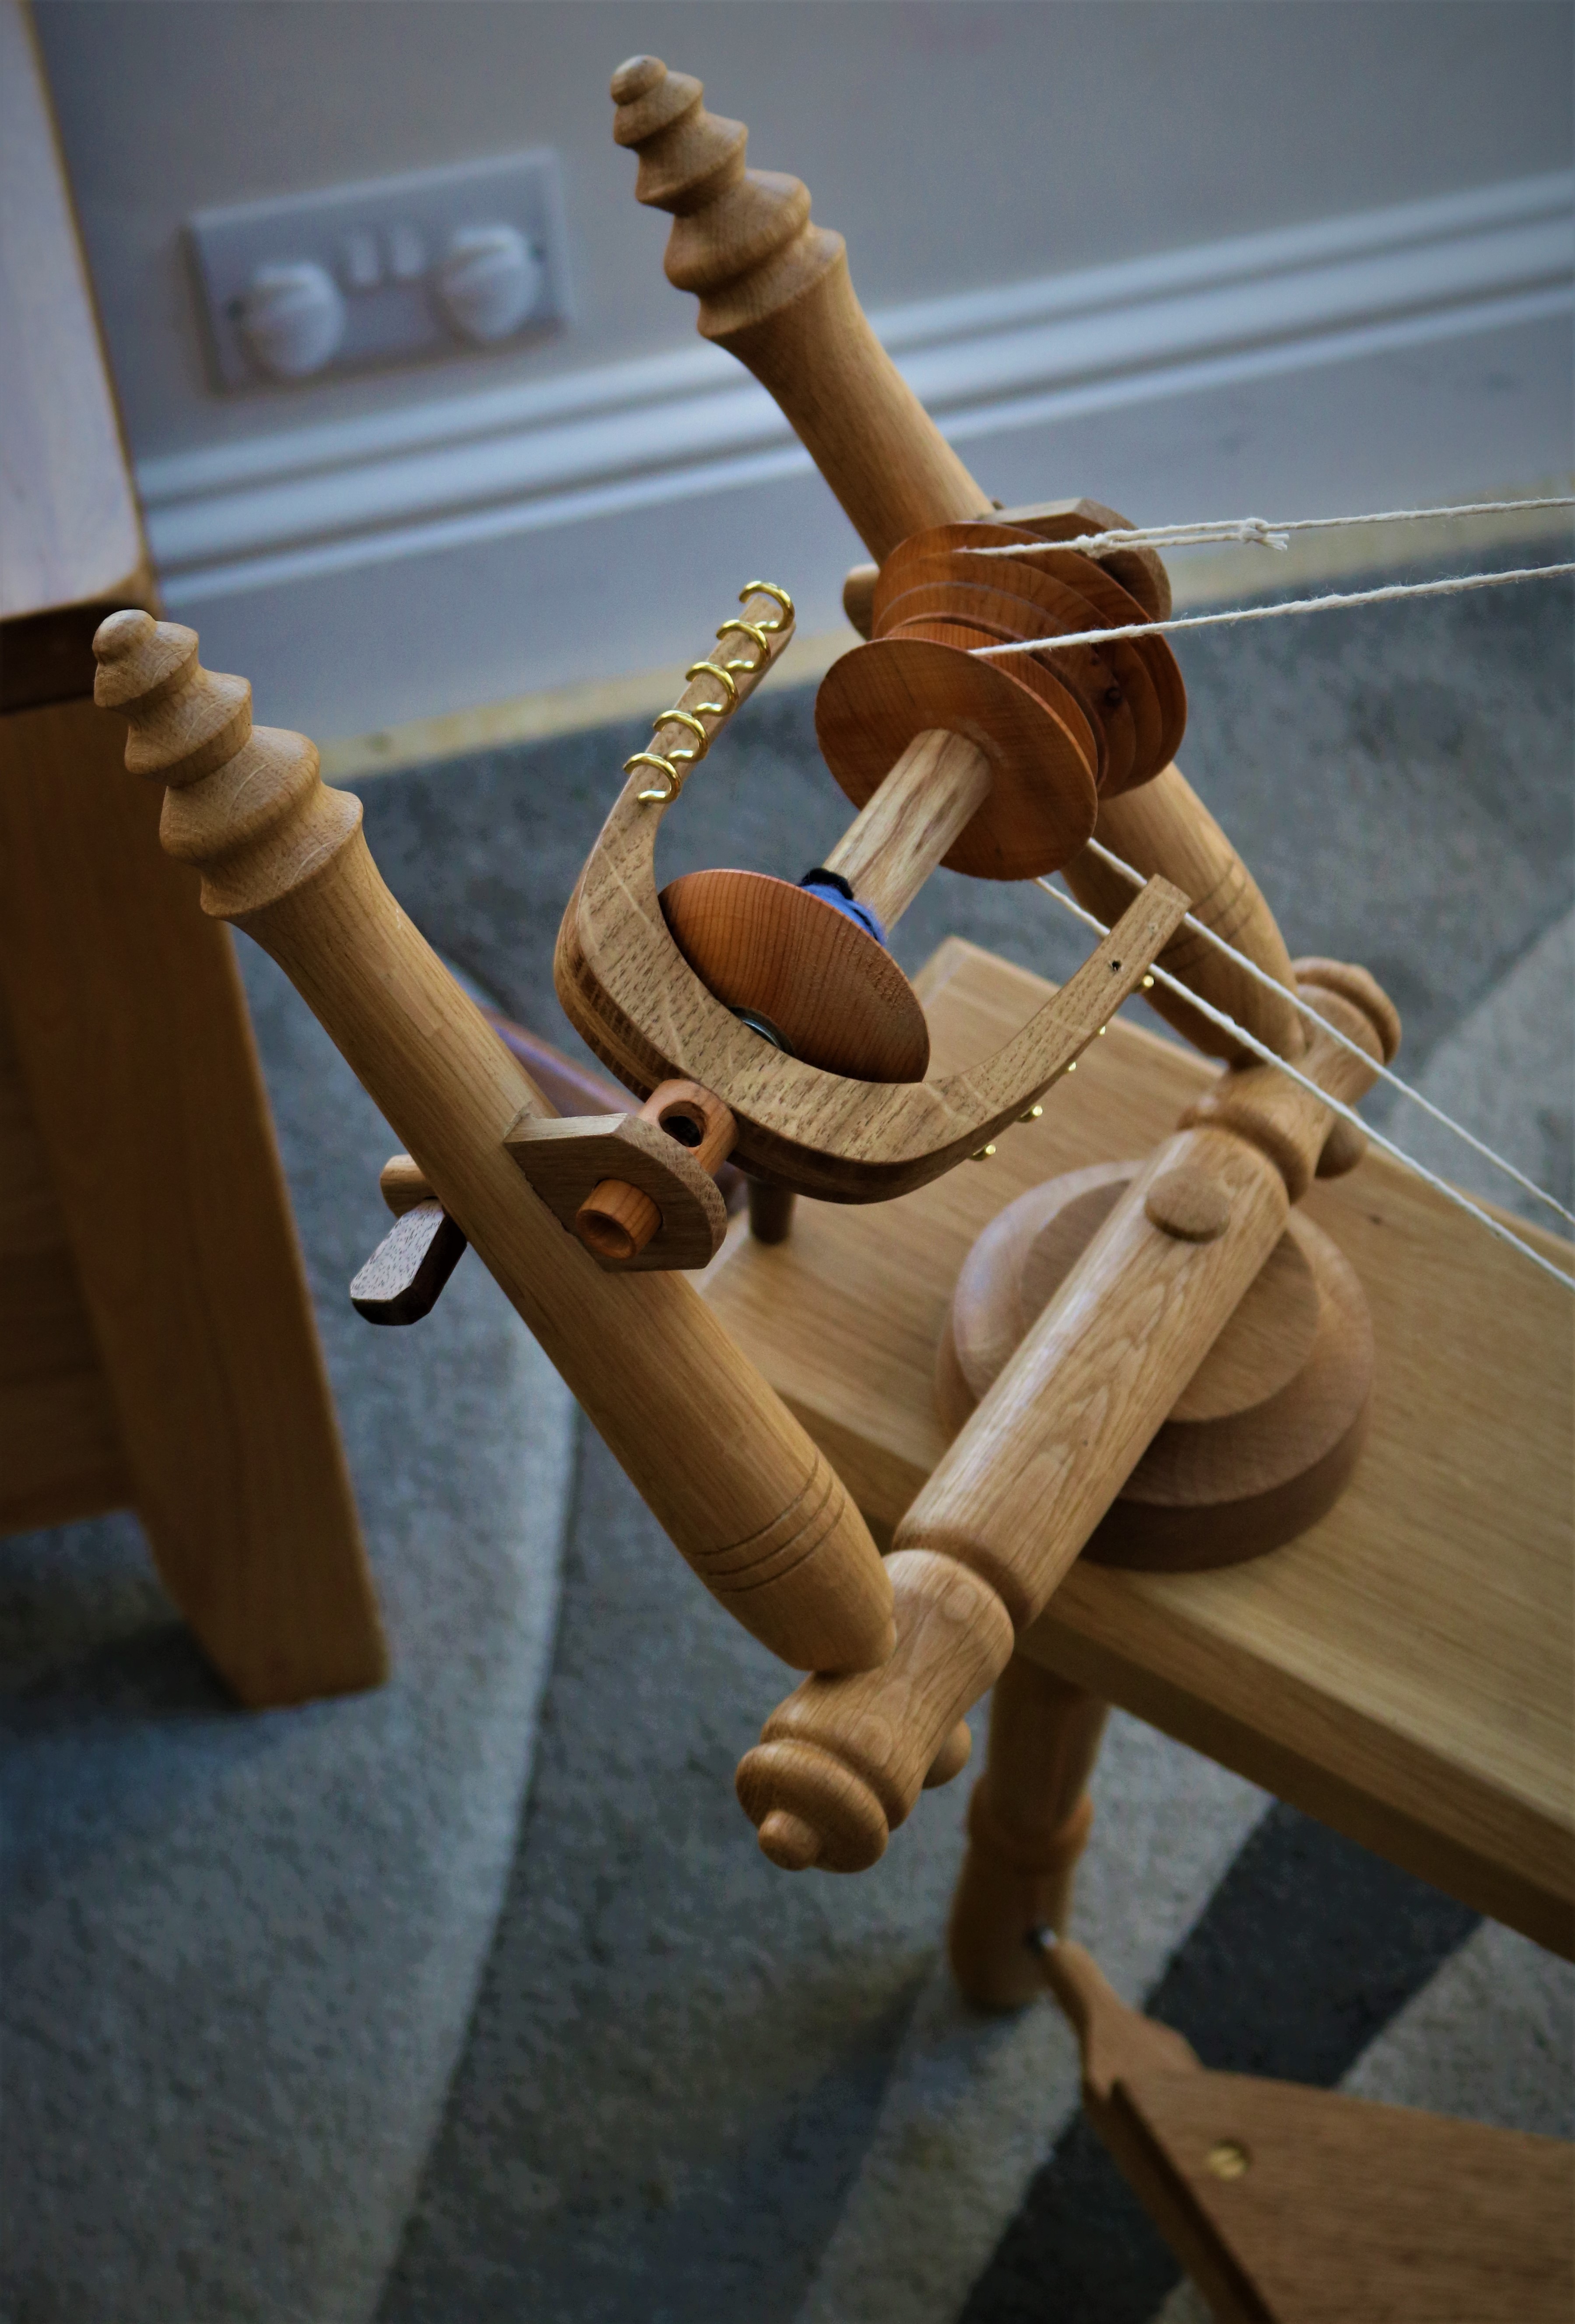
I have always fancied making a spinning wheel so at the age of 77 I have at last got round to it! I am fortunate to have met someone who can use a spinning wheel so this lady gave it a trial run and to my delight I was told that it works fine. Now I have set myself the task of learning too use it myself. Think it may take a while before my wife will be able to knit me a sweater with the results!
I have attached a few photographs of the finished wheel. It mostly made from Oak with the exception of the pulley whorl and the bobbin which are Yew because of the fine grain. The tension screw handle and the small locking pins are walnut just for a change of colour.
#MakeItInMarch
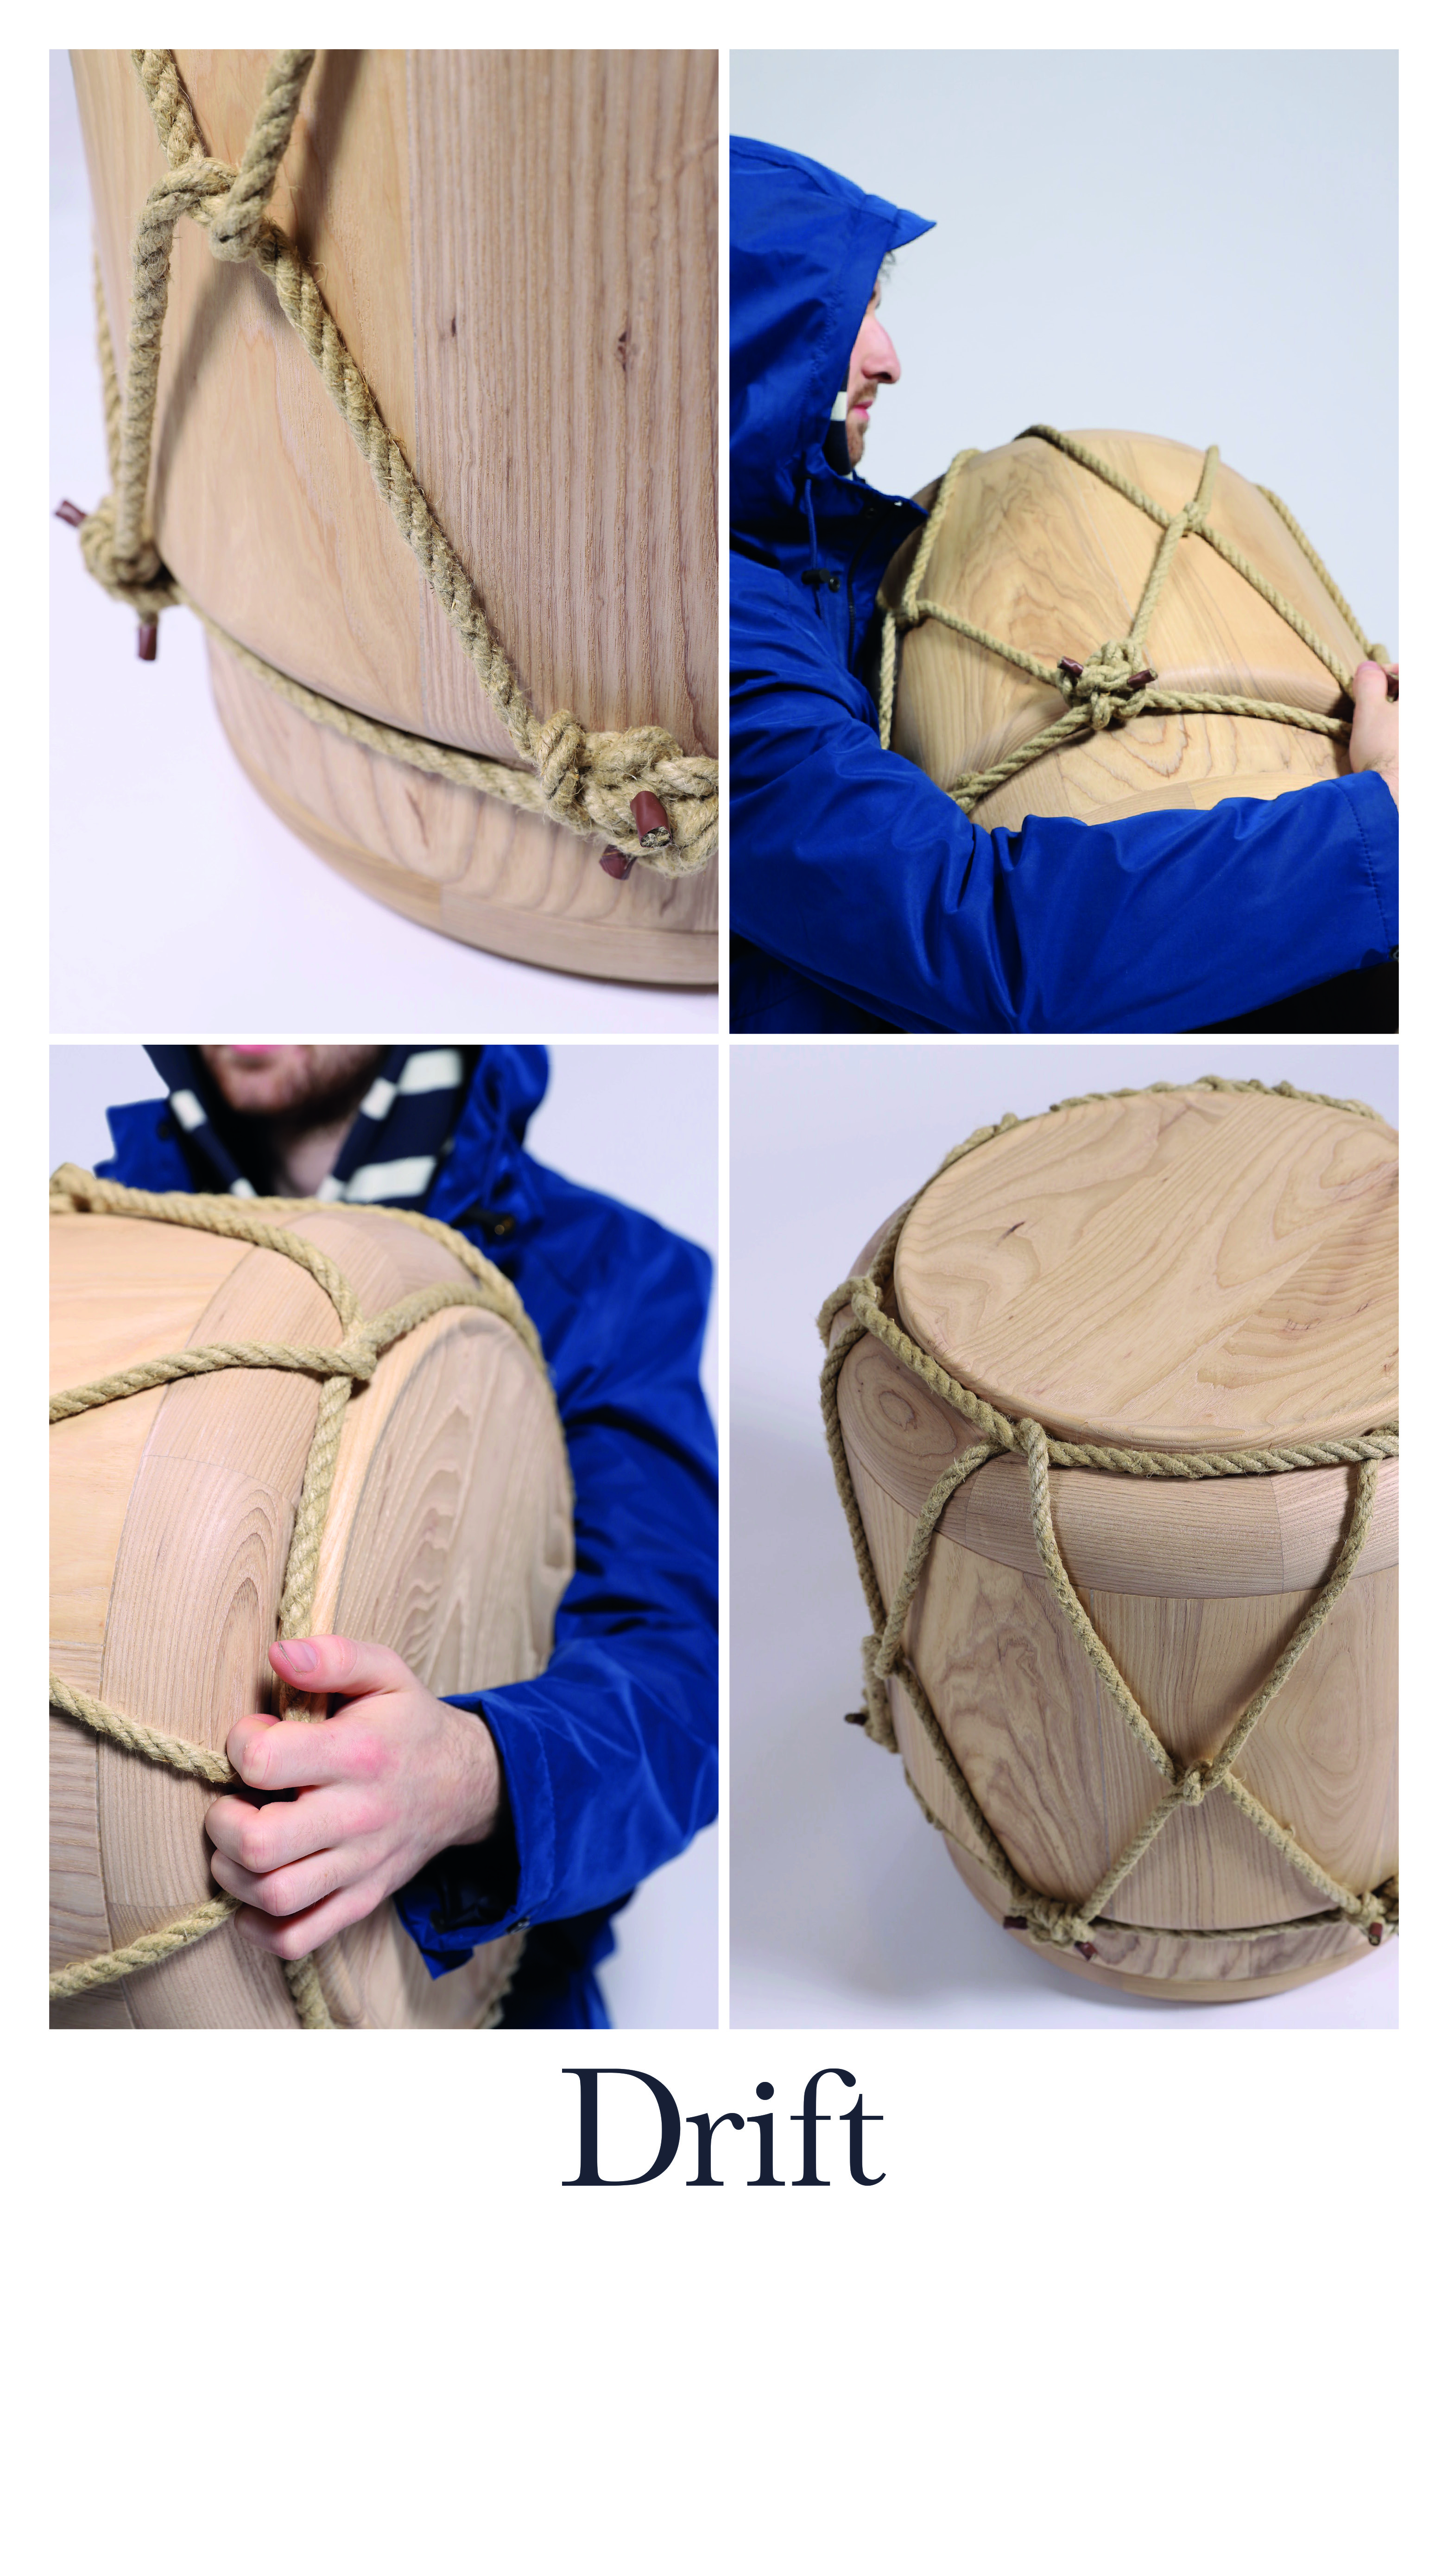
Drift - A hefty Occasional table made primarily of 2 inch Ash, turned round and stained pale to give a soft, weathered look. This was a completed as a final year University project inspired by Nautical cues
That’s absolutely stunning!
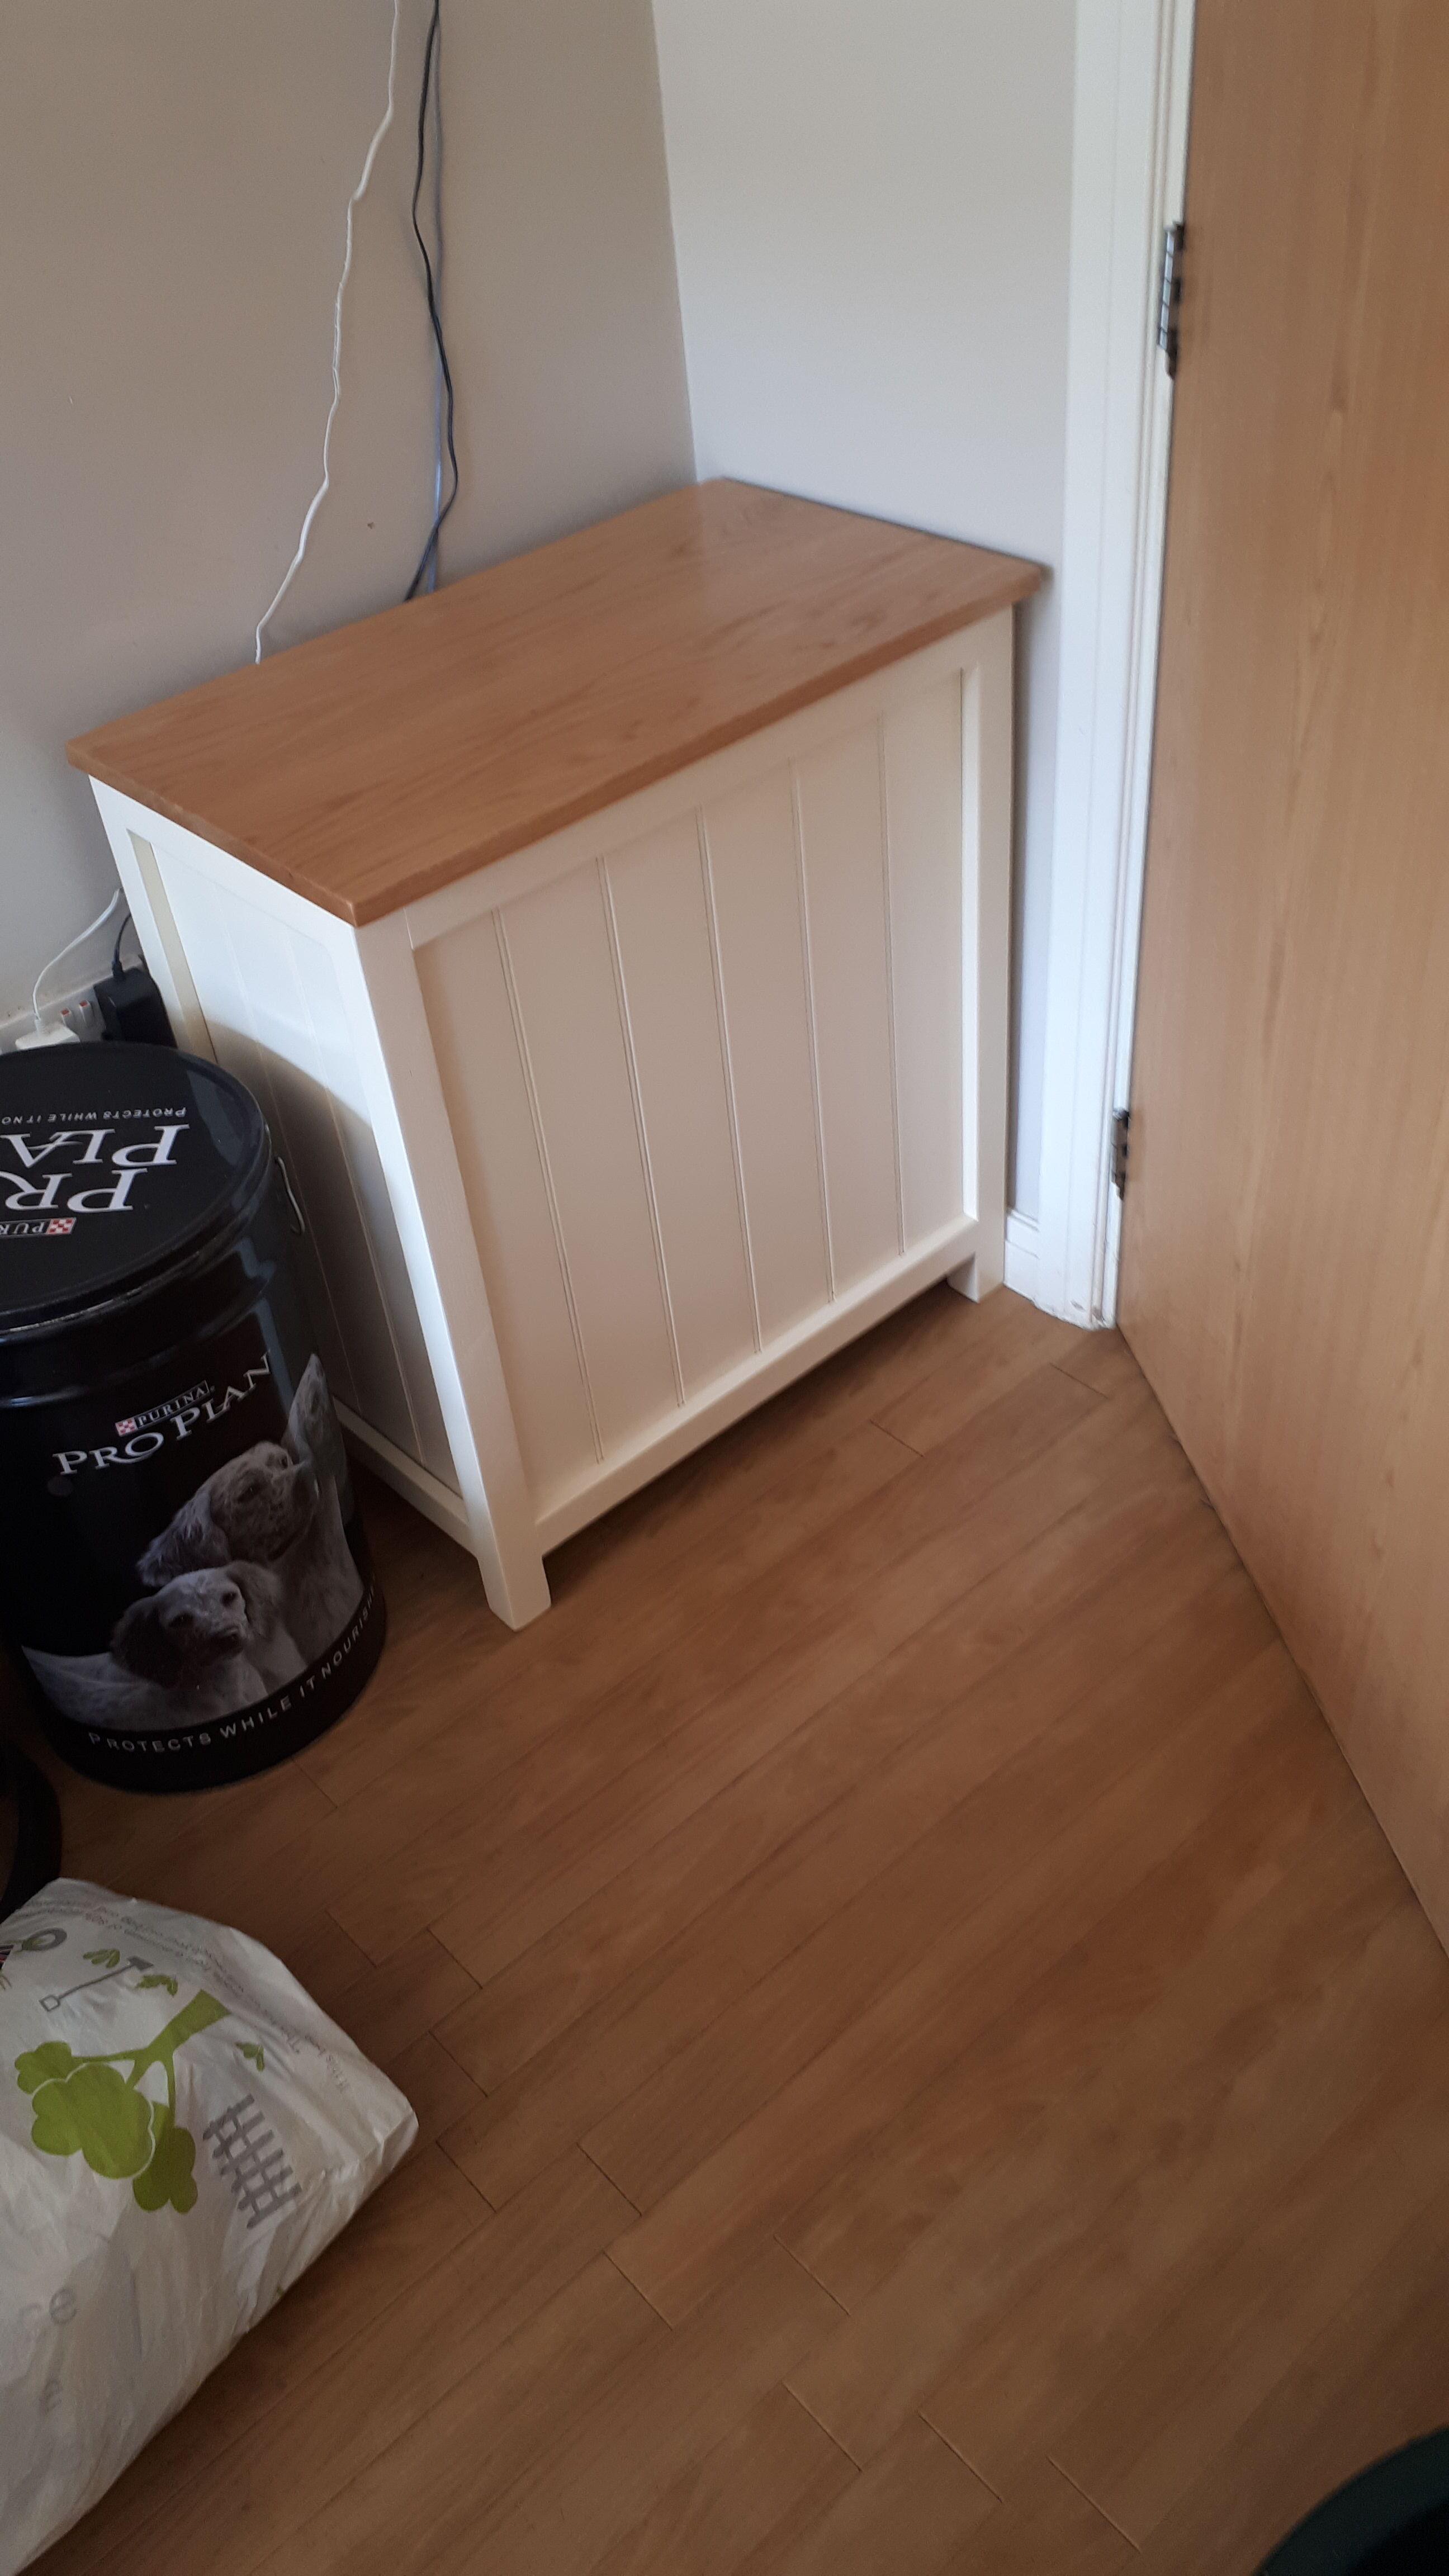
A small laundry bin to cope with 4 children! Made from pine and MDF, spray painted cream with a solid American Oak lid. All I need to do is get them to use it now…
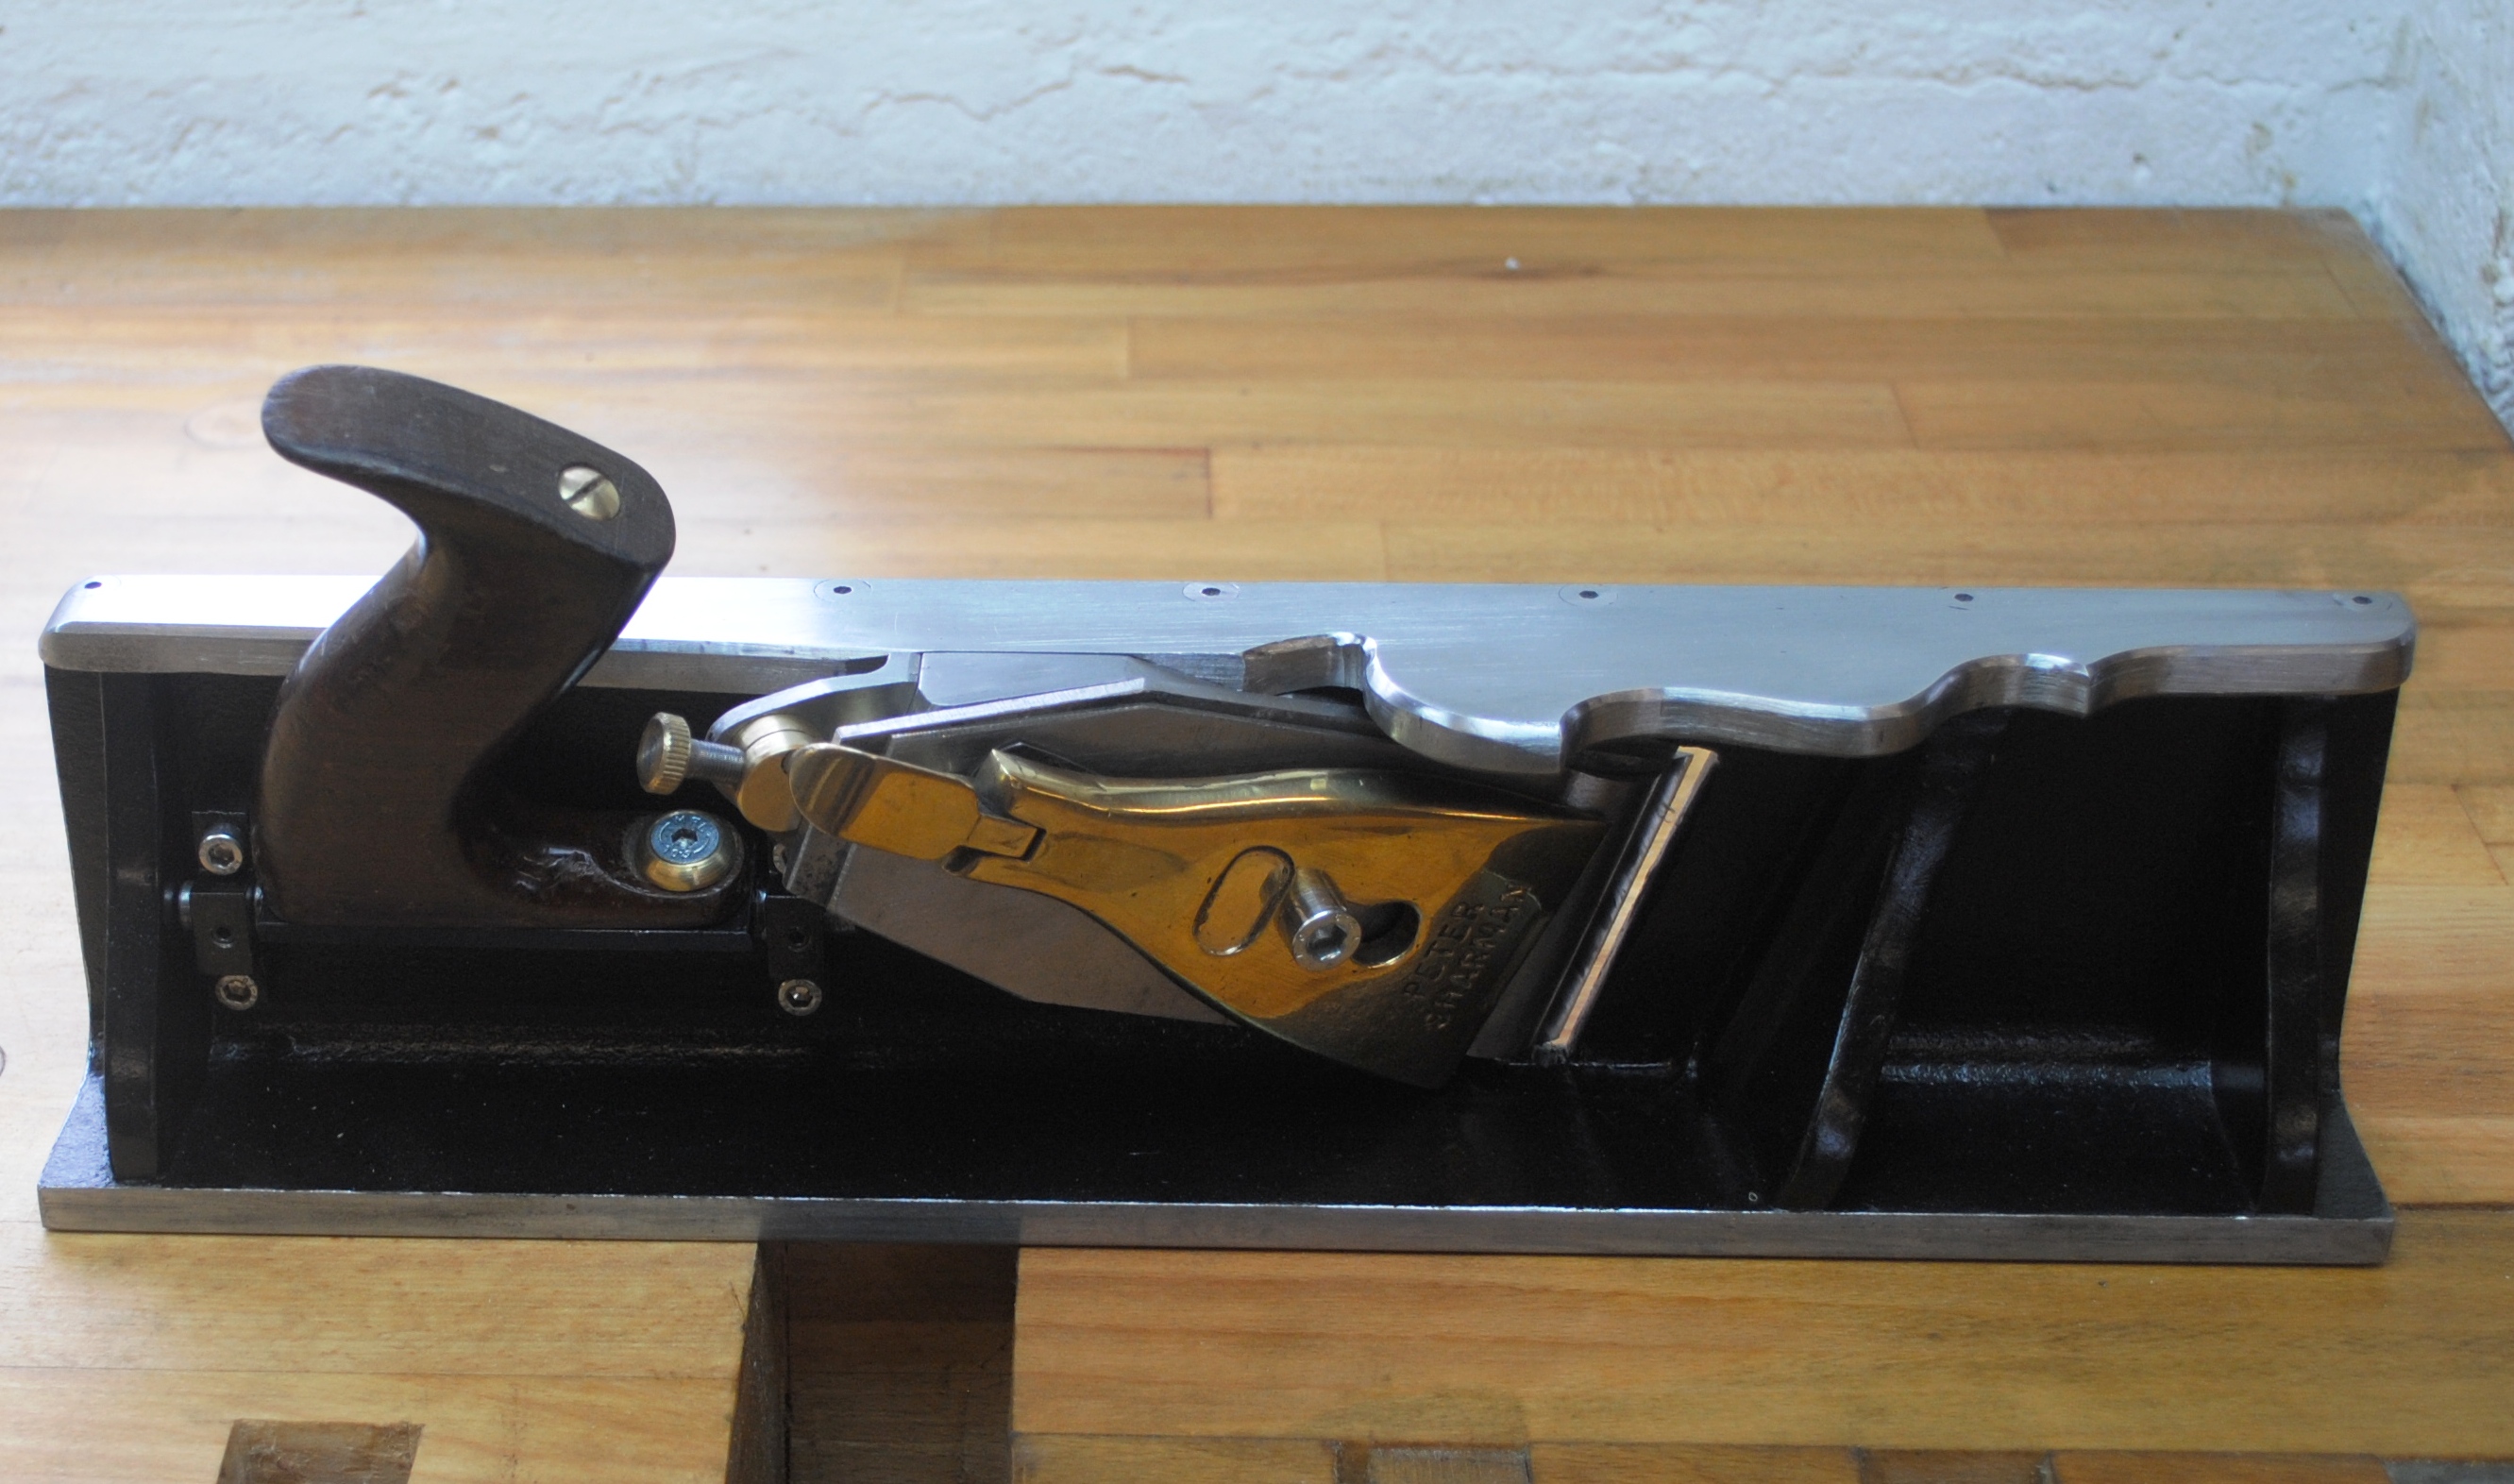
I have included some pics of my March project. Over the years (decades actually) I have often idly thought that it would be nice to have a dedicated shooting board plane, Although I must confess that I secretly tend to prefer the word chuteing to shooting which says more, I suppose, about my typical pedantic and curmudgeonly tendencies.*
Many years ago I remember stumbling across a tool dealer at a woodwork show at Sandown Racecourse who was selling a Stanley 51/52 Shooting board and plane. After some negotiation I eventually baulked at the price that he was demanding and gave up in disgust. Naturally, in retrospect, it was an absolute bargain but it did not seem like that at the time although I would, at least, have had the use of it for the last 35 years.
These days Lie Nielsen offer a re-vamped version at an eye-watering £507 for the plane alone whilst Lee Veritas’s equivalent offering sells for £330. Out of interest I read a couple of comparative reviews that seemed to suggest that The LN version performed slightly better and its additional weight seemed to have been a contributory factor. Once again my miserly nature prevented me from buying either but it did get me to thinking that I could probably make something that would do the job and it might even do a slightly better job.
My thinking was that I could make a plane body based on a length of substantial steel angle. This would leave scope for me to increase the overall weight to even more than the LV version which stands at 4 Kg by opting for a wall thickness of 10mm. The second advantage that was attractive about employing extruded angle rather than a casting was that I could avoid all the problems associated with introducing heat during the manufacturing process which inevitably leads to banana-shaped planes.
Incidentally I learnt some time ago that Stanley opted to have all their plane bodies cast in Taiwan or some such. so rather than waste time and money waiting for the castings to season outdoors for a couple of years in the British climate before attempting to machine them it was deemed that the ‘seasoning’ could take place during the shipping journey to the UK. Interesting to reflect on how so many fine old tool companies have been ‘improved’ by the men with the calculators so that, with a bit of Value Engineering their products are barely good enough for the DIY market now.
I decided that I would increase the skew angle to 30 degrees rather than 20 on my project in the hope that a bit more of the slicing action could not do any harm. I also decided to incorporate a 20 degree bed angle so that I could use the bevel-up approach. 12 degrees would have been nice but that would have caused too many accommodation problems with the increased skew angle.
I started out with 1/2 metre of unequal steel angle which measured 150mm by 90mm by 10mm thick. I reduced the length to 16 inches and sliced off a strip using a slitting saw on the milling machine to reduce the 150mm side to 90 mm. The 90mm side was reduced in a similar fashion to 54mm which is similar to the original version in the forlorn hope that if I ever tripped over an original Stanley 52 shooting board mouldering away in a junk shop it would fit!
The detached strip was then grafted back onto the angle to make it into a channel. I resisted the temptation to weld/braze this on and secured it with csk Allen screws. The off-cut that I had sawn off the length then furnished me with 3 profiled webs that I hoped might help to maintain the squareness of the structure and again these were screwed in place. One of these is fitted to match the skew angle of the iron so that was a little more critical to shape and fit.
I cut the skewed mouth by chain-drilling a series of holes and carefully milling with a 4mm slot drill, phew, it was a relief when I had done that without ruining the slot drill!
I sculpted the frog from a billet of mild steel and fitted it into the plane ‘body’ via some slotted holes and M5 cap screws to allow for some adjustment. It was somewhat a labour of love to shape the 20 degree bed angle through 10 mm steel with no more than some determined filing, scraping and the occasional use of a Dremel, but patience won through.
I forgot to mention that the only steel angle that I could source with suitable dimensions was black rather than bright mild steel. Of course this has caused a lot of extra work to obtain flat polished working surfaces and I am still not there yet. I have spent many (I won’t say particularly happy) hours ‘planing’ sheets of abrasive paper taped to a 1" thick sheet of glass to get to the present condition.
You will see that I have shaped the top flange paying due deference to the scrolls, curlecues and chamfers etc. of a traditional Norris type infill plane in a flight of pointless self-gratification although rather serendipitously it is quite comfortable to grip.
I was originally committed to buying a posh (and costly) plane iron from Veritas but whilst trawling through one of my drawers I discovered a rusty old 2 3/8" laminated plane iron by Ward that I reckon is a good bit of steel although it needed quite a bit of work to flatten it to a usable condition. The brass lever cap was an ancient ebay purchase that did not break the bank.
I had an old Rosewood tote that came from the same drawer and I mounted this on a steel plate which was, in turn, screwed to the flat that I had milled on a spindle with turned down ends. The latter ends are housed in a pair of milled steel bearings that I have screwed to the inside of the channel. This has given me the option of adjusting the tote/handle to a comfortable angle to suit me and locking it in place with a pair of grub screws.
I have also made a dedicated chuteing board from some 18mm plywood that incorporates some toggle hold-down clamps. I intend (at the moment anyway) to make a graduated quadrant/protractor for the board although realistically I usually trim mitres with my mitre trimmer rather than chute them. Incidentally the all-up weight of my plane is now 7.5 Kg so this is well over twice the weight of the LV version and nearly twice the LN one. By the time that I have made a fine adjuster mechanism it will be that much closer to 8 Kg. Once my plane starts moving not much seems to deter it so I am hoping for some good results, not to mention some larger biceps!
As expected, the friction between the plane and board was more than significant. Unfortunately I could not source any suitable brass angle so I have resorted to 12mm x 1.5mm aluminium angle instead. I have set this into the adjustable ‘jib strip’ and screwed it in place which is fine. It was not quite so simple to do the same thing with the other side because 12mm minus 1.5 wall thickness is 1.5 mm too much when it comes to clearing the corner of the plane iron. Rather than taking the corner off the plane iron I opted to cut a smidgeon off the aluminium angle instead. Since I cut this off by hand I had to make judicious use of my surface table and a vernier height gauge before I was happy with the parallelism.
Anyway we got there and I now have the advantage of a tailor-made recess to accommodate the odd shaving/dust which was always part of the scheme.
However when I tried the plane on the aluminium ‘runners’ the friction was not much improved, largely I think because aluminium is clearly not brass. The application of an old candle stub has cured that problem and the plane now glides along very nicely, so much so, that it would be very easy to send it shooting off into space at the end of the stroke once that 7.5 Kg has overcome its own inertia! I have since dispensed with the candle stub and fitted some self adhesive PTFE strips to the aluminium runners which I thought would make a cleaner solution.
I have attached some images of the, almost completed, plane & board. The fine adjuster seems to work without backlash and I was able to adjust it easily to cut 2 thou shavings although 4-5 thou shavings save a few strokes in practice.
I designed the fine adjuster around a 1/4" 40 tpi screw thread so that 1 thou advance of the iron equates to 1/25th of a turn. The same control also controls the lateral adjustment of the iron. Incidentally you can just see the pinch screw that controls the backlash in the nut and also the grub screw that stops the whole adjuster assembly becoming separated from the frog.
I still have some very deep pits to remove from the bearing surface underneath and I am rapidly loosing the will to spend the rest of my life polishing them out but heigh-ho.
The fine adjuster seems to work without backlash and I was able to adjust it easily to cut 2 thou shavings although 4-5 thou shavings save a few strokes in practice.
I designed the fine adjuster around a 1/4" 40 tpi screw thread so that 1 thou advance of the iron equates to 1/25th of a turn. The same control also controls the lateral adjustment of the iron. Incidentally you can just see the pinch screw that controls the backlash in the nut and also the grub screw that stops the whole adjuster assembly becoming separated from the frog.
I decided that I really must make a case for the plane because it is an awkward shape and size to fit into existing drawers or tool boxes and it would soon be encased in a decorative coat of rust if I just leave it out on the bench. I confess that it is only of mitred plywood construction, largely because it needed something fairly substantial to deal with its sheer mass. I opted for handles at each end rather than a top handle for largely the same reason, because hinges and catches would have been sorely tested. I fitted inset handles just to avoid increasing the overall length.
The next image is of the angle guide fence that I have designed and made for the chuteing board. All the materials were just laying in my scrap box waiting for this particular moment, so all of those pundits who advocate disposing of any thing that has not been used for a year would have been wrong yet again. The base is made from a disreputable section of old flagpole tabernacle and I made the ‘protractor’ component from a rusty section of black mild steel channel. I milled the profile on the milling machine which I also used to jig-bore a range of holes corresponding to the most common angles that I will probably use. The indexing head is furnished with slotted holes to allow for precise initial adjustments to be made. I used an imperial taper reamer to ream the indexing head and protractor in situ. I then turned a knurled indexing pin with a corresponding !:48 taper so that backlash can be kept to a minimum. I have incorporated slots in the vertical surface of protractor to facilitate adjustment of the mahogany sub-fence. I have also made this double-ended to cope with the longer projection required for mitres. The protractor can be rigidly locked onto the base with two M6 cap screws for which I have drilled and tapped some extra holes. I am still debating whether to give the assembly a coat of Hammerite, in a probably vain attempt, to keep rust at bay for a while.
Maybe I should contemplate blackening rather than painting. I have tried various blueing and blackening methods over my time. I still use hot oil blackening occasionally which I think that we used to call colzetising. I vaguely recall that we used to treat small items on a hot coal shovel. I see that that word, when spelt with a ‘K’ seems to be exclusively used when applied to the blackening of stainless steel so something seems to have changed.
I used to have some blueing chemical for clock hands, goodness knows where that has gone, but I seem to remember that the finish was not so robust as hot blueing. I had a similar experience when I was asked to blue someone’s antique pepper-pot revolver in another lifetime and finally resorted to oil blackening. Now I come to think of it the deal was that I would overhaul his revolver and he would give me an ancient punt gun that was rusted solid. Needless to say he was very grateful for my efforts but I never saw that punt gun.
The complete assembly has been inset into the base of the chuteing board and it appears to be quite stable at the moment.
The last image is of a second dedicated chuteing board that I have made particularly for chuteing mitres. The design (which is based on one originally proposed by Bob Wearing) is similar to one I have had for decades where the advantage of a top rail discourages the tendency for the plane to tilt in use which would of course compromise the accuracy of the resultant mitre. The addition of an angled runner section helps to control the precise positioning of the plane and proves to work well, especially since the sheer mass of the thing definitely works in in its favour here.
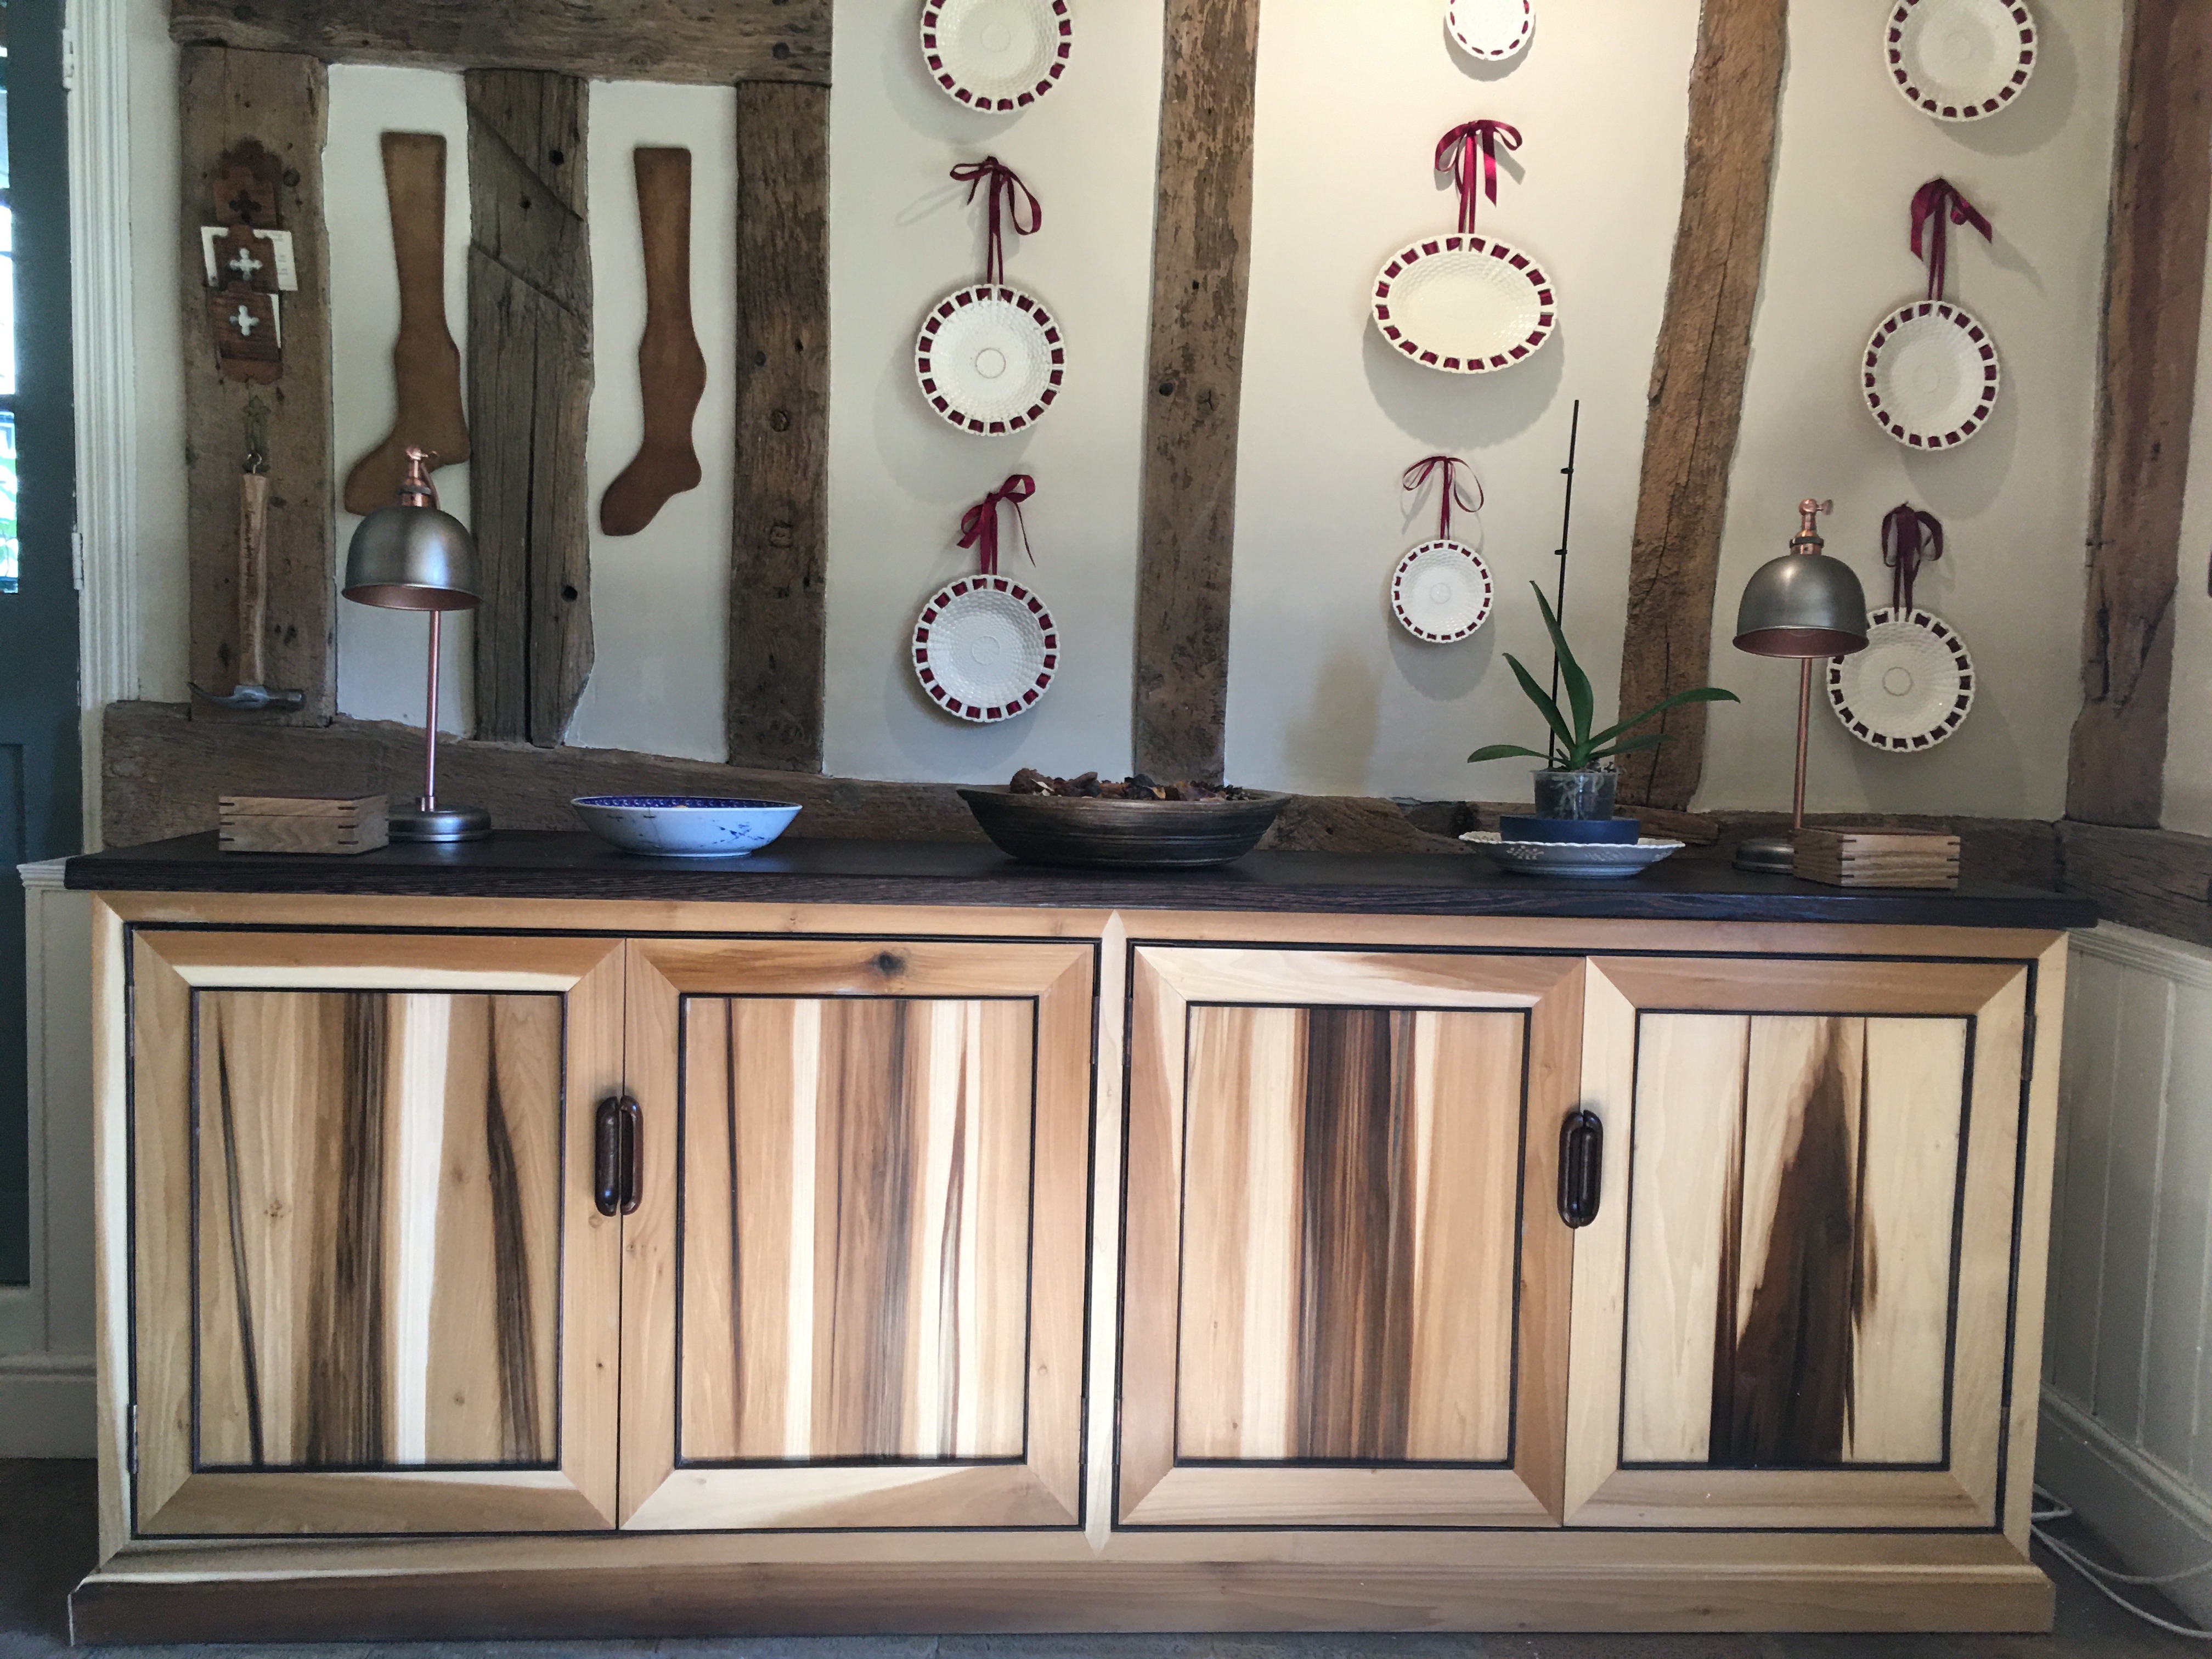
One of two kitchen sideboards made from tulip and wenge. Made to match kitchen already completed. Built in workshop converted from my garage when I started woodworking in 2015.
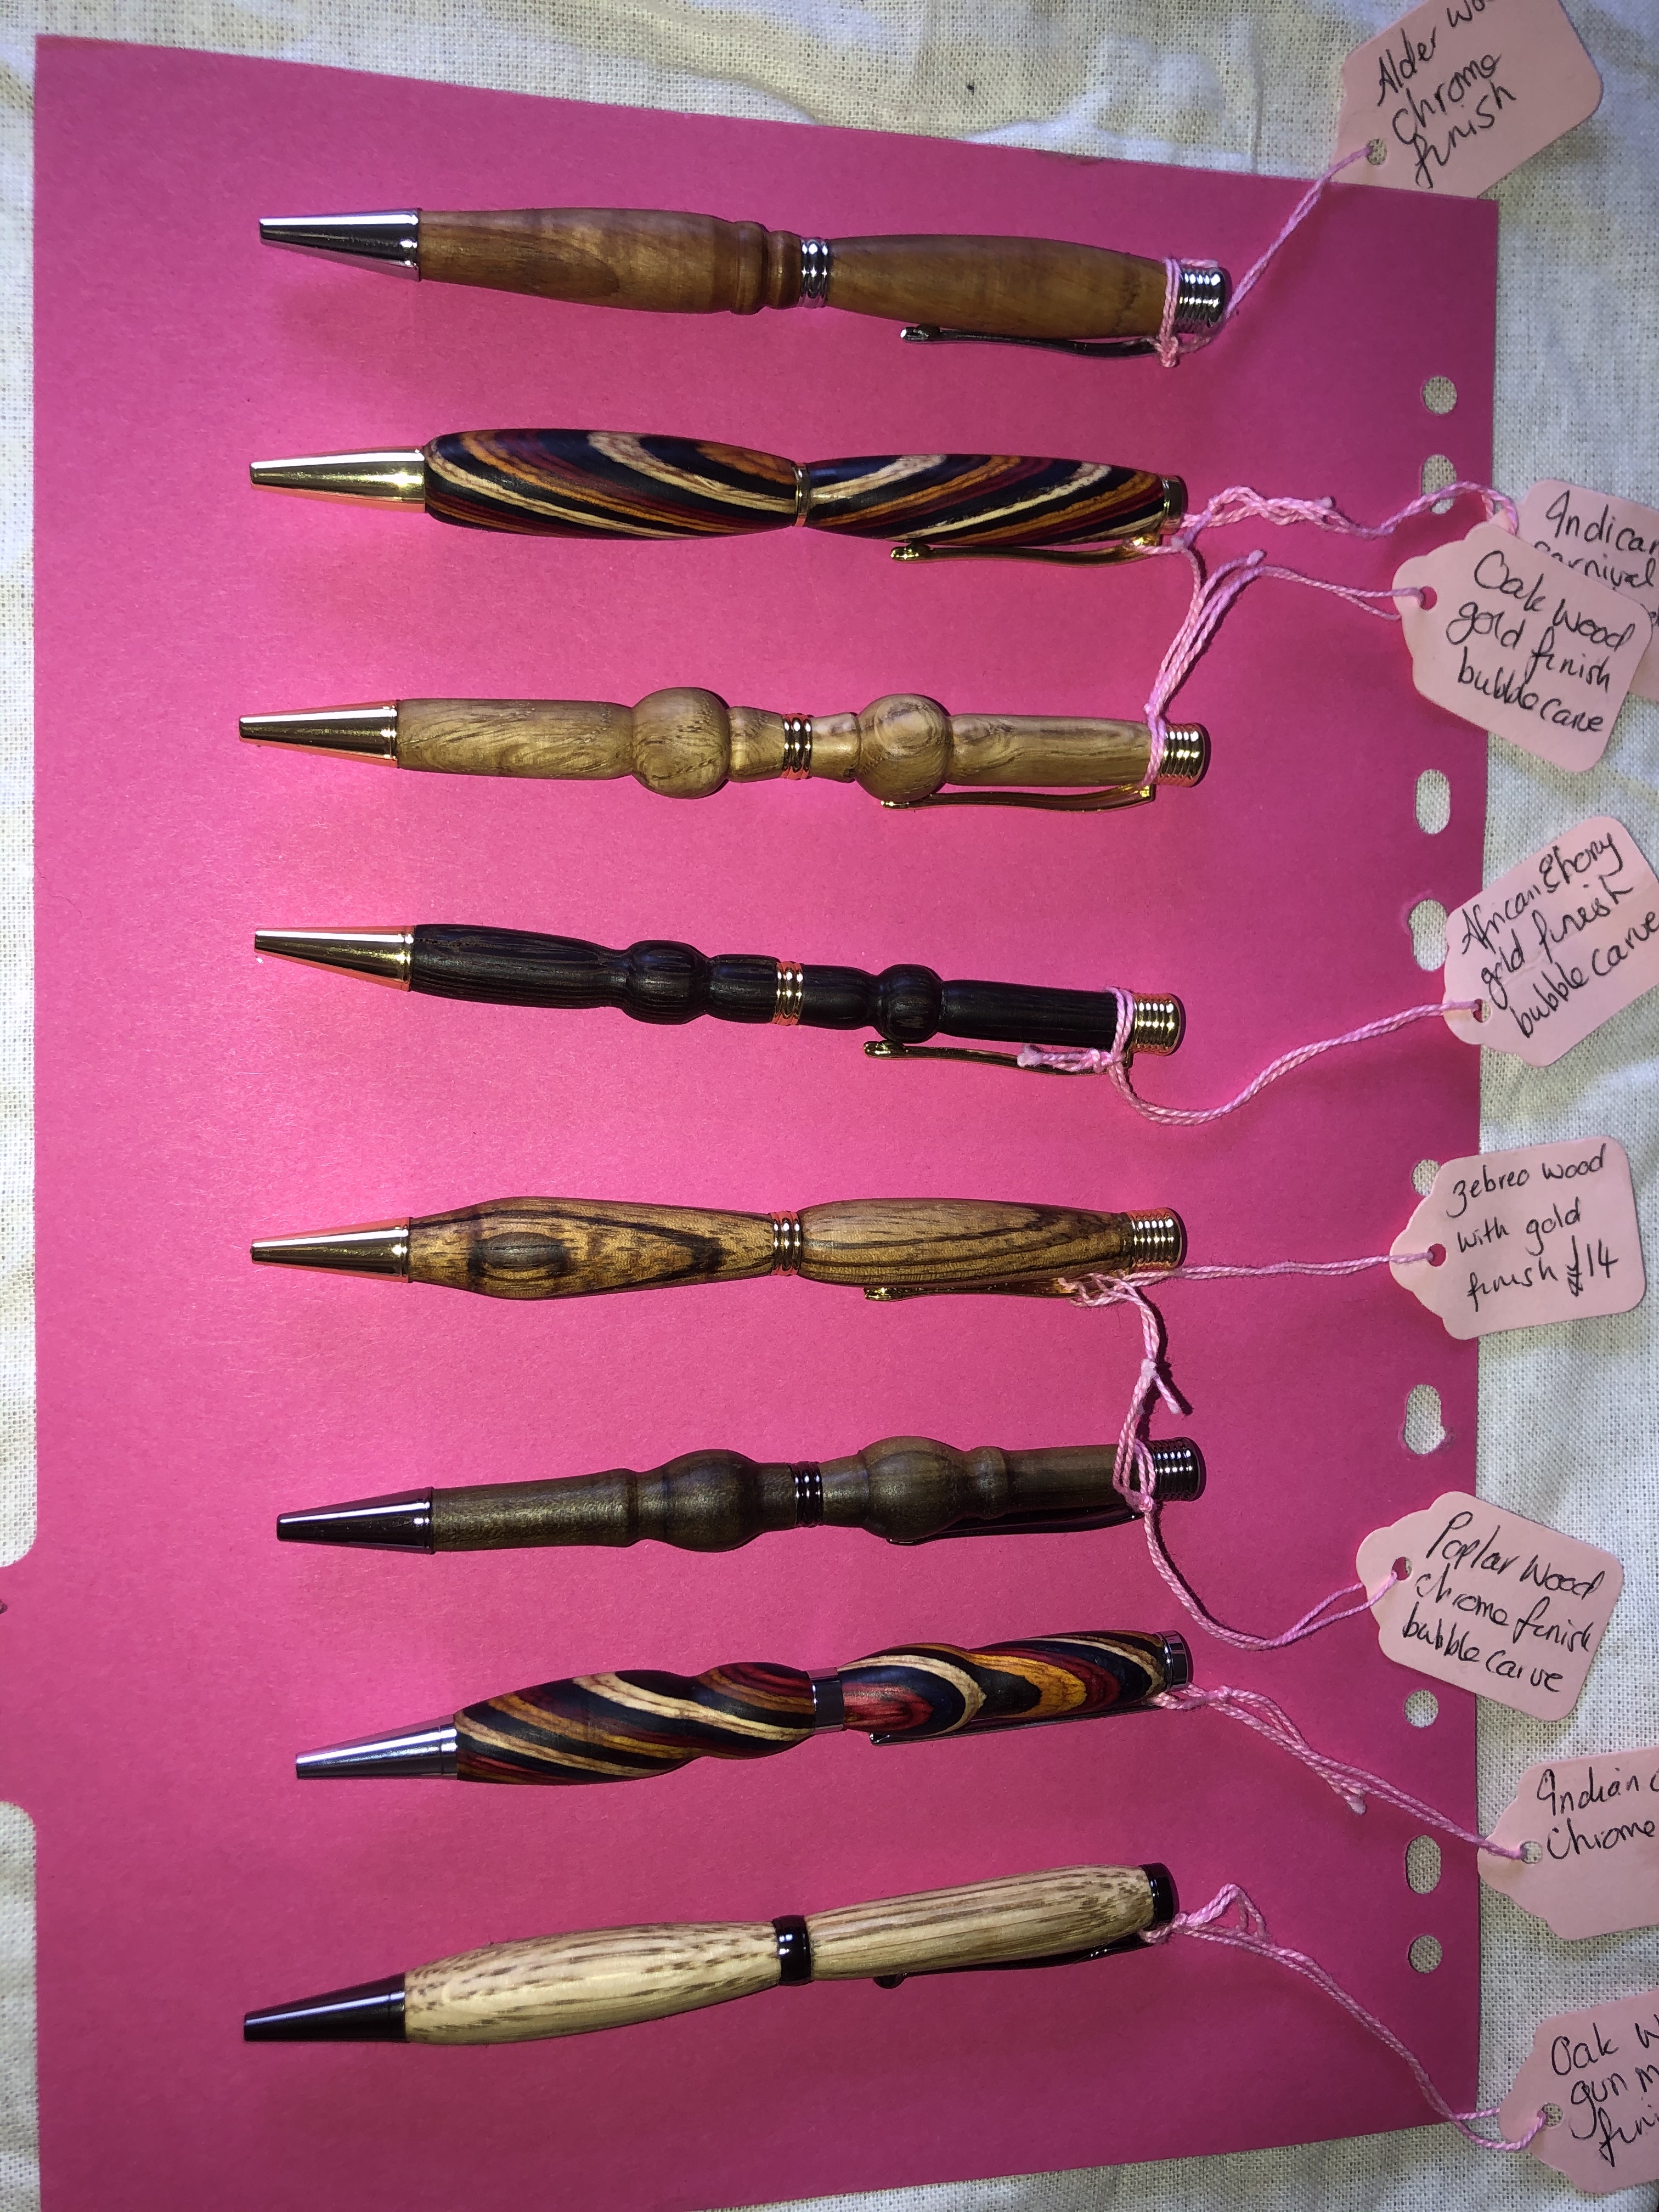
A series of bowls and turnings, turned and carved and joined in the right order with glues screws and butterflys , finished with craft paint and lacquer
MP3 Infinity Mirror Jewellery Box
This Jewellery box was a gift for a friends birthday. It’s one of my first woodworking/maker projects and I wanted to try out a few different materials and techniques as well as incorporating electronics into the project. There was a lot of prototyping, starting over and beginner mistakes but I learnt a huge amount and was really happy with the finished result. Now I’ve figured out all the fiddly bits I’ll hopefully make some more similar boxes.
I appear to be limited to only 2 pictures so there are more pictures & videos with descriptions for anyone interested here: http://www.sumitrai.com/projects/mp3jewellerybox/

The wood stock was walnut veneer MDF.
My simple entry is the result of an attempt to tidy the workshop that was interrupted by the usual distraction of picking something up and thinking “hmmm…”
A spare bit of beech, with some ebony and a couple of acrylic pen blank offcuts. All very scientifically assembled and whizzed up on my magnificent 1628VS.
I made all the packaging too